by Garlido
This blog post is a living document; I will be updating it over time with more examples as I slowly gather them. There are many more examples not shown here and this post would never be published if I waited to gather them all first.
Special thank you to everyone who graciously provided photos for this guide.
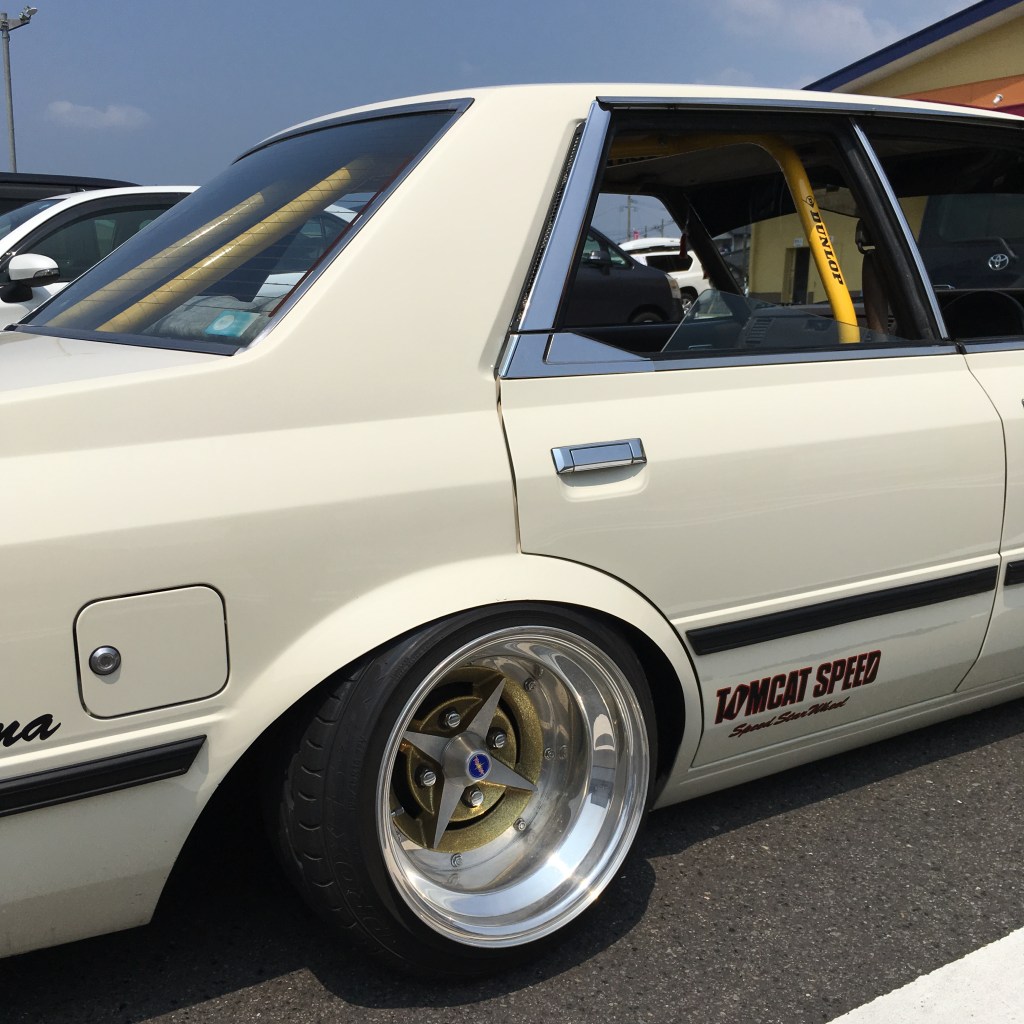
What is custom metal fender 鉄板フェンダー (teppan fender)?
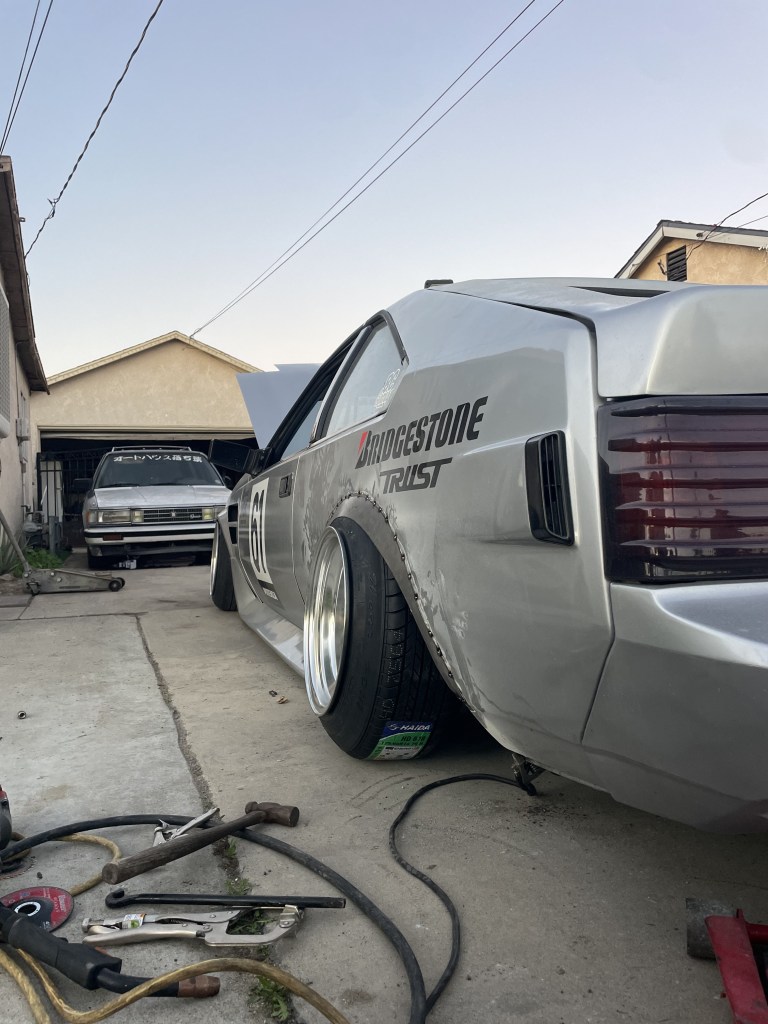
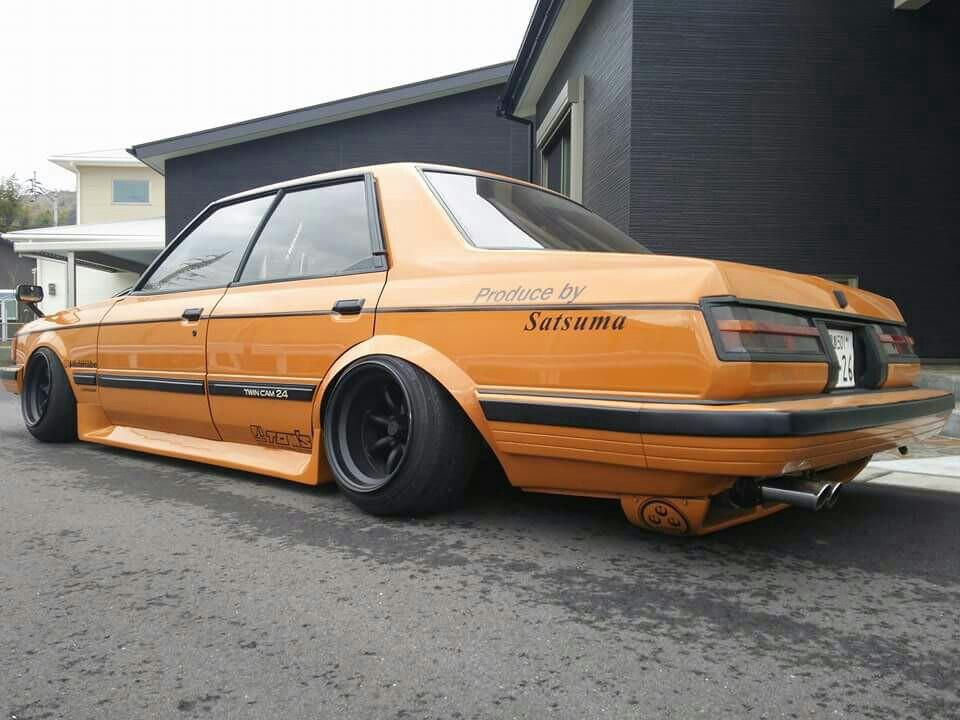
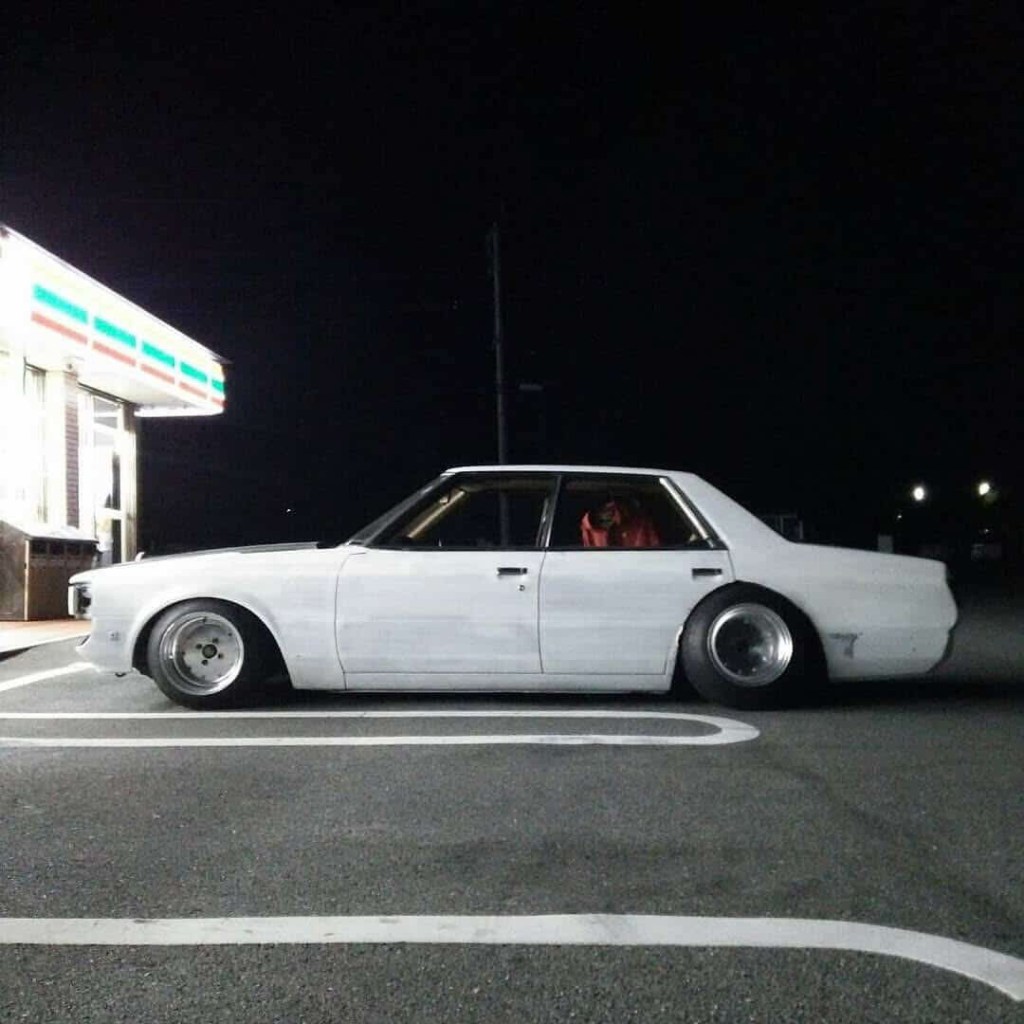
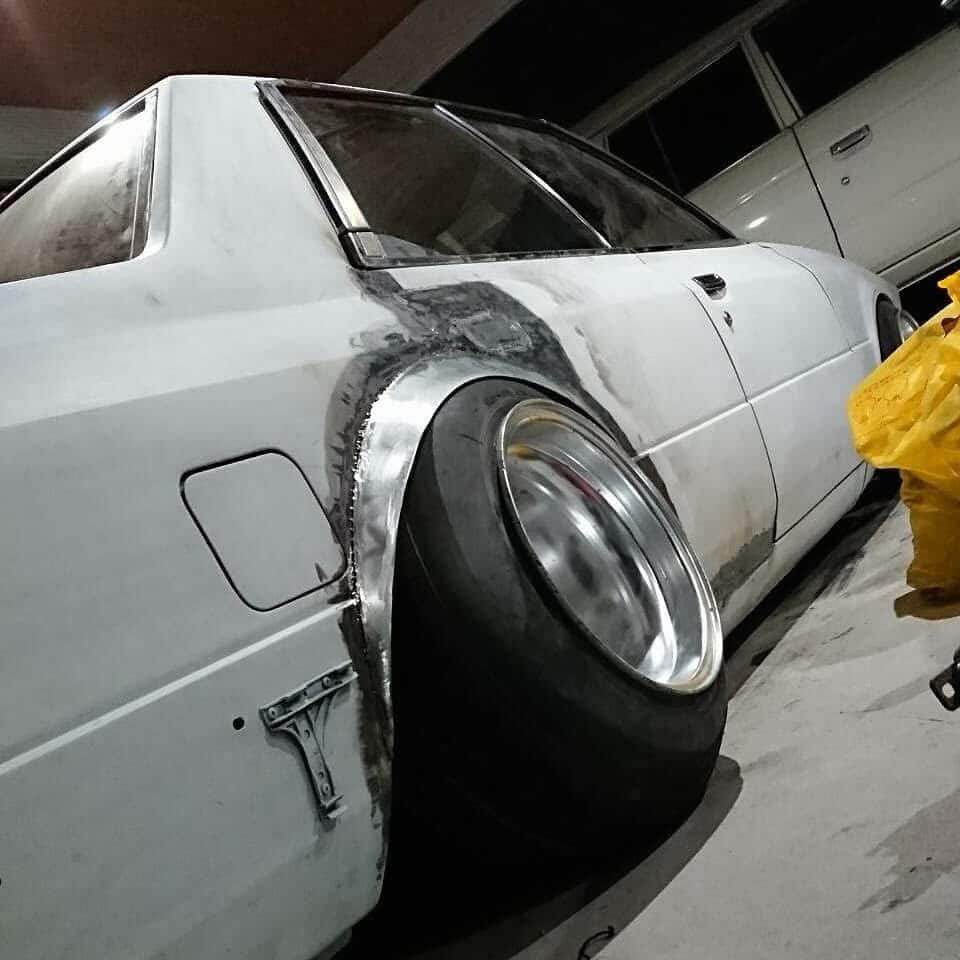
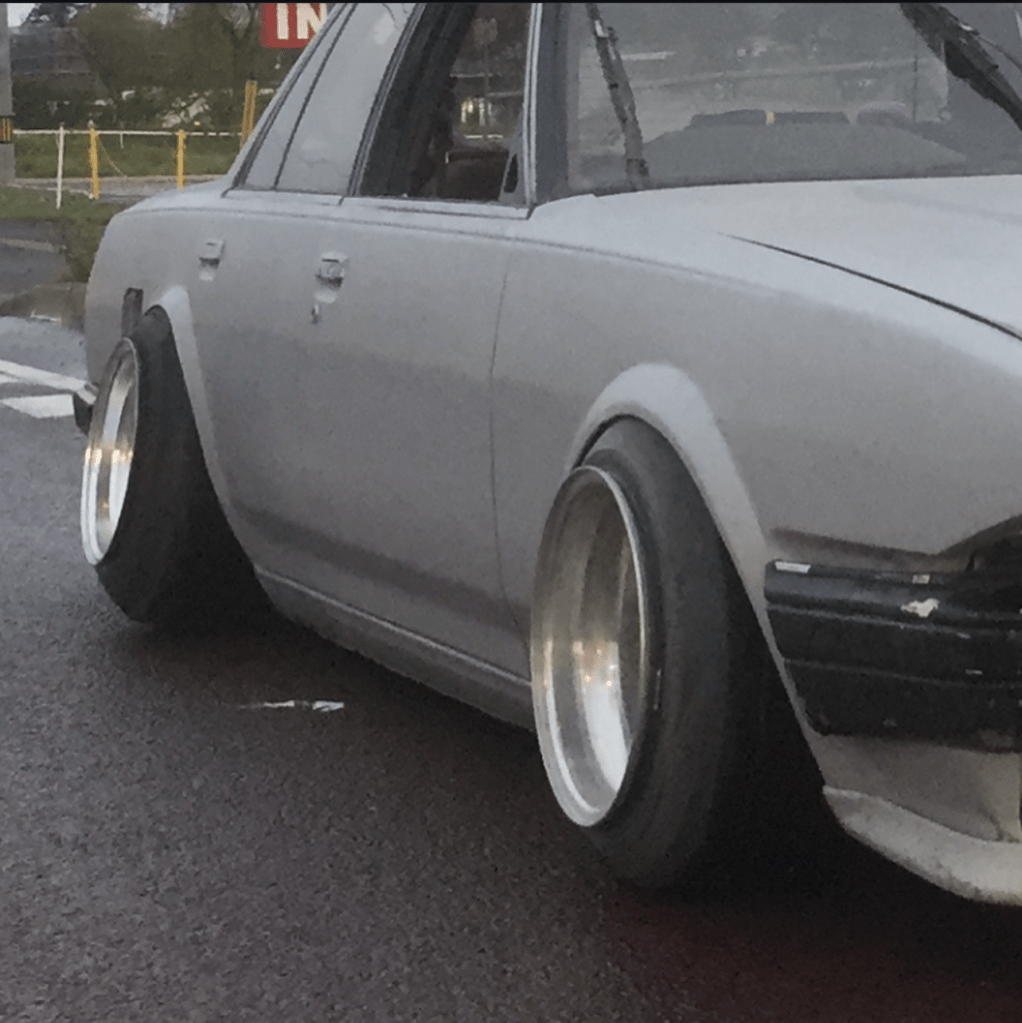
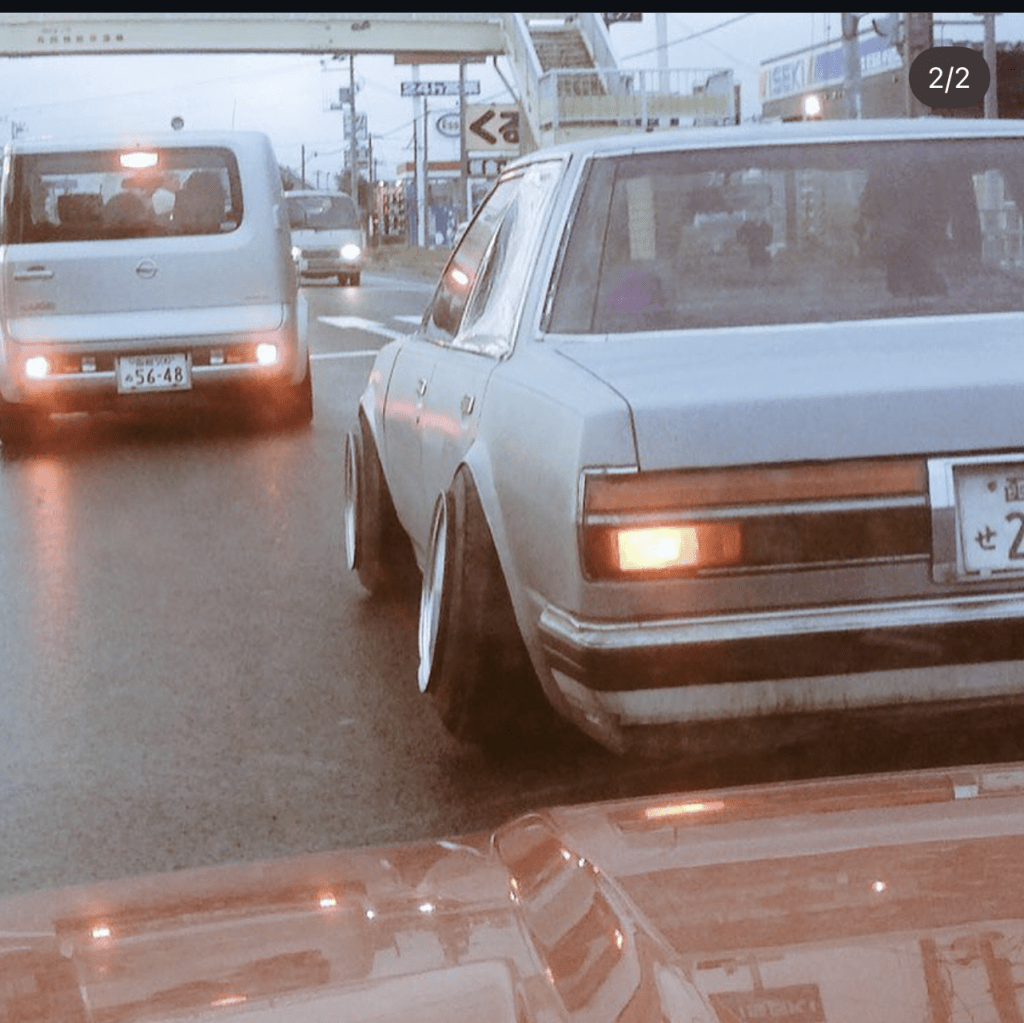
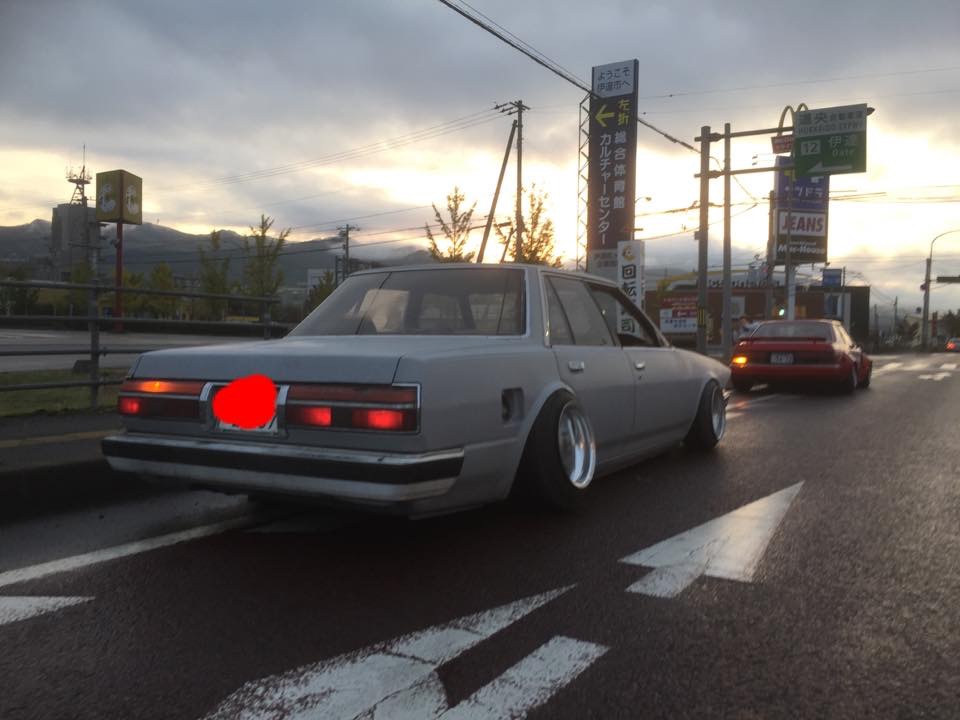
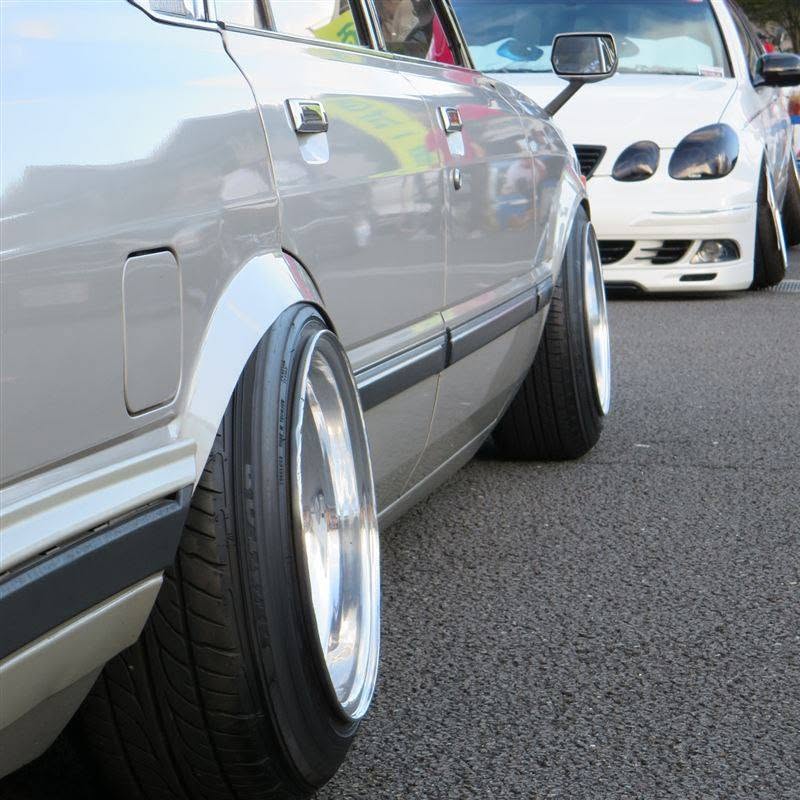
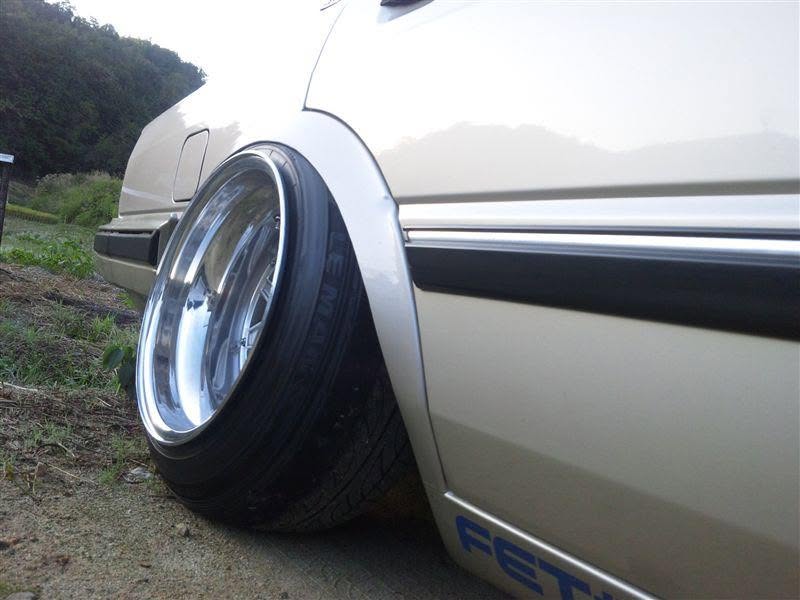
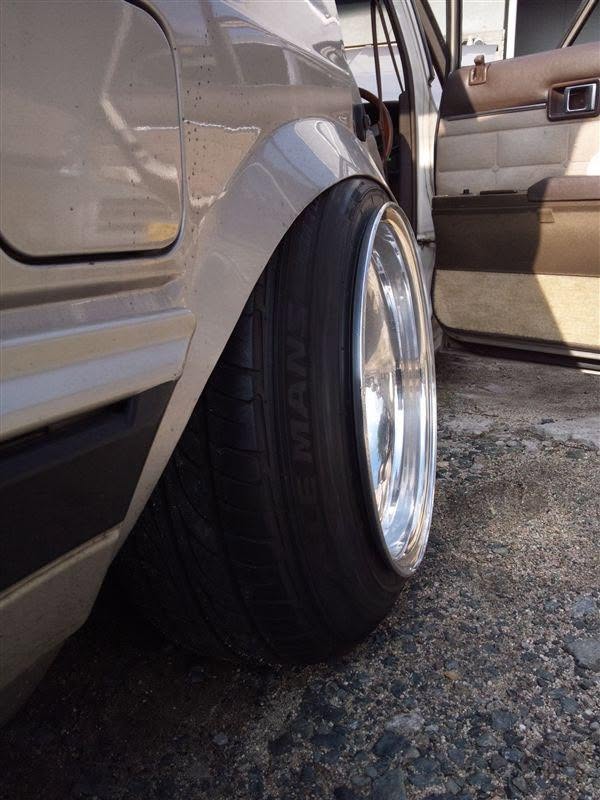
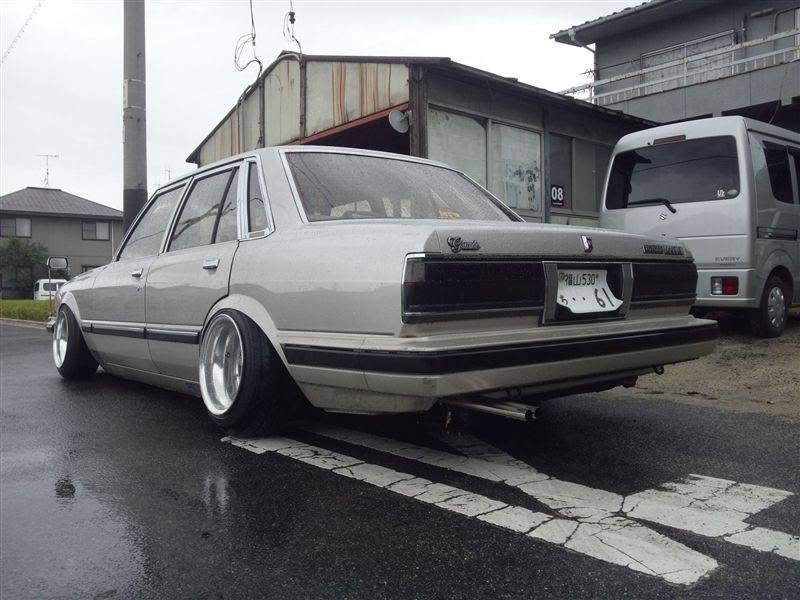
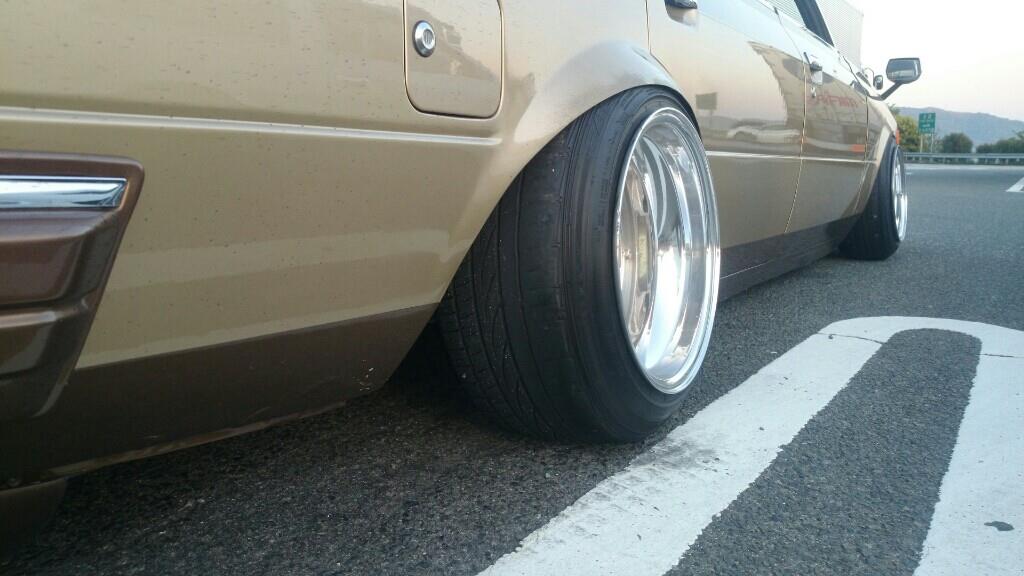
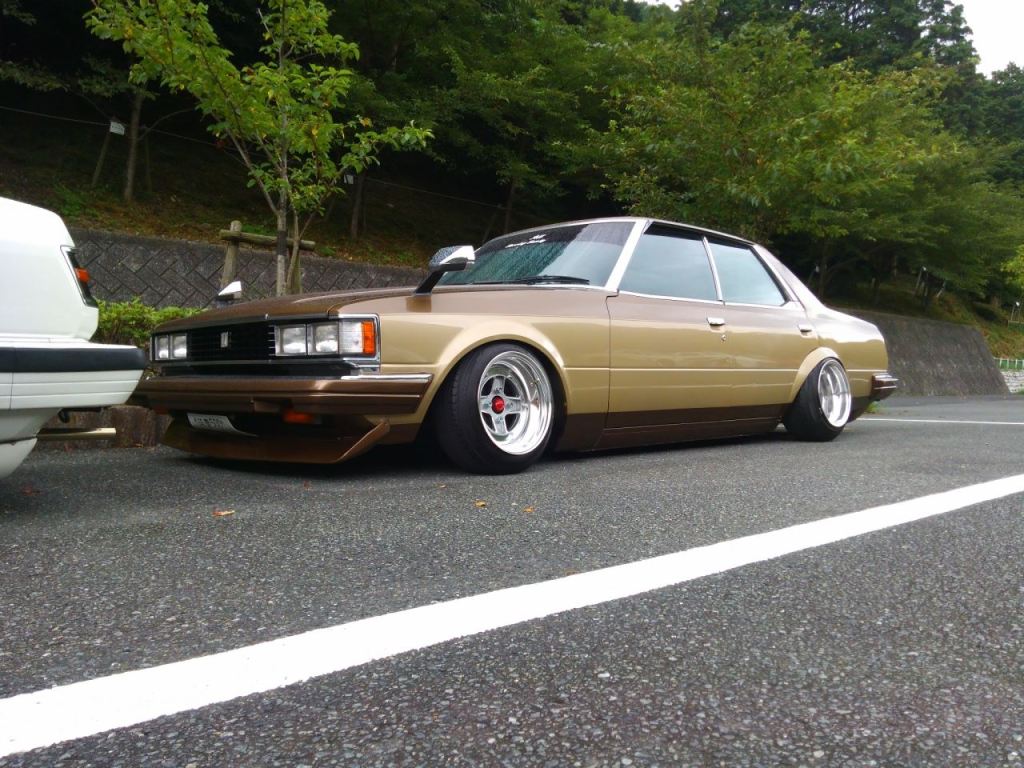
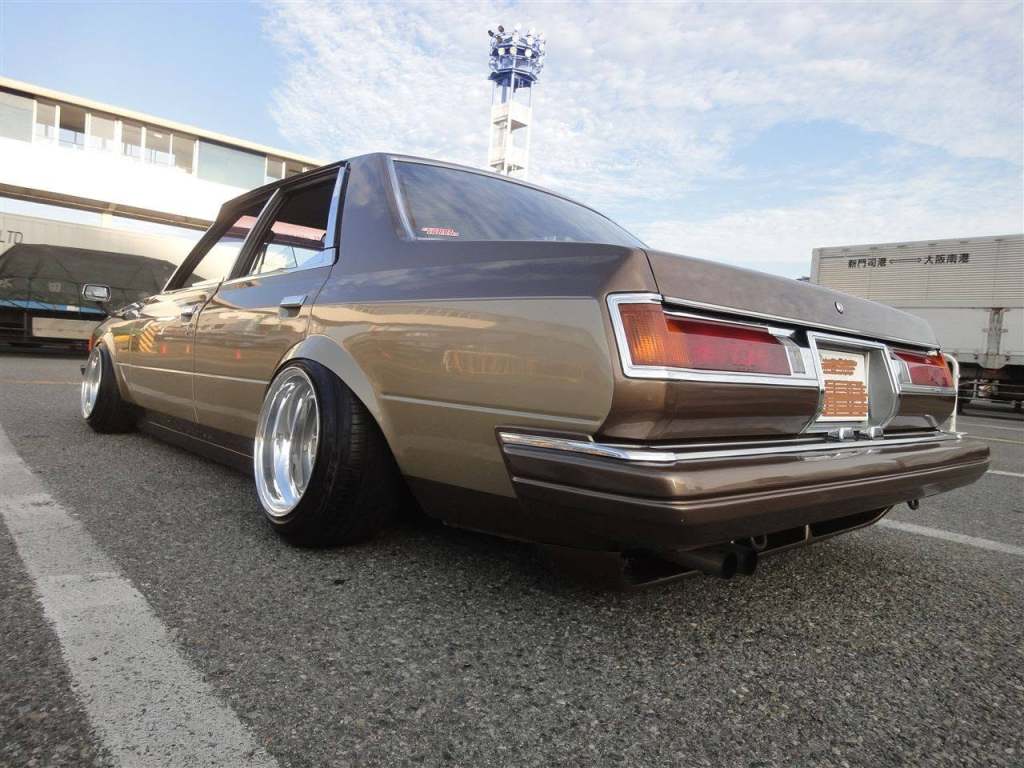
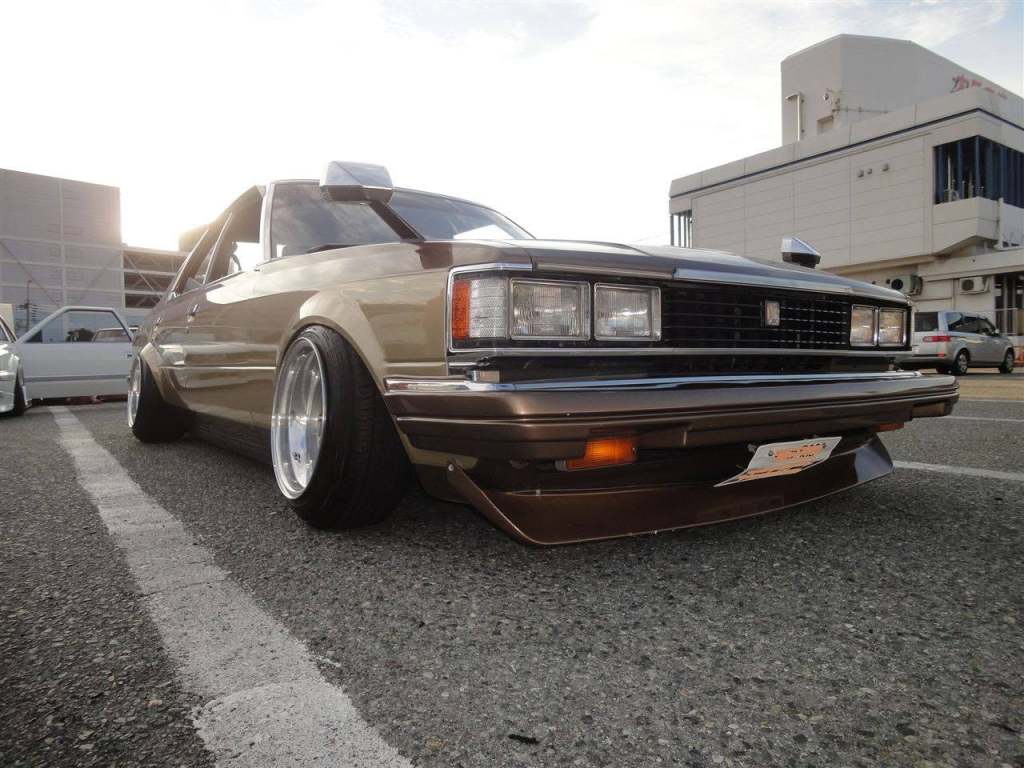
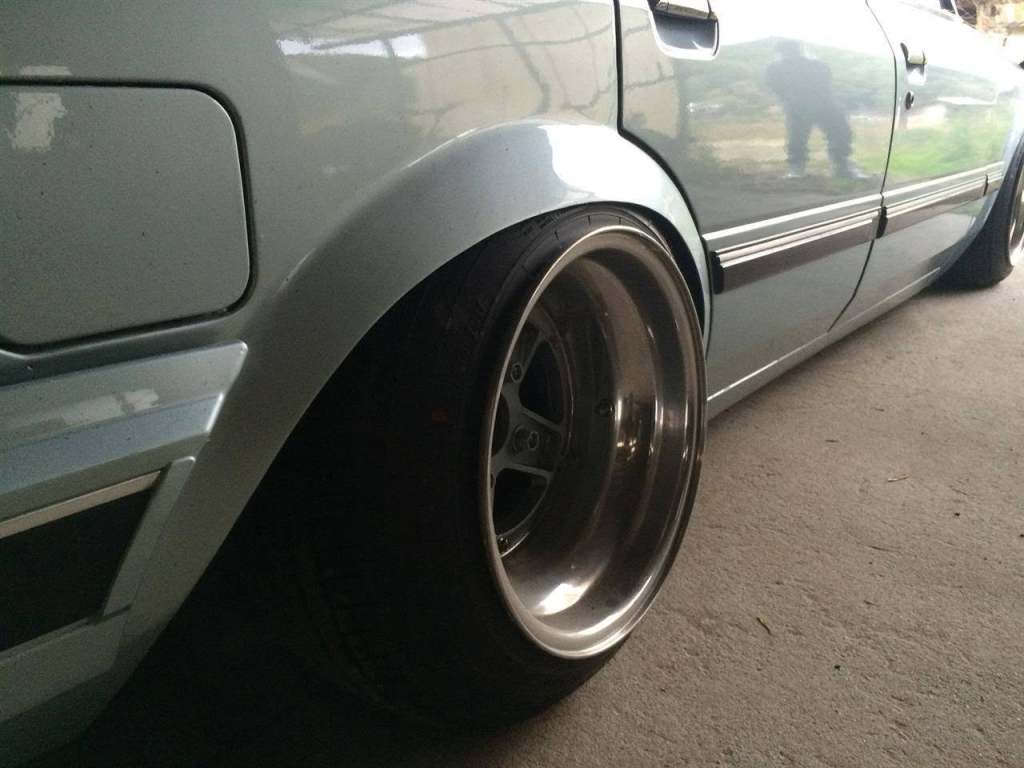
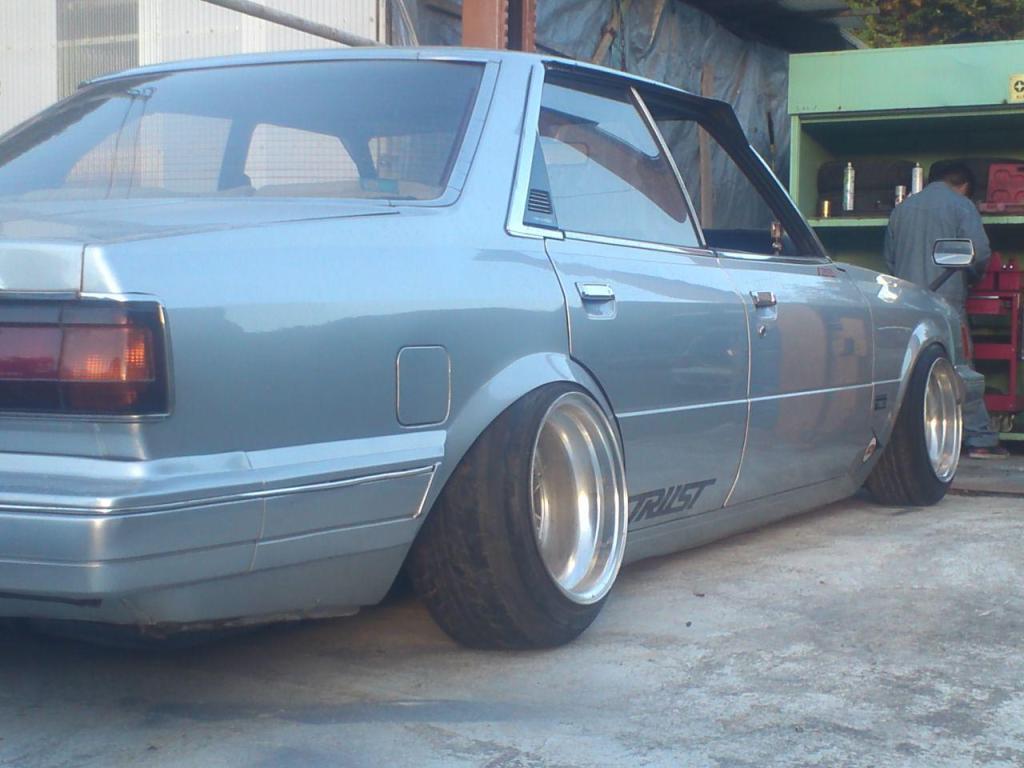
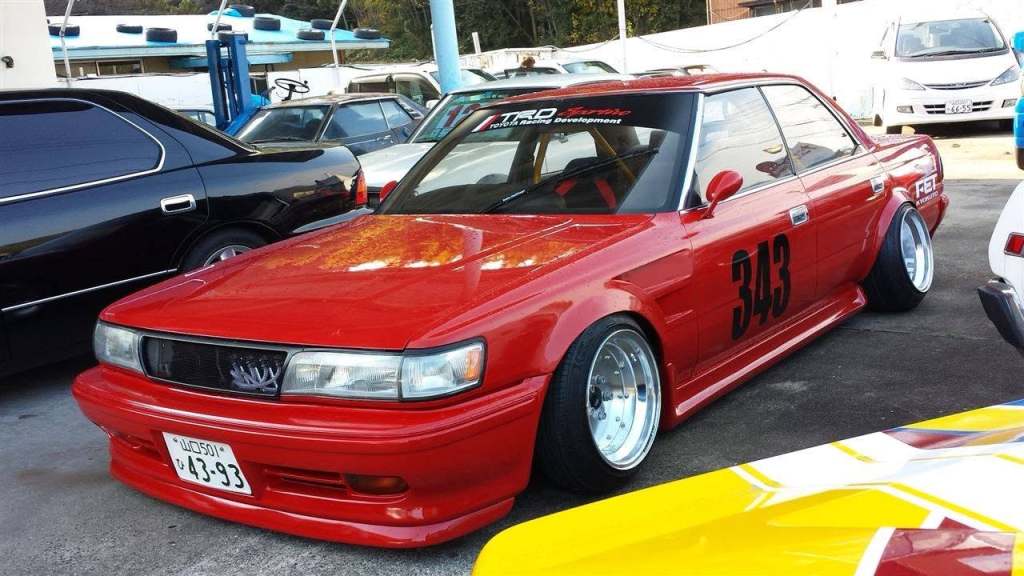
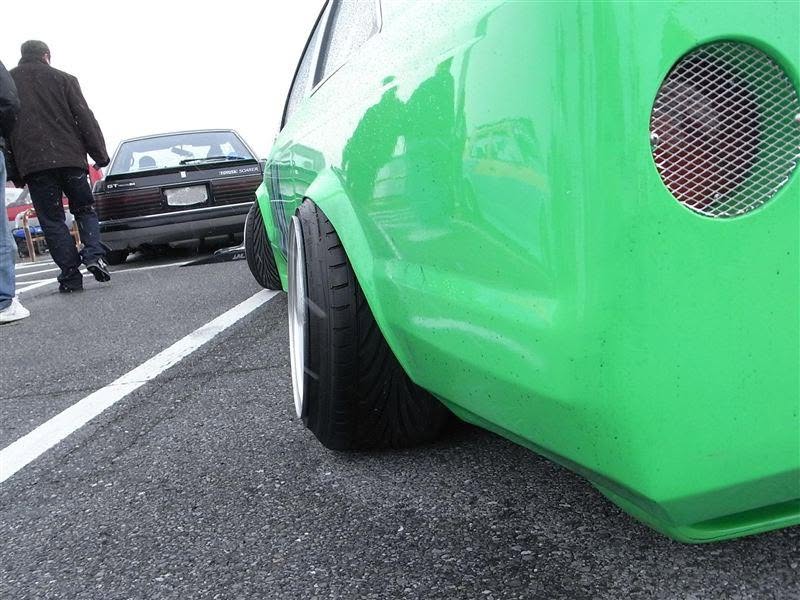
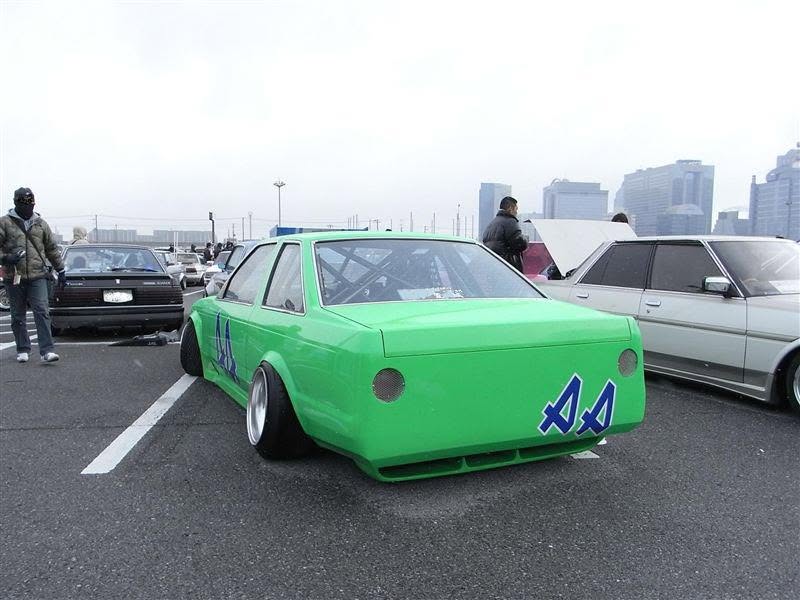
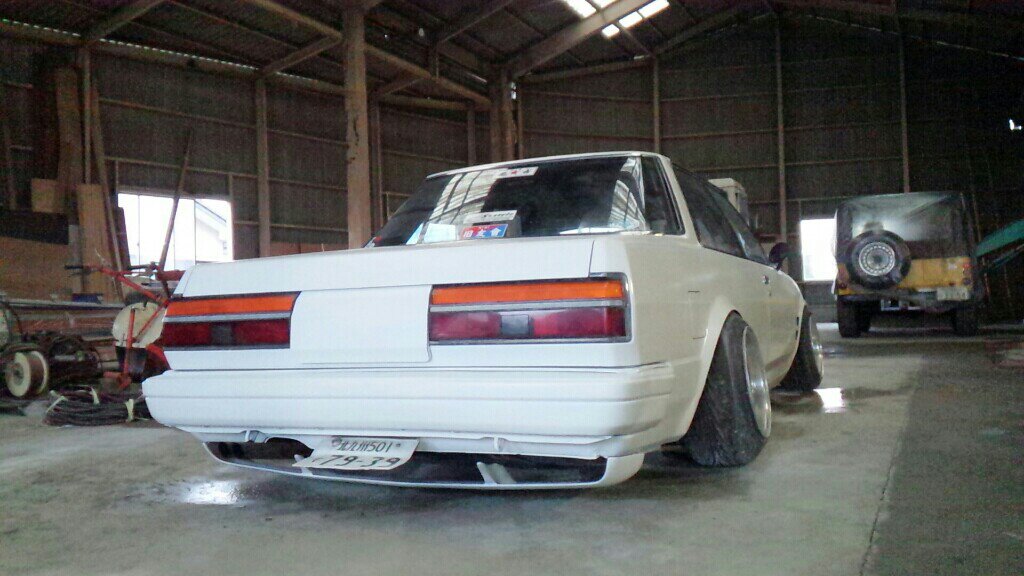
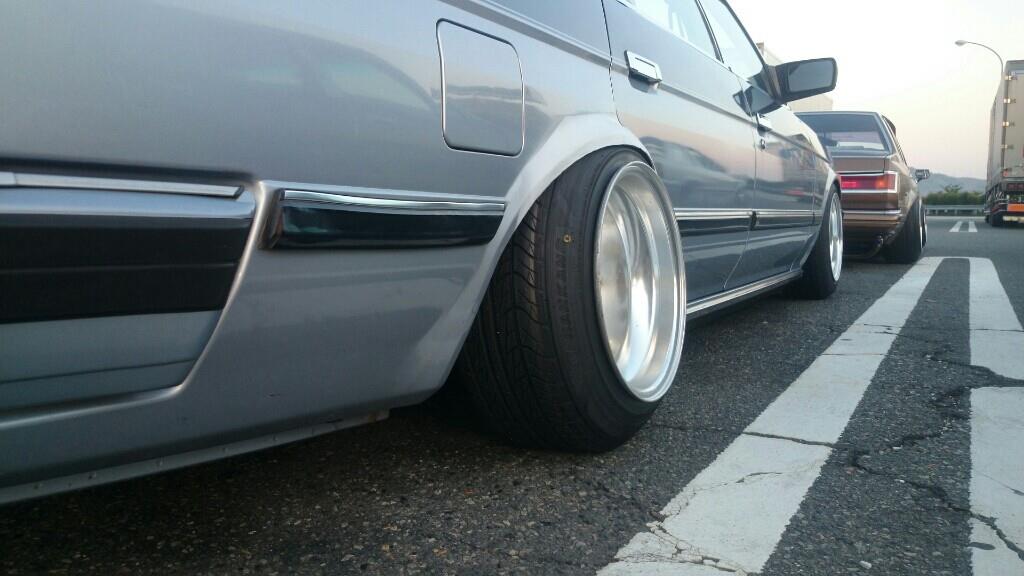
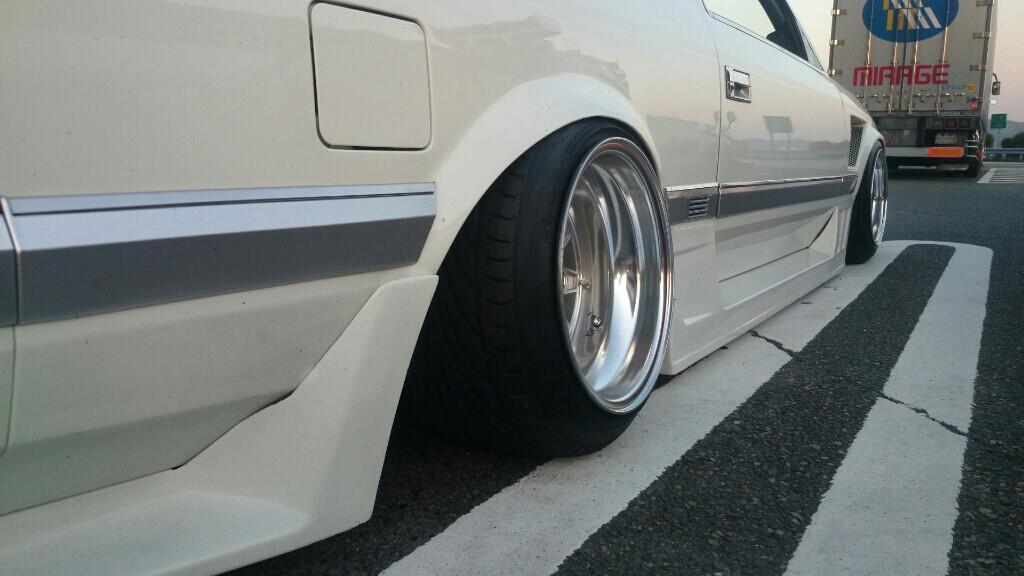
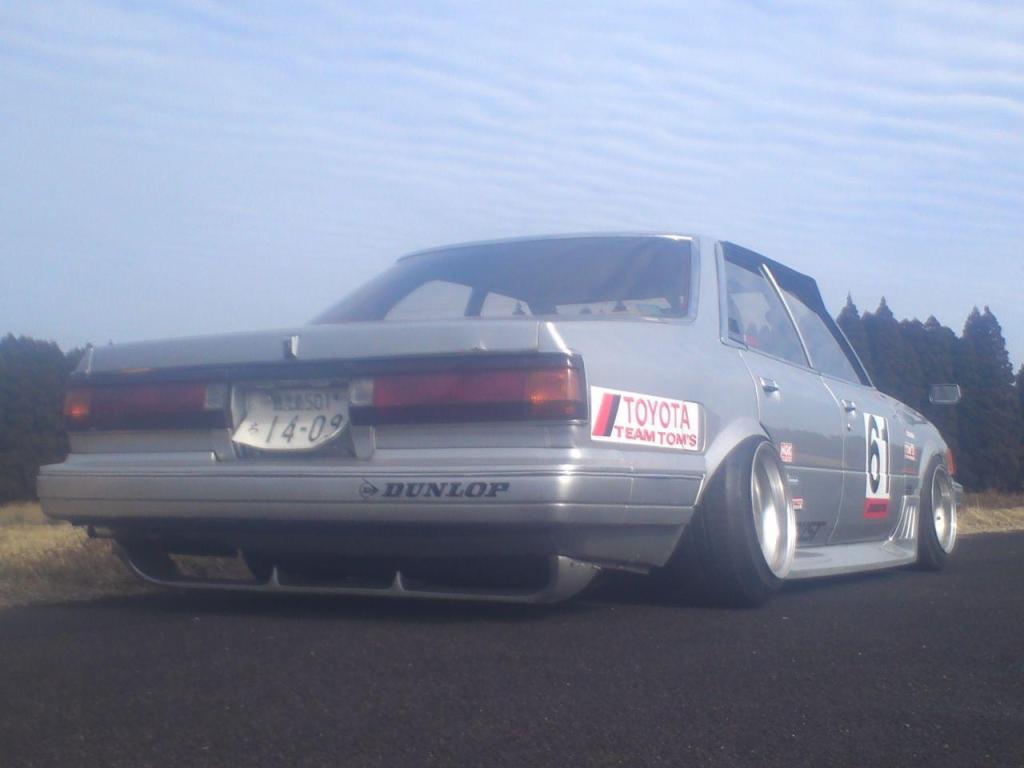
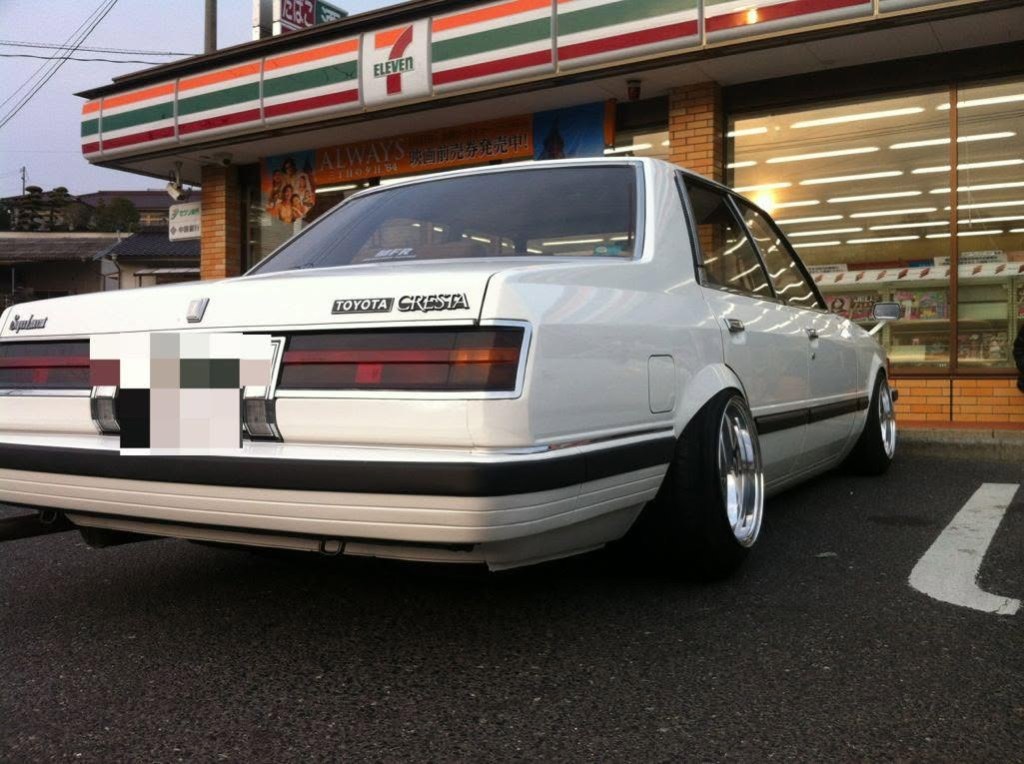
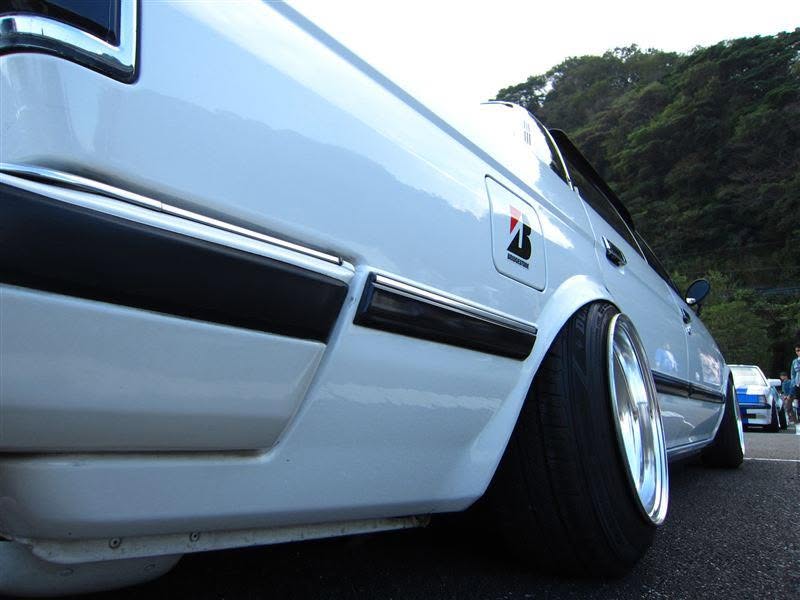
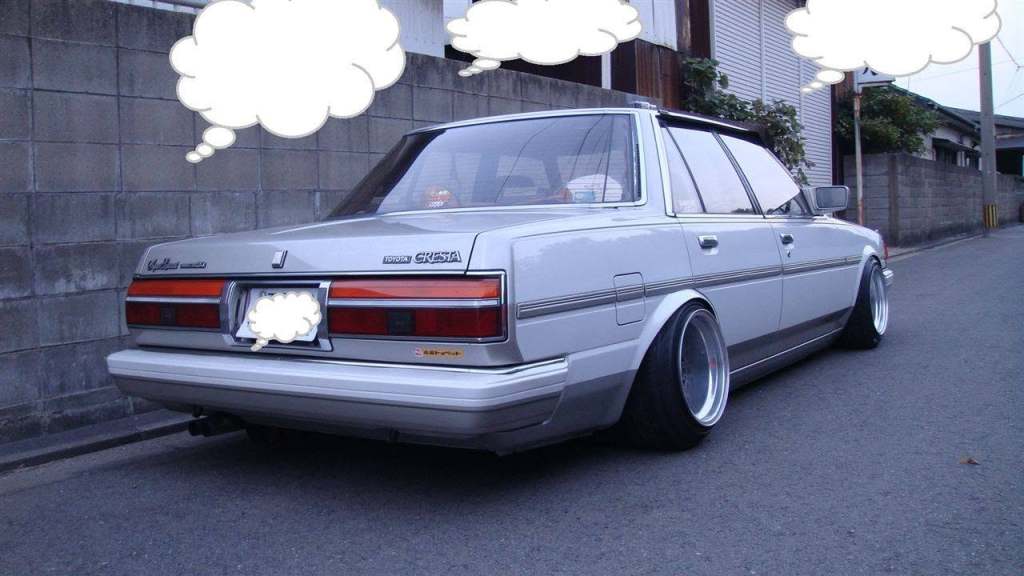
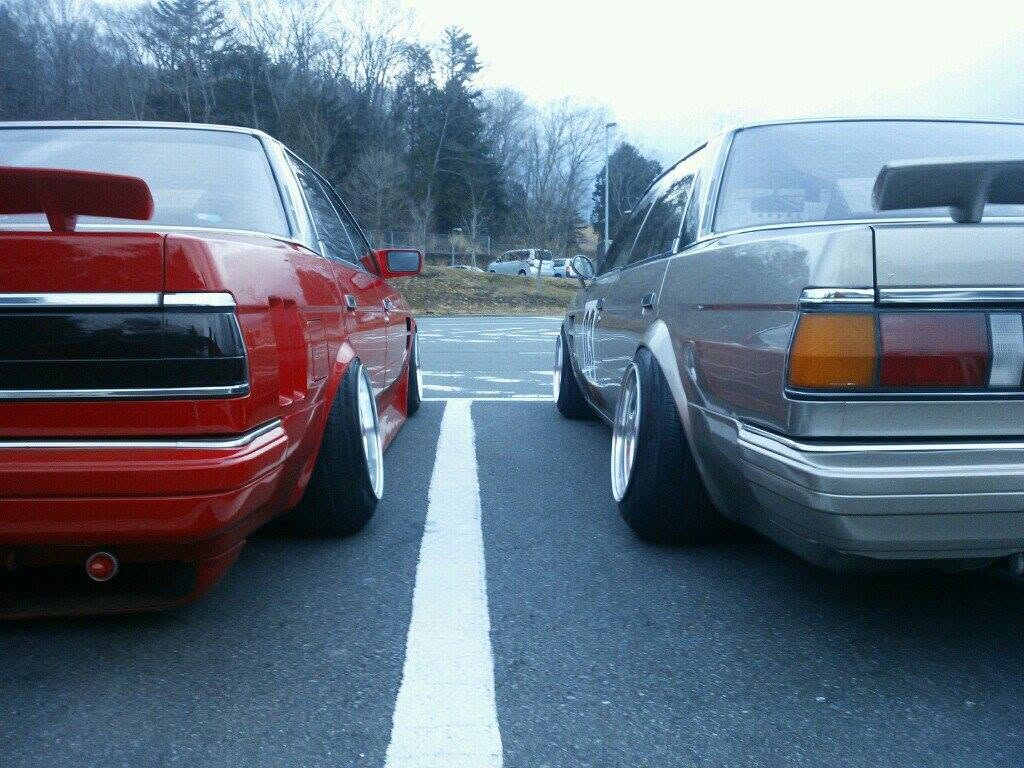
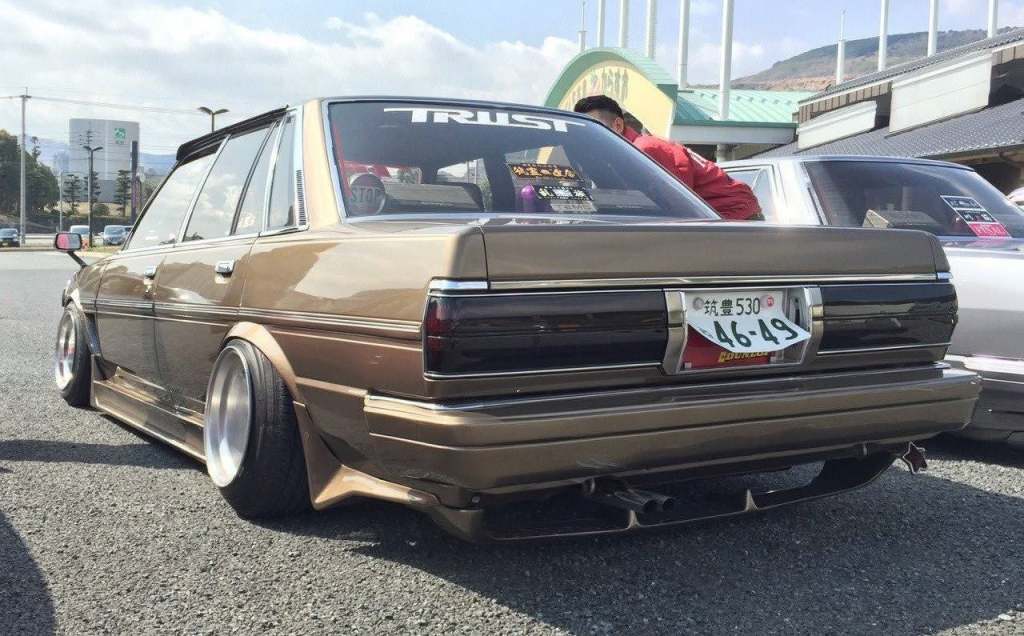
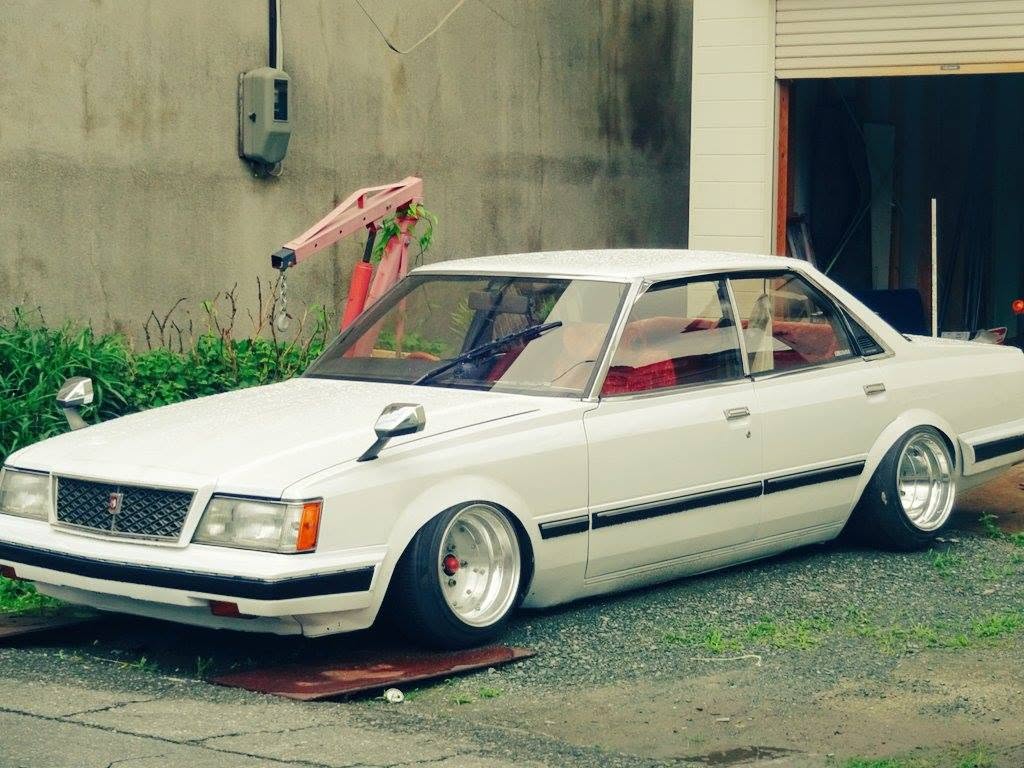
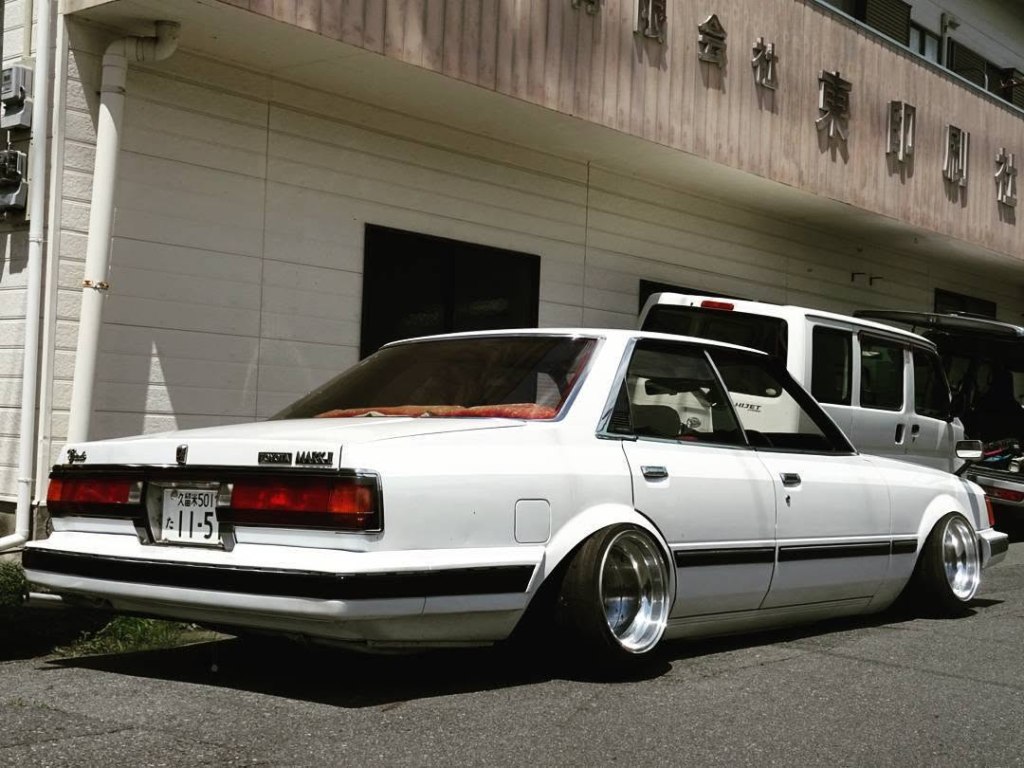
In the realm of kaido racers, and the subgenre of Fukuoka Shiyou (Fukuoka specification), teppan fender (colloquially referred to as metal fender or custom metal fender in English) is a method of cutting the original rear (sometimes front, although much more rarely) factory fender and replacing it with a curved and thin piece of steel. The goal of this fender is to allow wider wheels and tires to be fitted at the rear of the car. This gives the car a much more aggressive stance, while maintaining a relatively stock body form (as opposed to ZG flares or Works flares.)
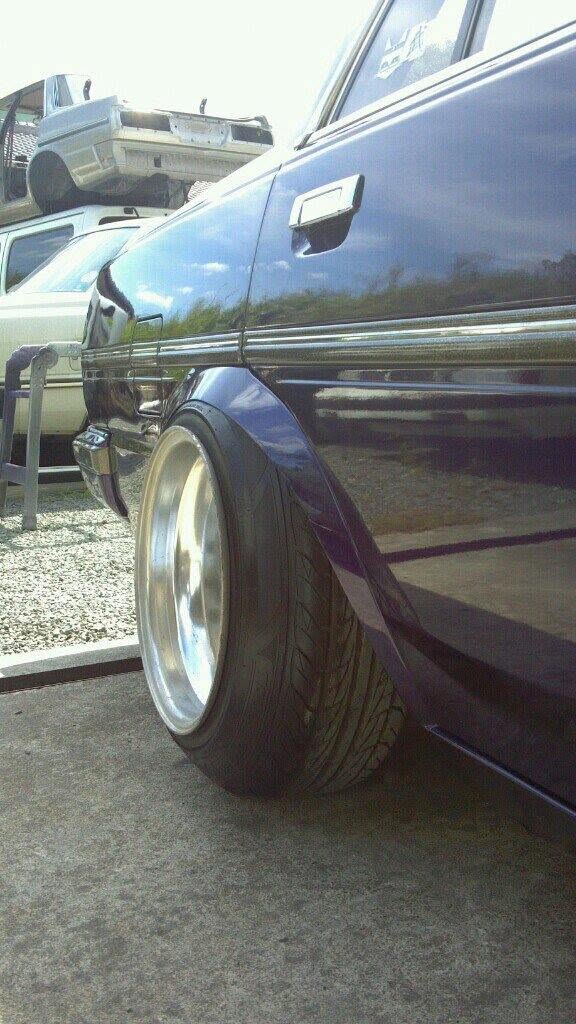
Within Fukuoka Shiyou, the preferred method of modification is err on the side of simplicity, yet subtle modifications yield high impact results, such as very low ride height, wide wheels with stretched tires (引っ張りタイヤ hippari tire) and tires sitting very close to the fender (ツライチ tsuraichi.)
This is my personal favorite style, and I have been studying examples of teppan fender in Fukuoka Shiyou cars for close to 15 years. I feel that information surrounding the process of making these fenders, along with the proper wheel and tire sizes commonly used, is a bit of a word of mouth affair, and my goal with this article is to provide a resource for people who are interested in this style but don’t know where to look. In many cases, most of the information we have obtained is a result of studying photos of cars with teppan fenders, asking owners for details such as sheet metal thickness and wheel, tire, and suspension specs, and attempting to make our own metal fenders through trial and error.
Nowadays, there are many more people in the western kaido racer community making their own metal fenders. In this article, I will progress through examples as follows:
- Metal fender basics:
- Wheels and tires
- Arch cut height アーチ上げ
- Fender shape
- Tsuraichi
2. General guide & Build progress photos:
- Where to cut
- Tire fitment
- How to make a template
- Welding in the fender
- Miscellaneous examples
Metal Fender Basics
Wheels and tires
All guidelines beyond this point refer to the traditional base cars for metal fender Fukuoka Shiyou cars, most commonly 80s Toyotas. Although there are no limits to the application of metal fender (Blackwood Mercedes, Jackson Hakosuka) these cars may require different wheel sizes, tire sizes, and fender shapes.
Common wheel sizes:
- 10j
- 10.5j
- 11j
- 11.5j
- 12j
The wheel diameter used is typically 14”, and the minimum wheel width that requires a metal fender is 10j A-type. Please refer to wheel offset sizing at kaidoracer.com. From there, wheel width can increase up to 12j A-type and possibly beyond, although beyond 12j A-type would be experimental. Usually anything wider than 12j A-type would be in over-fender, works-fender, or silhouette car territory.
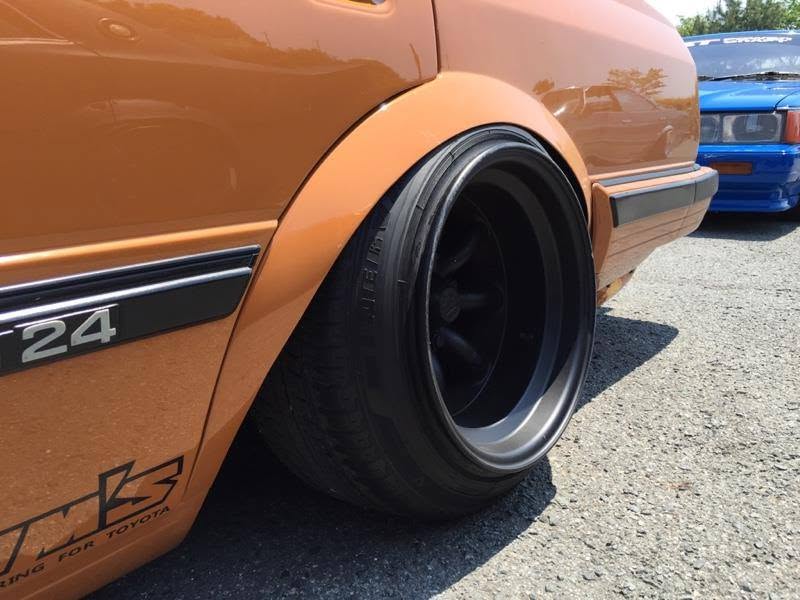
The tires must be stretched (hippari tire) because it is part of the style, as the fender hugs the curve of the tire.
Common tire sizes:
For 10j and 10.5j wheels:
- 175/60 (regular profile)
- 185/50 (low profile)
- 185/55 (regular profile)
- 185/60 (regular profile)
- 195/45 (low profile)
- 225/40 (low profile)
For 11j, 11.5j, and 12j wheels:
- 195/60
- 205/60
Other sizes may be experimented with, but going below 175 width on a 10j is a dangerous and difficult stretch. Going below 195 width on an 11.5j or 12j is also dangerous and difficult. These extreme stretches have been achieved, but I wouldn’t recommend it.
Arch cut height
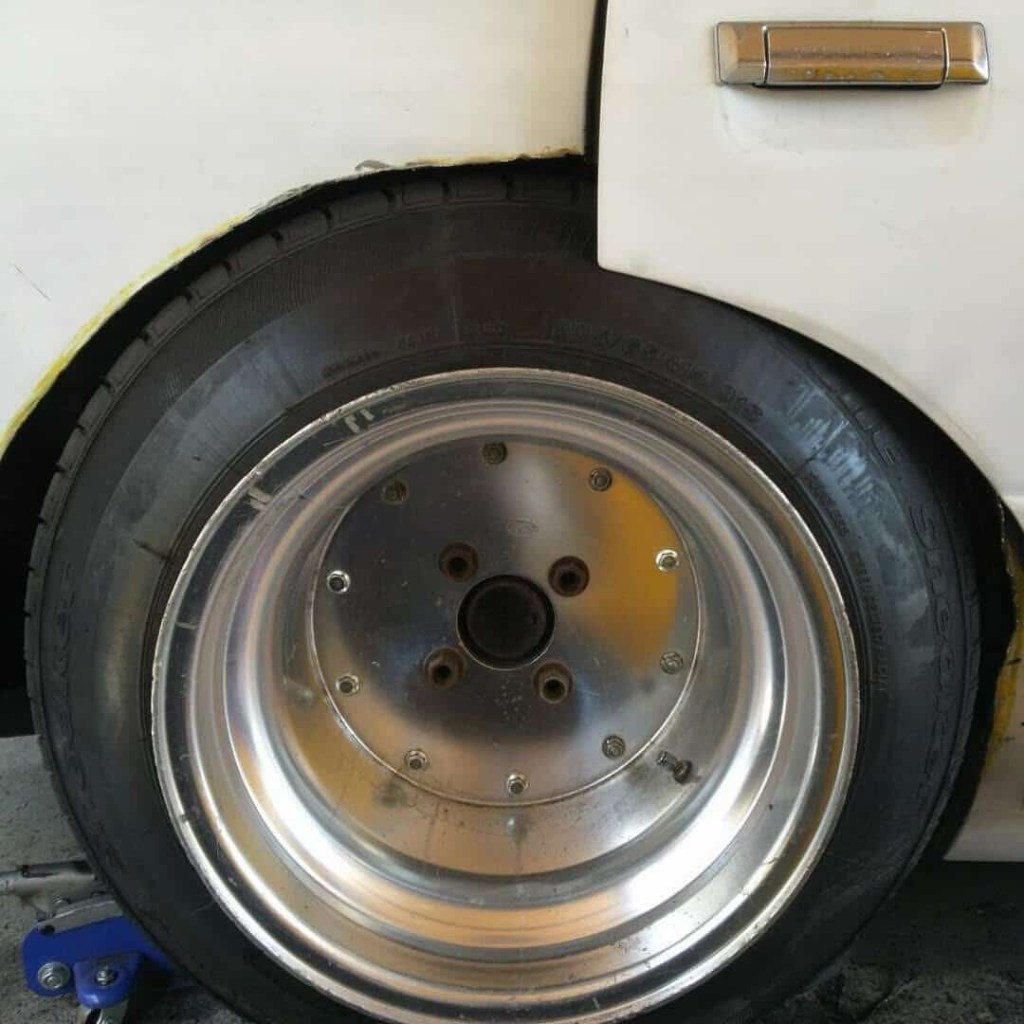
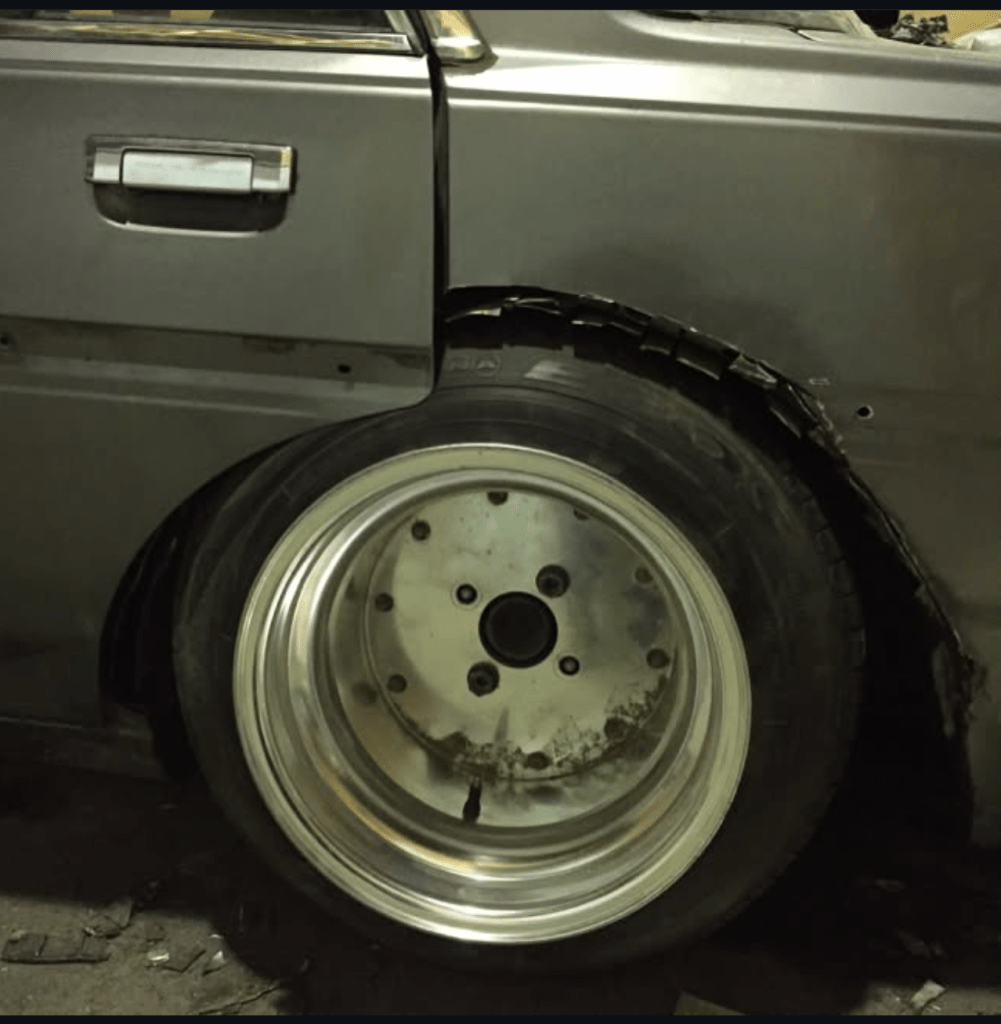
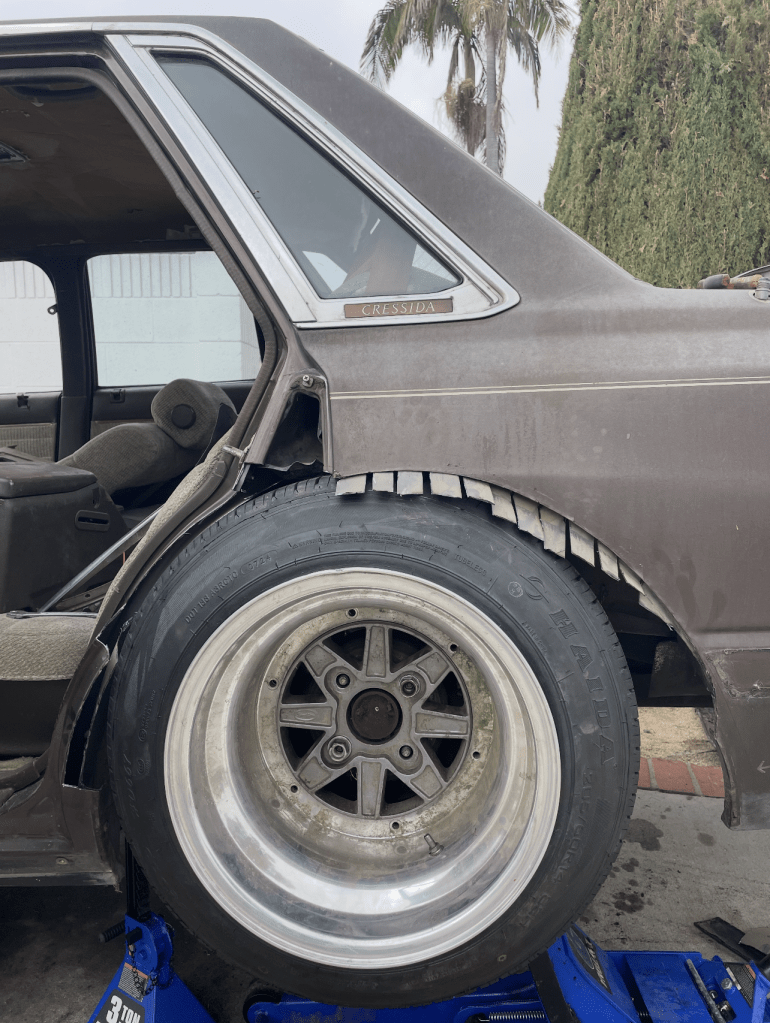
The height of the cut is important and dictates many factors. Ride height, tire stretch, wheel width and offset must be finalized before cutting the fender, as they are all needed to achieve a proper fitting metal fender. Typically, the original fender should be cut slightly above the tire at the desired ride height of the car.
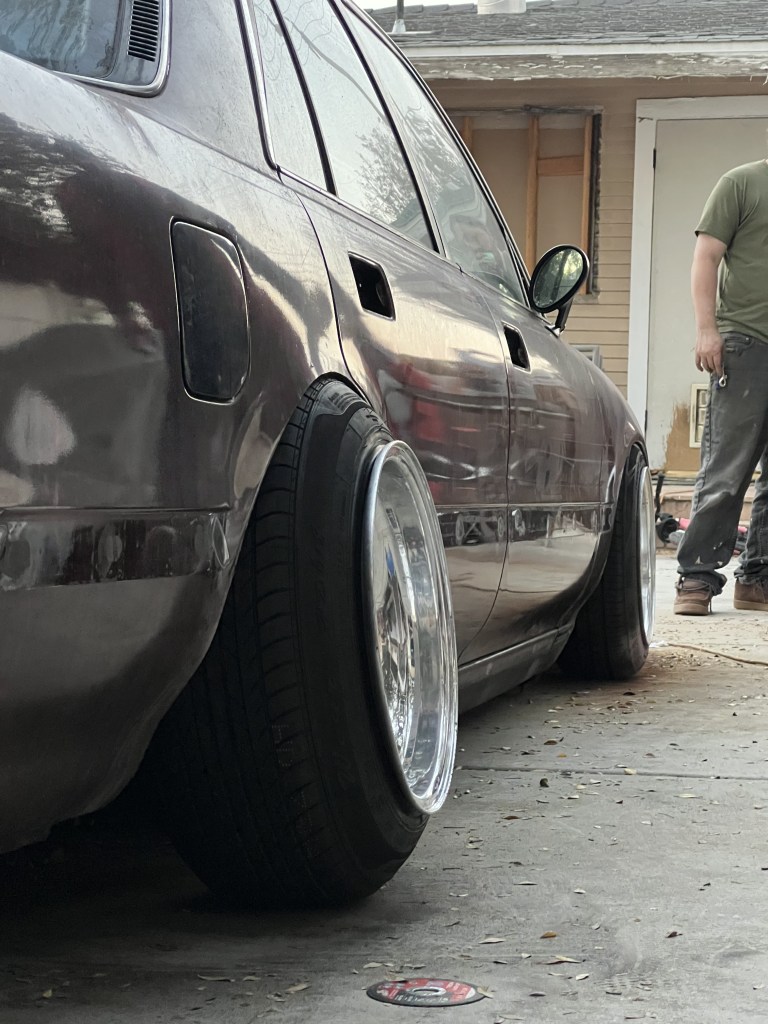
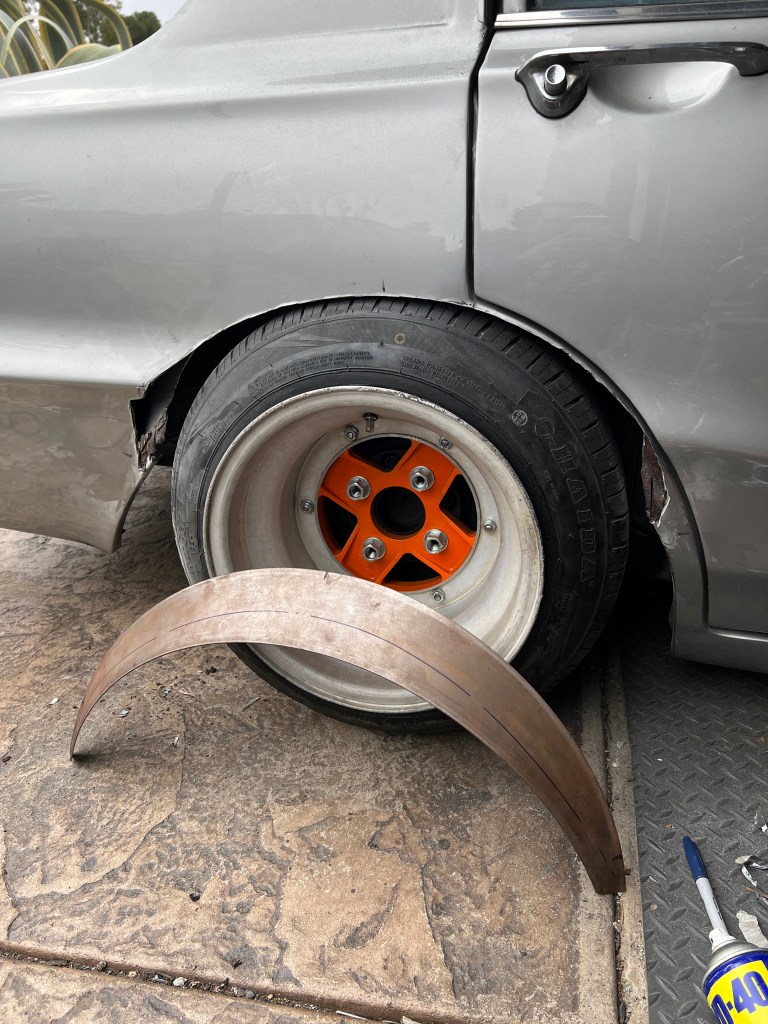
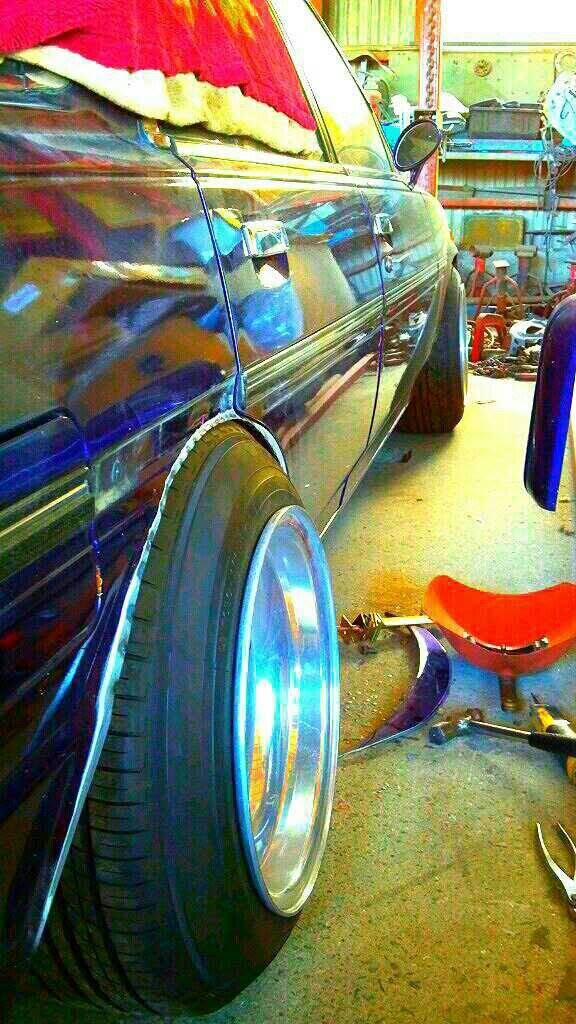
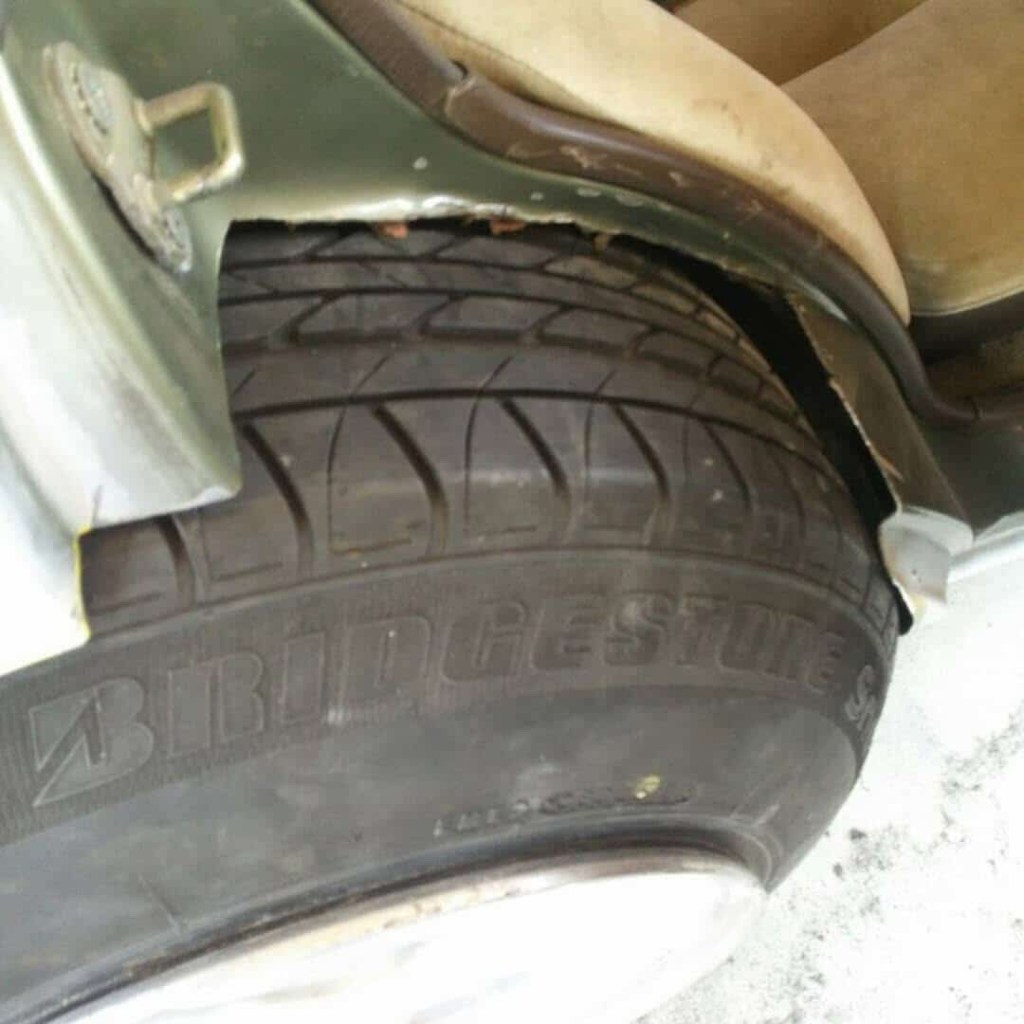
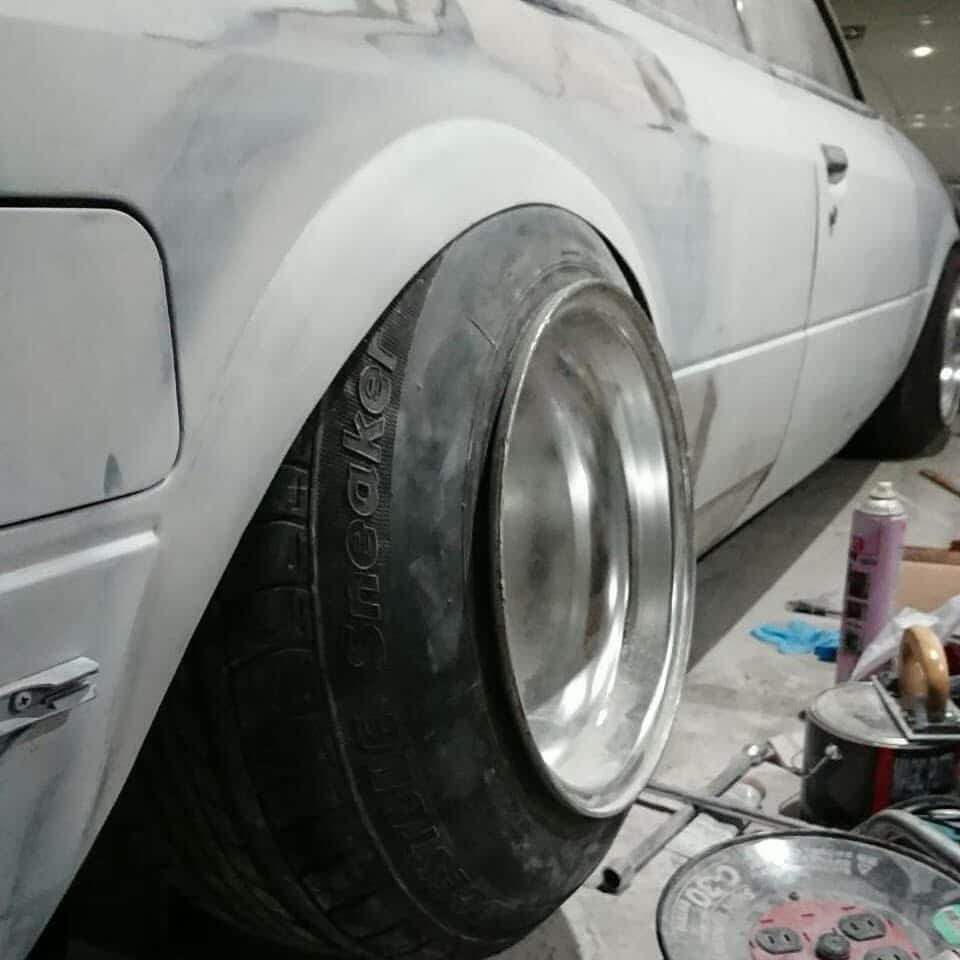
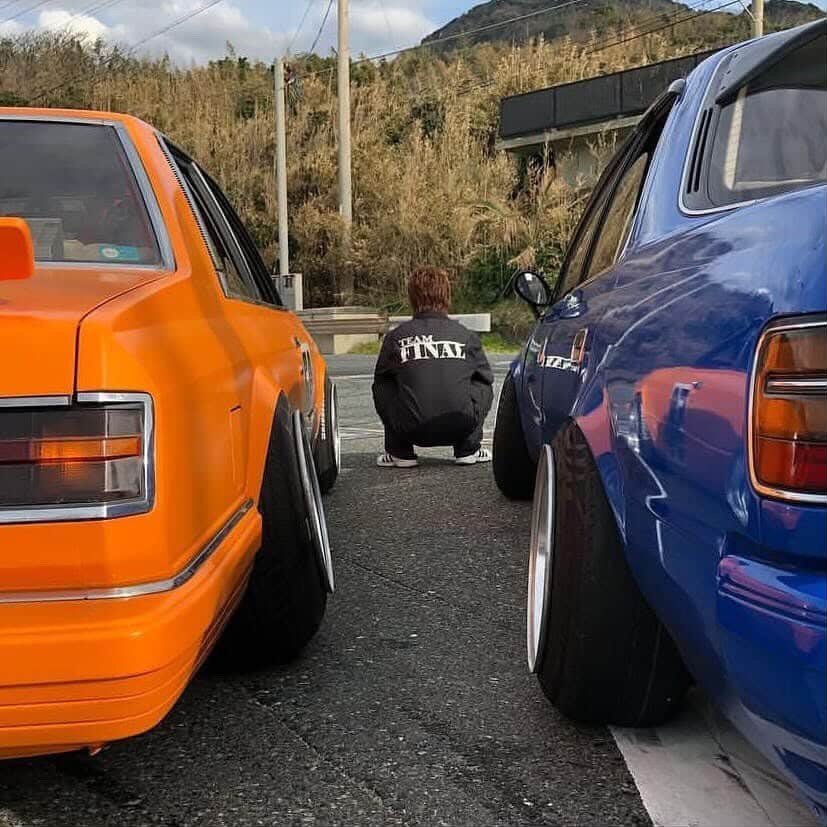
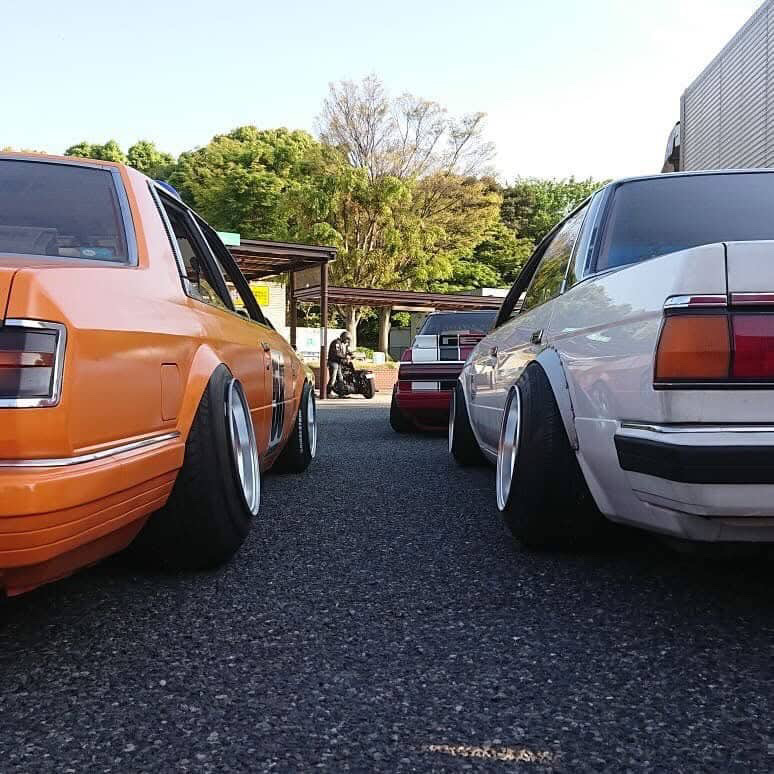
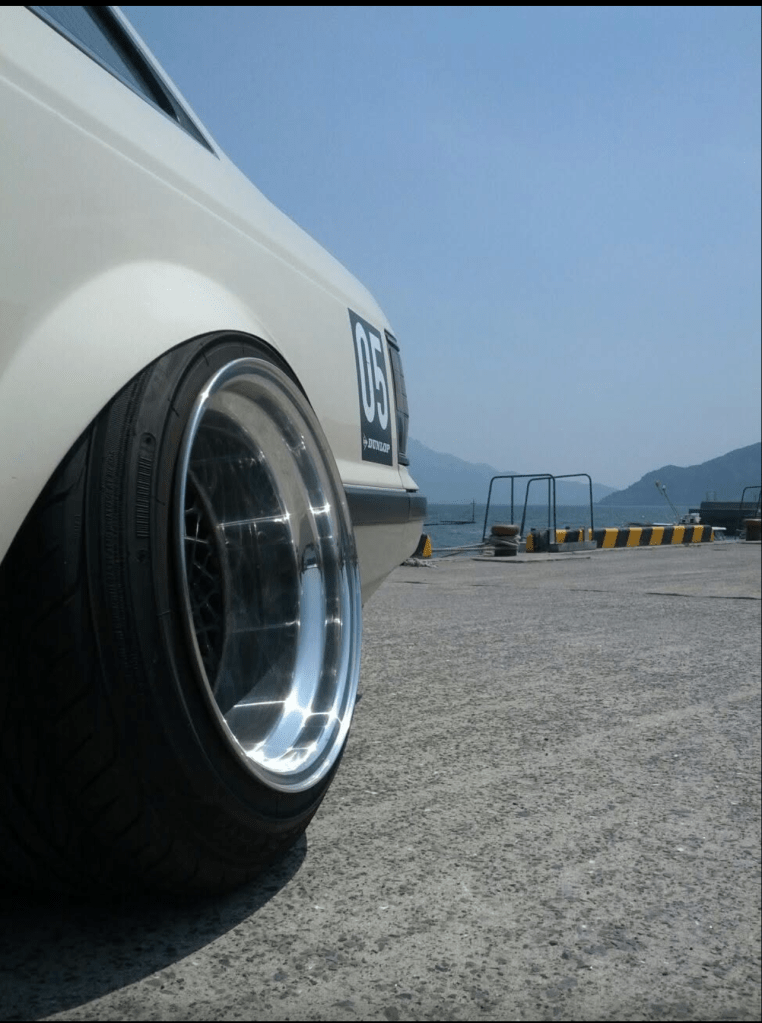
As seen in these examples, the fender cut typically runs along the natural line of the door, although in some cases the door line can be trimmed slightly. The typical desired wheel width, tire profile, and tire to body fitment are shown here as well. The rim is protruding substantially from the body, the tires stretch inwards towards the car, and the corner where the sidewall meets the tire tread typically sits about where the arch cut is made. At this step, you should question whether the wheels will ever fit. That means you are on the right track to a good-looking metal fender.
High-cut アーチ上げ (arch age)
Made popular in modern times by Ryo Endo’s orange GX61, if using a super wide wheel (11.5 or 12j) with a tall sidewall (195/60, 205/60), the arch should be high-cut to lower the car to the proper height. This usually involves an invasive procedure that cuts well into the quarter fender and the door.

Fender shape
Metal used is 20 gauge mild steel. The shape of the metal is subject to personal tastes. I would categorize the shapes as follows:
- Angle:
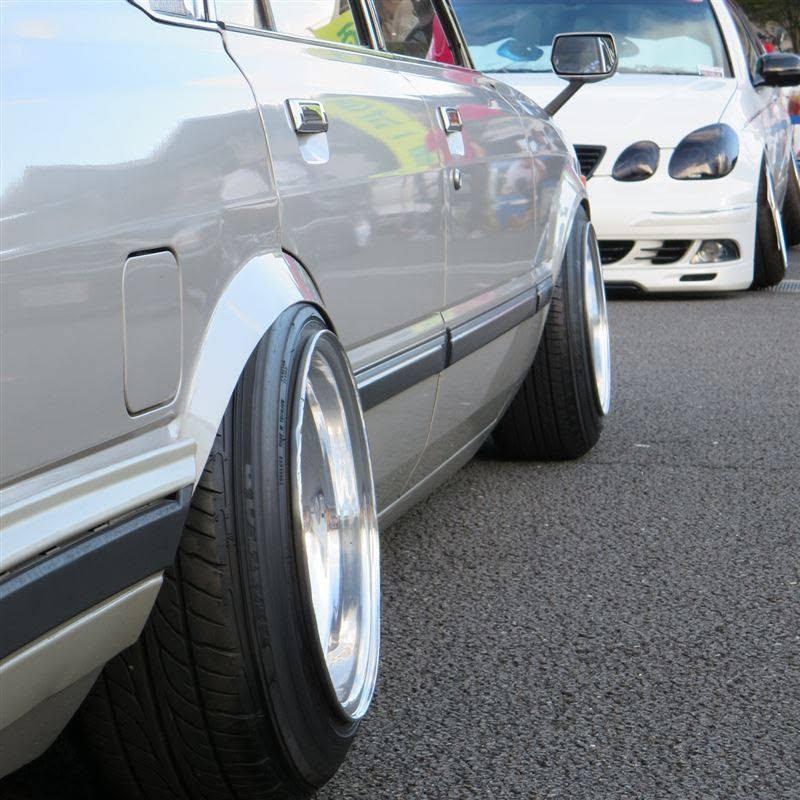
Aggressive: The angle of the fender is more horizontal in relation to the tire. This gives the body a wider feel, but sacrifices tire clearance (tsuraichi). Aggressive angle can also be caused by cutting the factory fender close to the top of the tire.
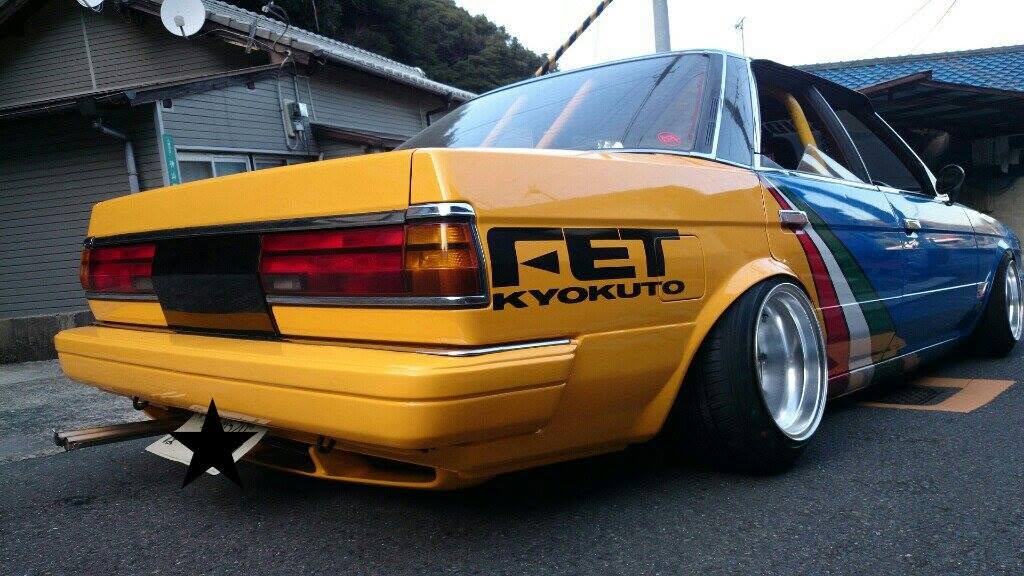
Shallow: The angle of the fender is more vertical in relation to the tire, giving the body a more narrow and clean feel. Necessary to achieve tight tsuraichi. This also allows the fender to be cut higher above the tire, giving more breathing room to prevent rubbing.
- Height
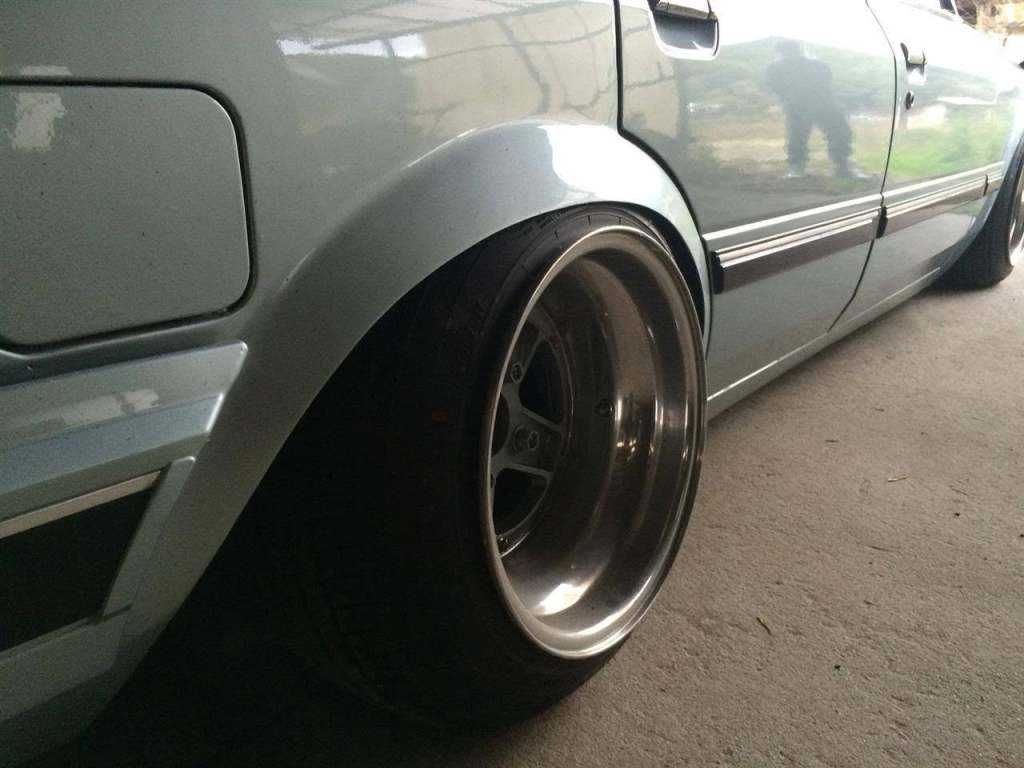
Short: A short fender that does not cover a lot of tire.
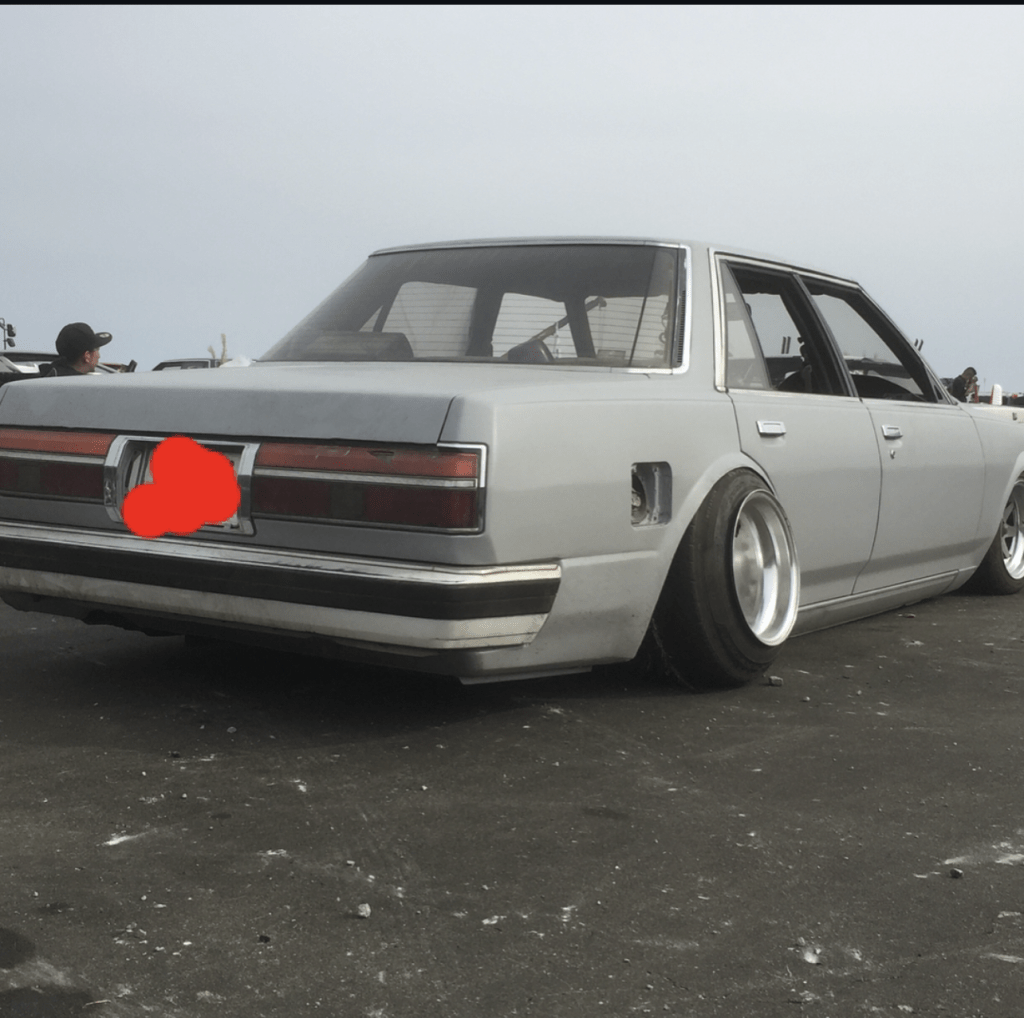
Tall: A tall fender that comes down closer to the rim.
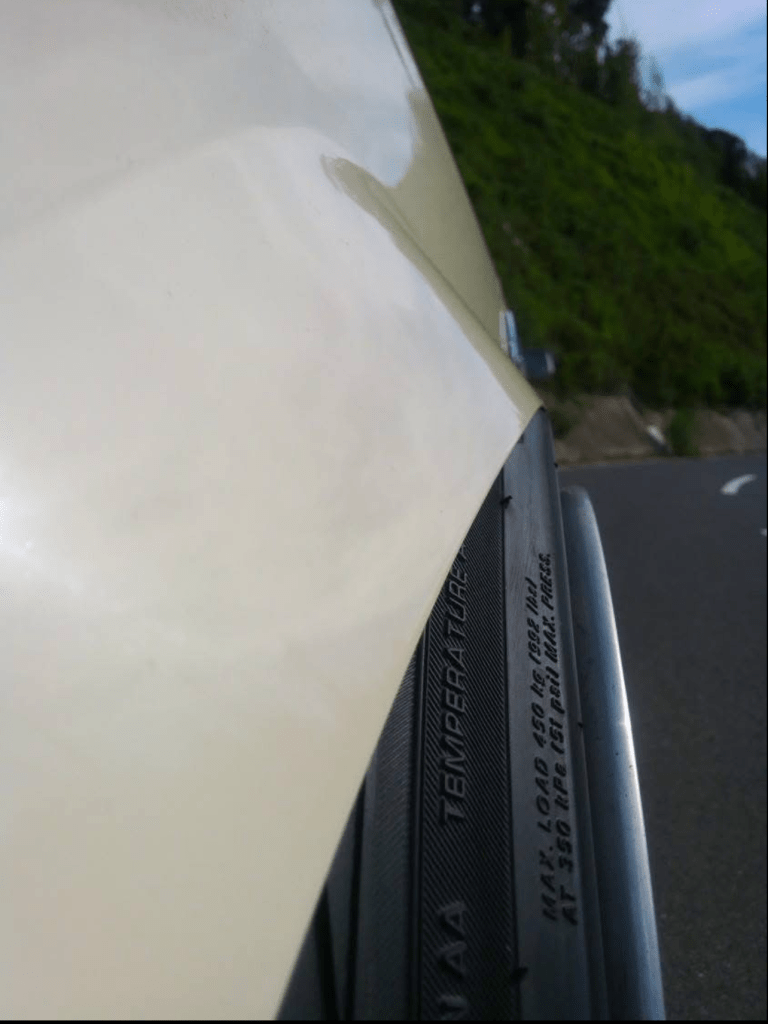
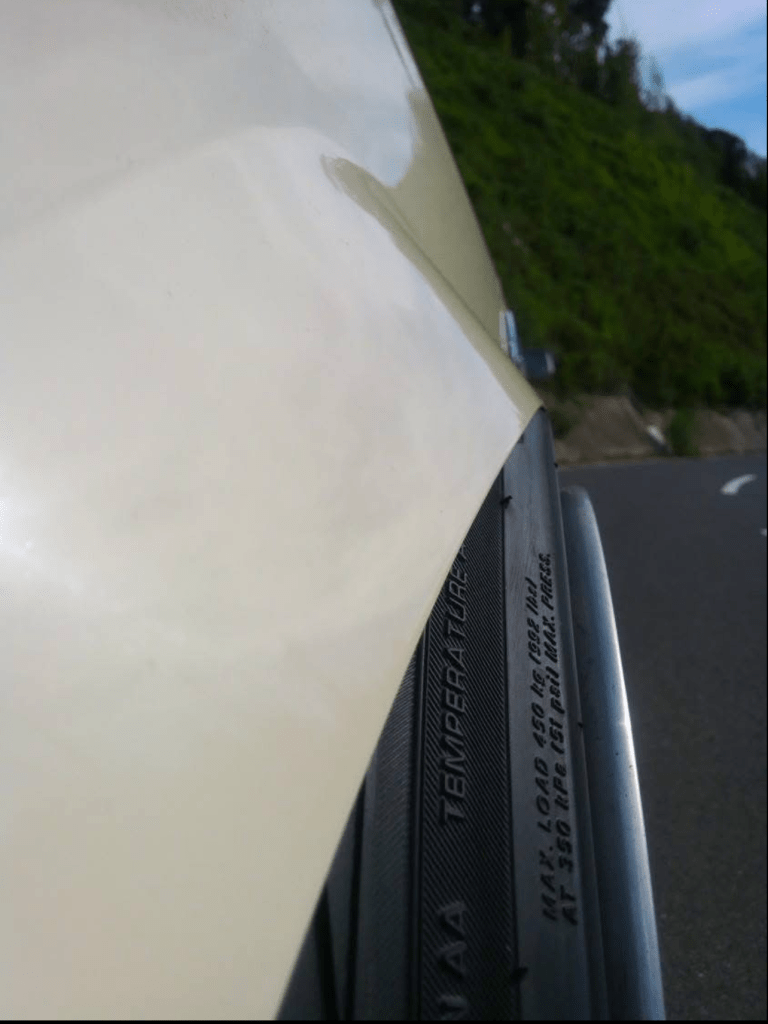
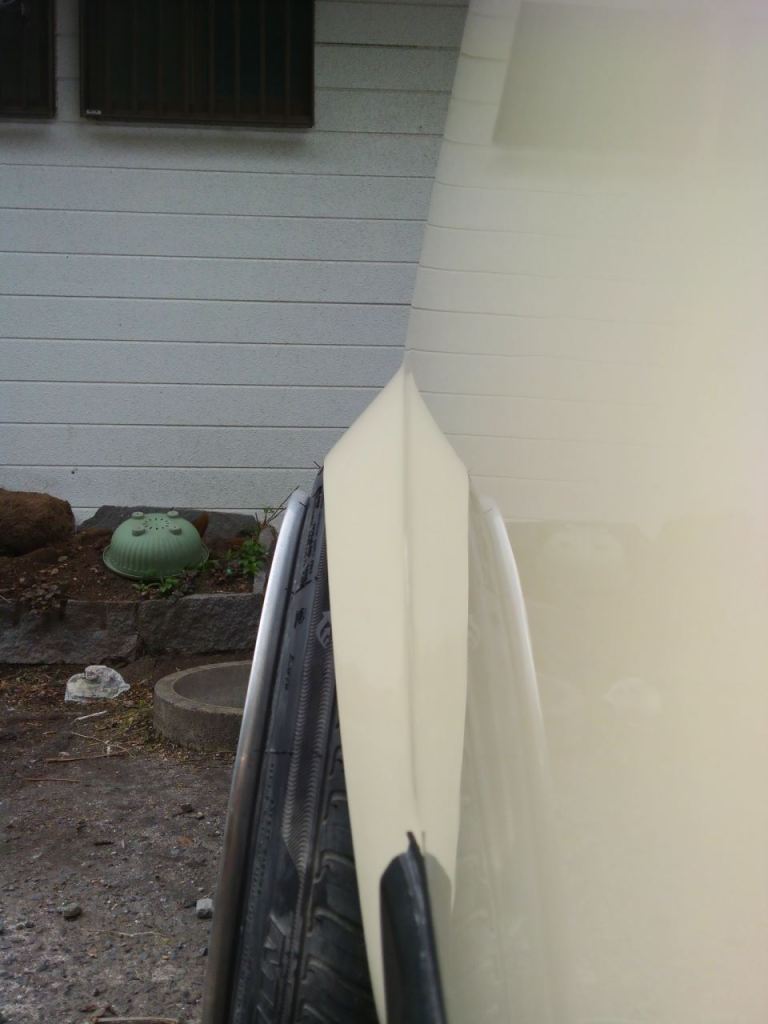
- Tsuraichi ツライチ. The fitment between the metal fender and the tire sidewall. Ultimately this is a style preference and includes practical needs, but super tight tsuraichi is definitely the impressive choice. If the tire rubs, it doesn’t count! Burnt paint is not part of Fukuoka Shiyou.
Super tight: Sometimes paper thin clearance between the tire and metal fender
Close: but w/ room to breathe. Not as visually impressive, but still looks good. Works well if you have softer suspension or like to have rear passengers.
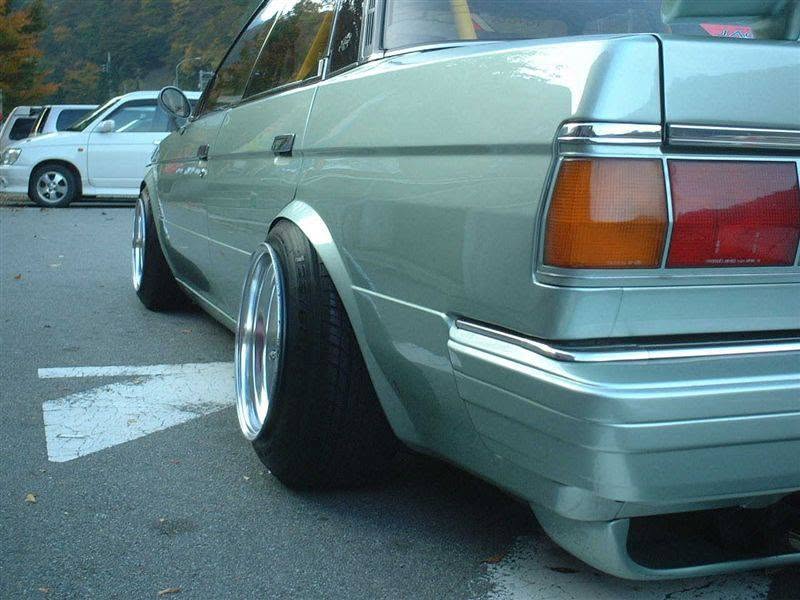
- End shape
Pointed: The fenders end at a point. Results in a more aggressive looking fender that juts out of the body of the car.
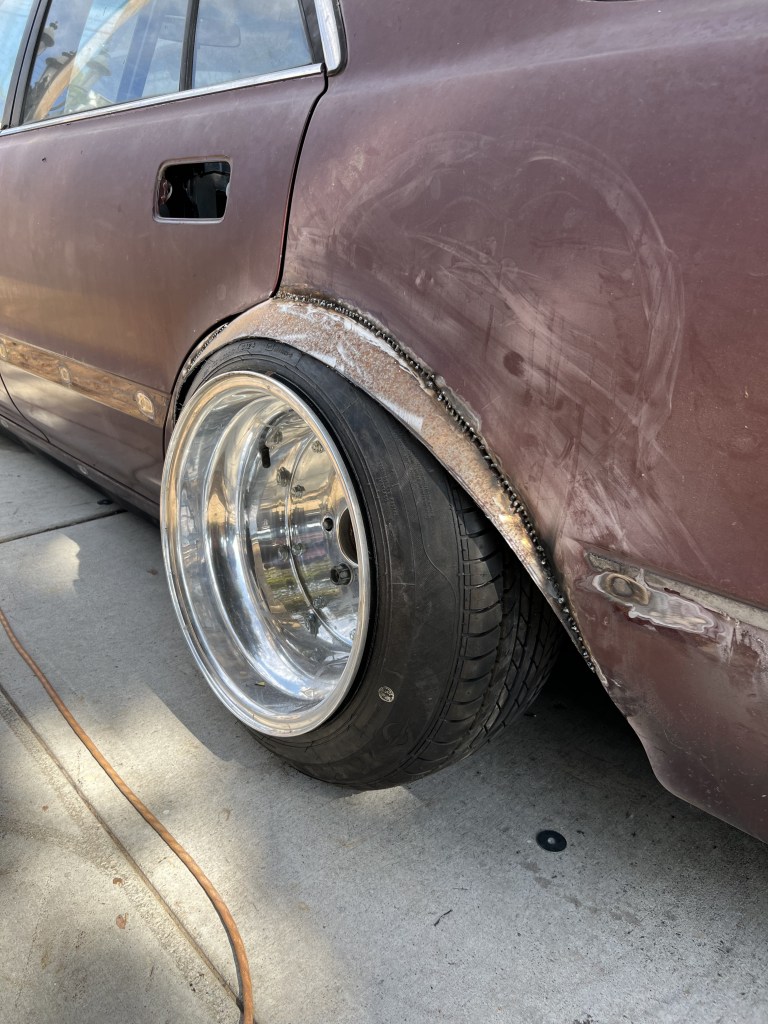
Square: A cut is made into the body of the car, and the fender fills this gap. Results in a very clean and factory feeling metal fender.
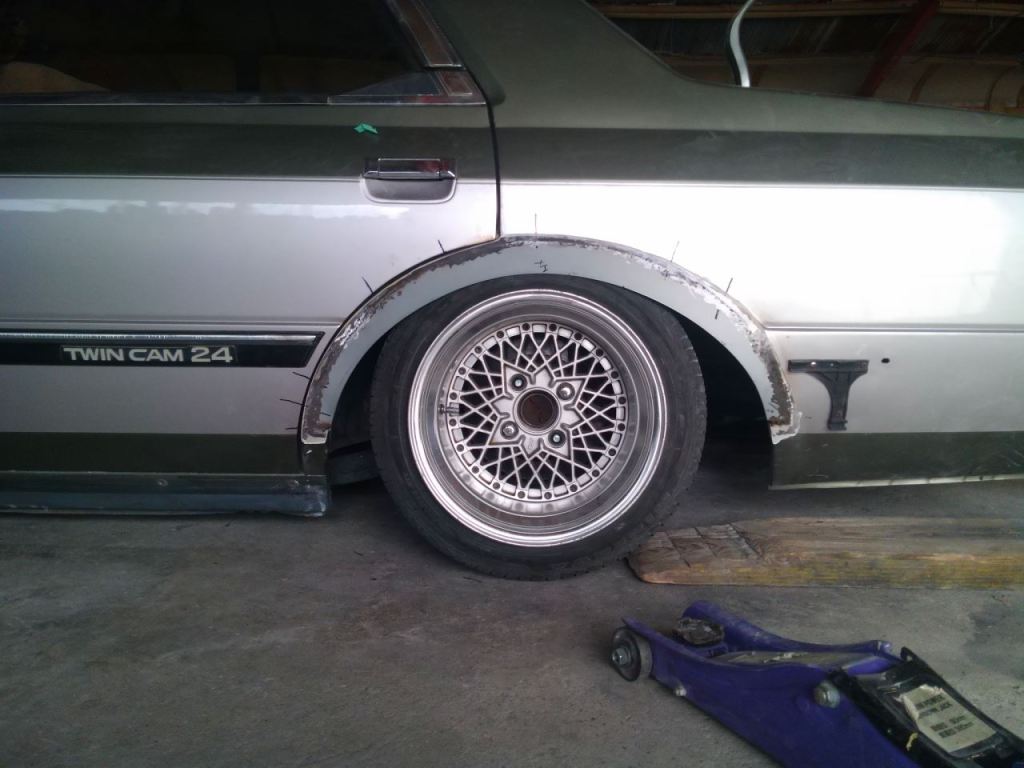
- End position
High: The fender ends high, showing more tire.
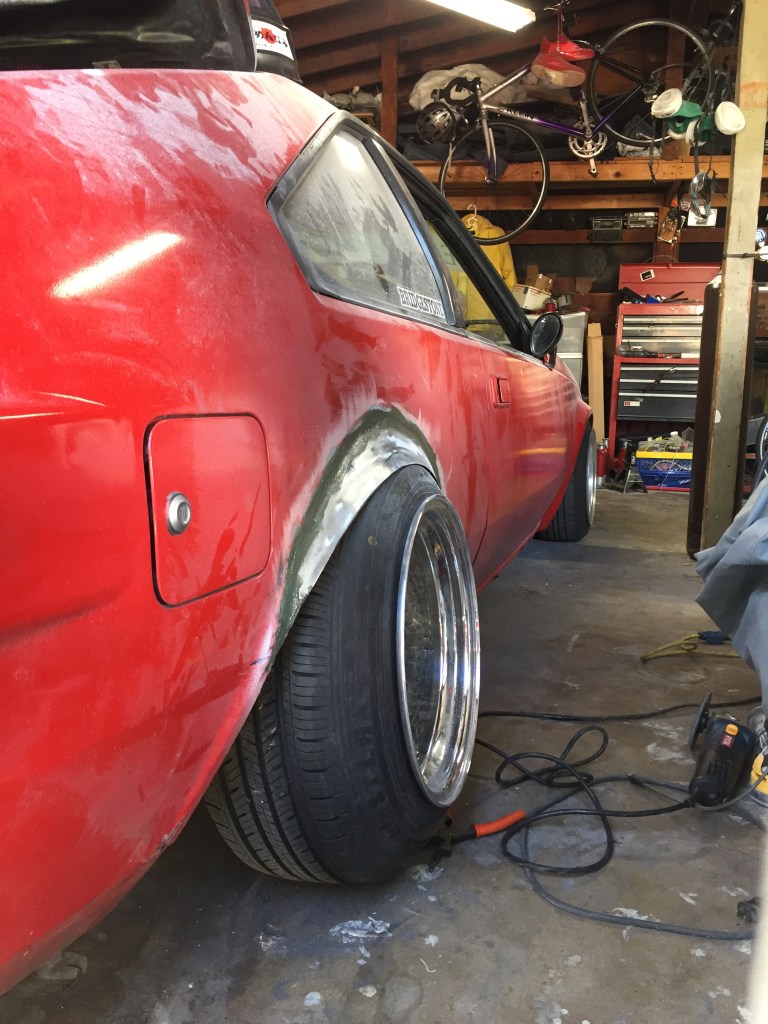
Low: The fender ends low, closer to the ground, hugging the body.
General guide & Build progress photos
I will start with a general guide to making a metal fender here in order to orient the reader. With the basic guide in mind, build progress photos can be referred to below, which demonstrate these steps in the real world.
Step 1: Acquire the proper wheels and tires. Refer to the wheel and tire section above.
Step 2: Cutting the fender entails either cutting at a previously known position (along the door line, or along some known body line) or through trial and error with your specific setup. The trial and error method involves mounting the final wheel and tire setup, then cutting the fender until the desired ride height is achieved without the tire hitting the body of the car. Cutting the fender involves cutting both the outside and inside skin of the car, so you will encounter two layers of steel that need to be cut and trimmed.
Step 3: Before moving forward with the metal fender, confirm that the car can roll and does not rub at the desired ride height with the stock fender cut away.
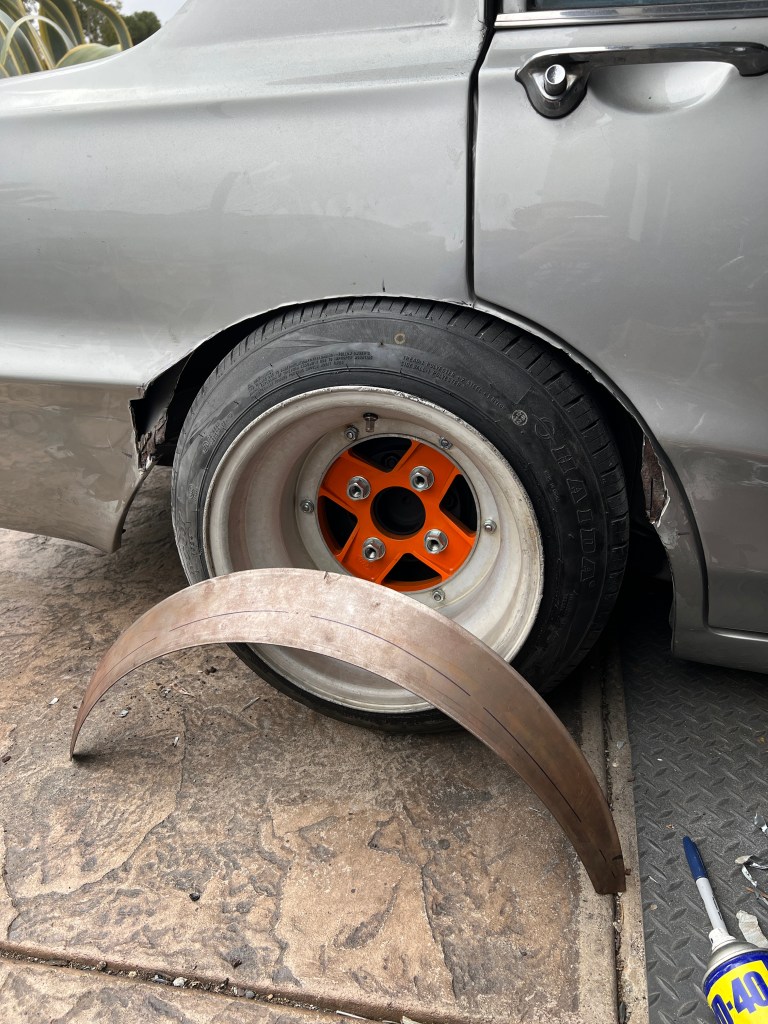
Step 4: Pick one of the various methods for mocking up the metal fender. Some examples are shown in photos below. These include: cardboard, card stock, tape, steel wire, corrugated plastic. Some flexible and easy to cut material that will act as a stand-in for the steel fender. Fender angle and tsuraichi should be considered here, although it can be later finalized at the metal fender stage.
Step 5: Trace the template onto 20 gauge mild steel and cut the fender out.
Step 6: Mock the fender up to the body of the car and against the tire. This is where the tsuraichi is set. You can use some sort of shim between the tire and the metal fender to set the tsuraichi. Authors note: I believe the ideal and easiest method for welding the metal fender in is to avoid any use of metal shaping with a hammer and dolly. Once the fender is welded into the body of the car, the complex curve of the metal fender welded to the quarter panel of the car are very difficult to manipulate cleanly without extensive experience with metal working. If the fender angle is too shallow and rubs the tire, or the fender angle is too aggressive and has more gap to the tire than desired, there will be temptation to simply “pull” or “push” the fender in the same way a fender roller would do. This will introduce waves into the quarter panel of the car. I believe the tack welds should be ground down and the fender should be removed and re-welded in at the desired angle. If the desired angle is not possible with the current shape of the metal fender, go back to step 4.
Step 7: Tack weld the fender in completely.
Step 8: This step is often skipped due to the nature of these projects, but this is the ideal step to test drive the car and make sure the tire does not rub. The dynamic movement of the tire and suspension in relation to the metal fender is sometimes unpredictable. If the fender rubs, go back to step 4.
Step 9: If everything looks good, grind down the welds and apply a thin layer of body filler.
Step 10: Sand and primer. Paint the car!
In the following section, in progress build photos of different owner’s cars are shown. Some methods vary according to personal tastes, skill levels, and desired quality (DIY vs show quality). In general, most of these builds should follow the general step guideline outlined above.
Adam Royea MA67 @royea_raodstar (14x10j A-type, 185/60, 20 mm spacer)
Square cut.
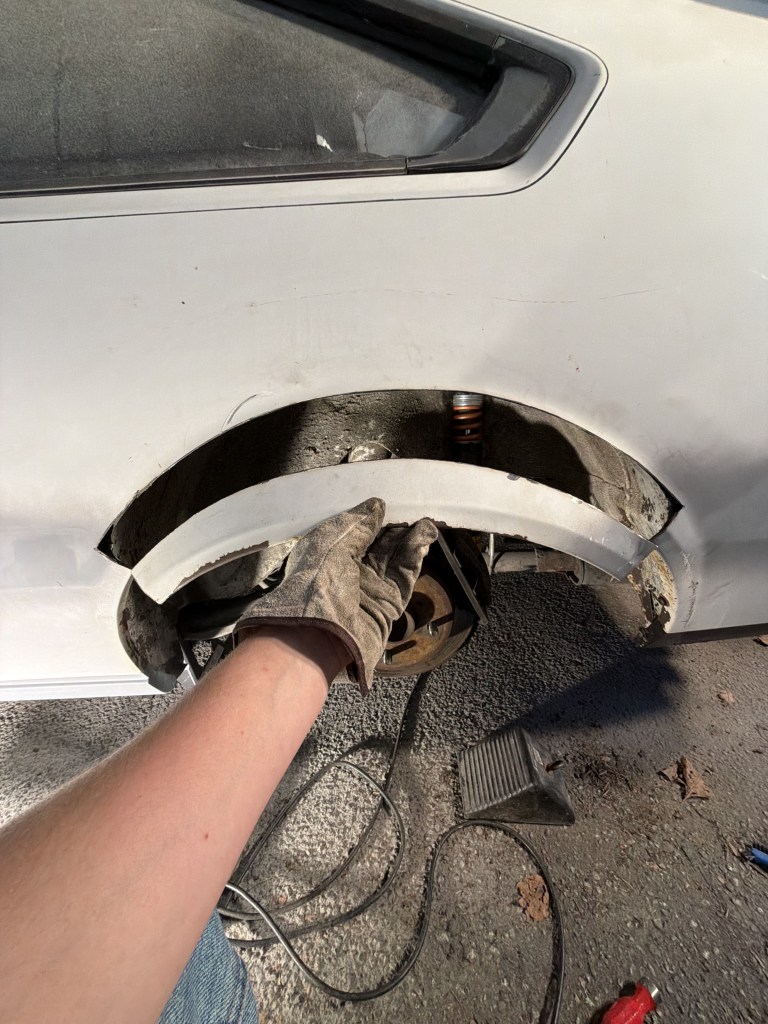
The car is brought down to ride height. In this case, Adam is using a thin metal rod to simulate the lower edge of the fender.
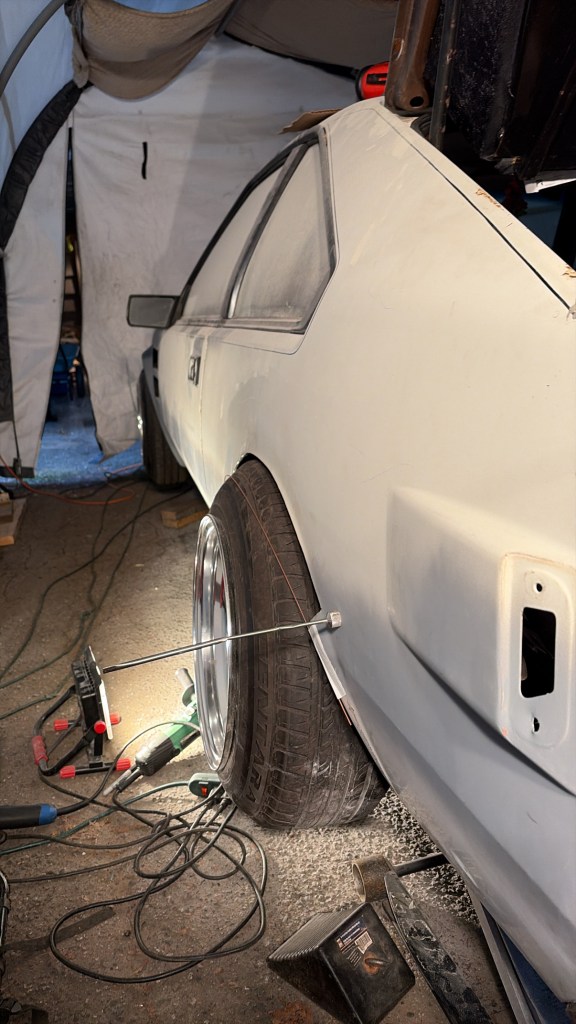
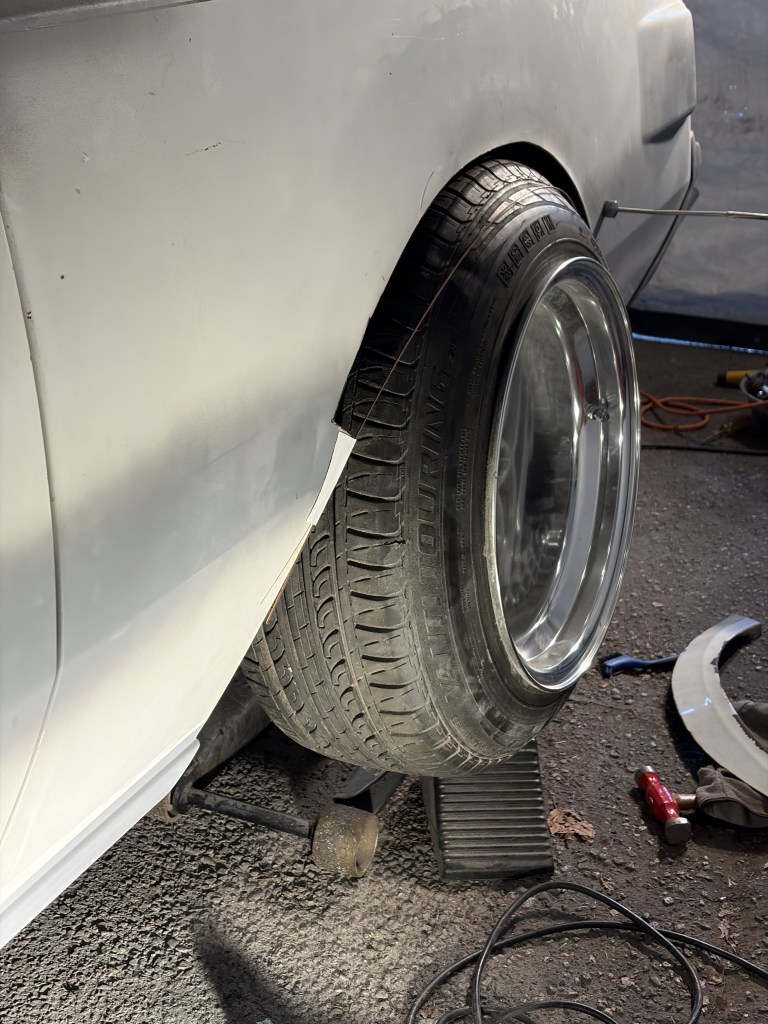

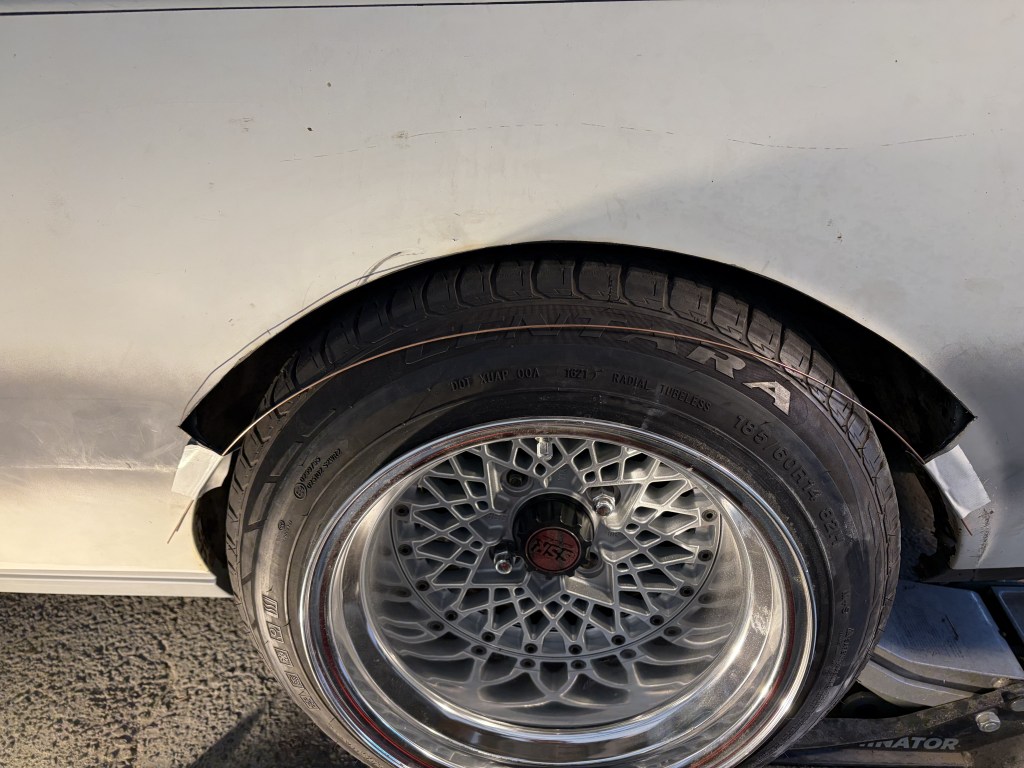
A paper template is formed.
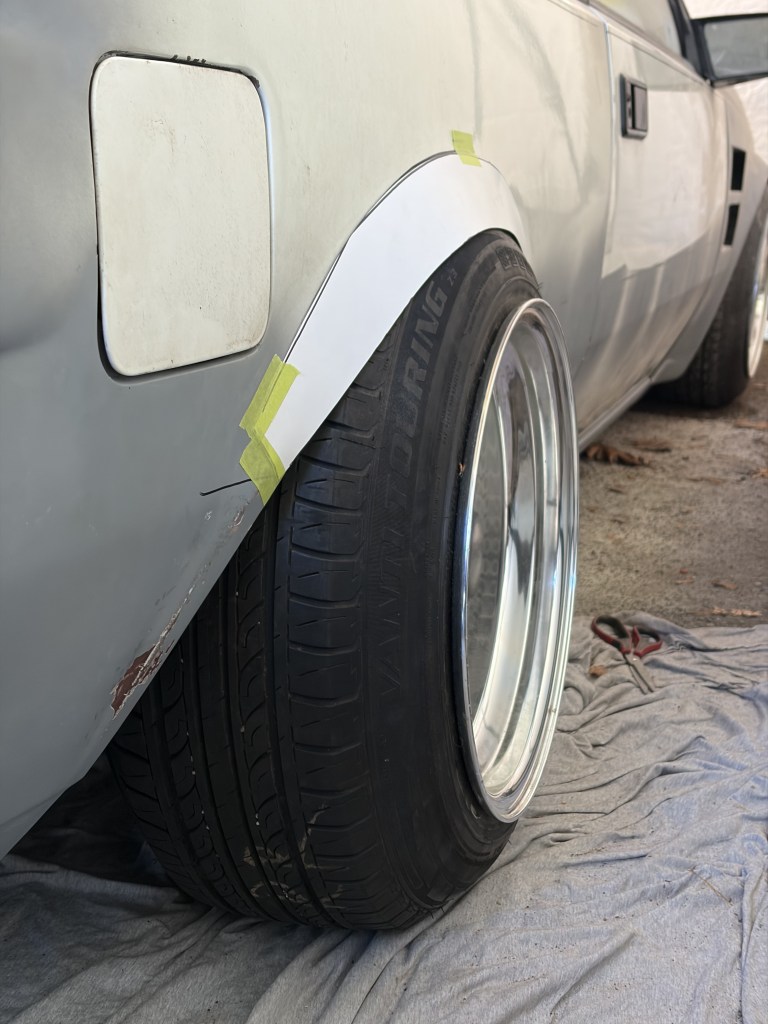

Paper template is transferred to thin (about 20 gauge) mild steel sheet metal, traced, and cut.

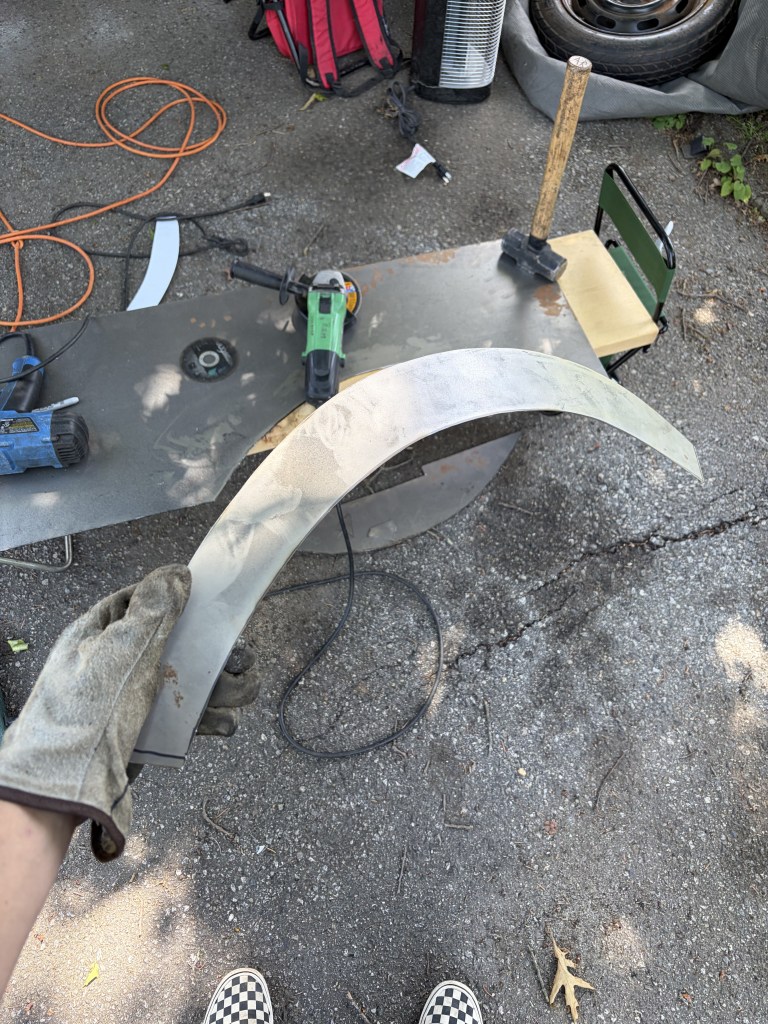
Metal fender is mocked upto the tire.
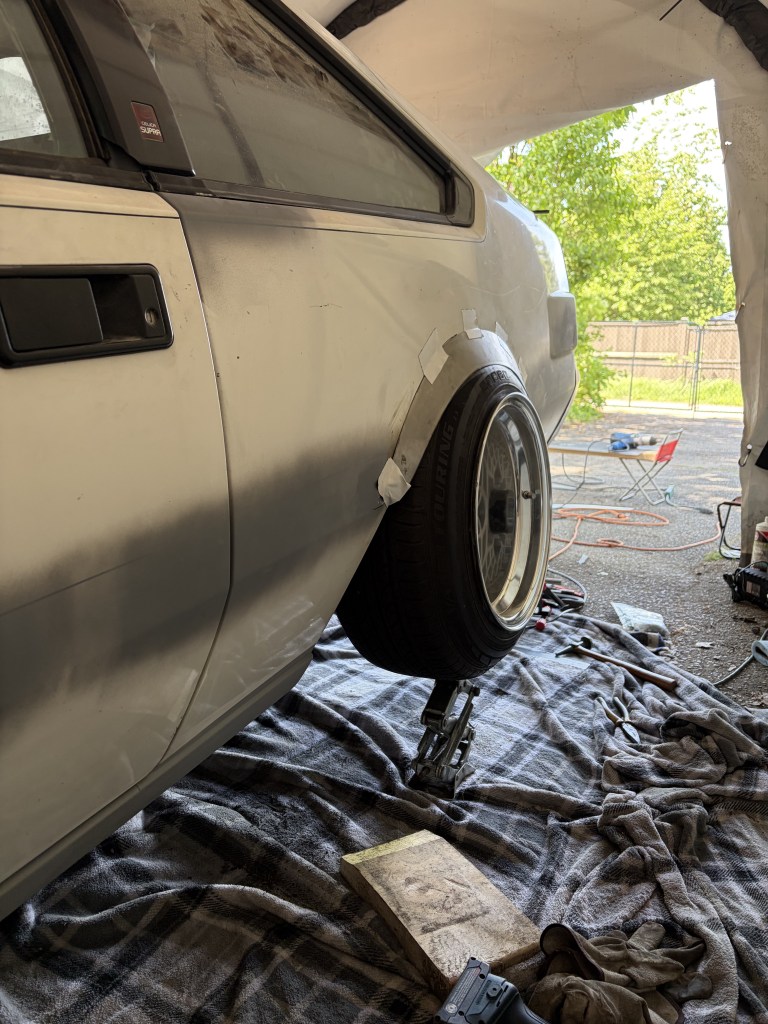

Good tsuraichi!


Square cut ends meet with the cut on the body of the car.
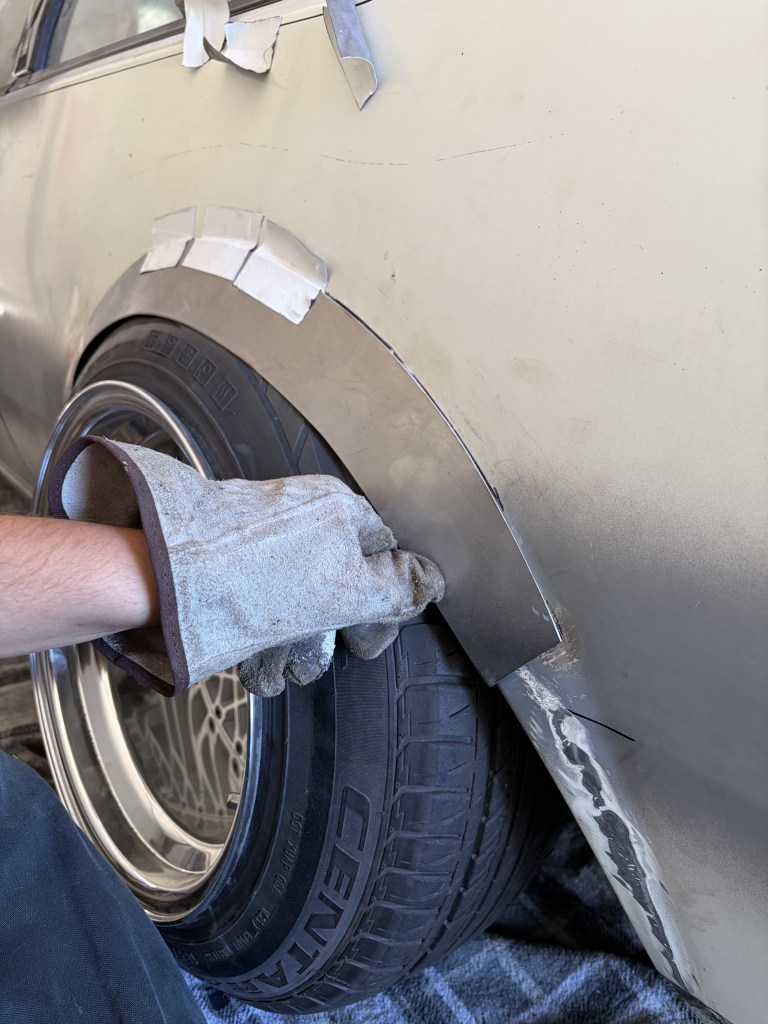
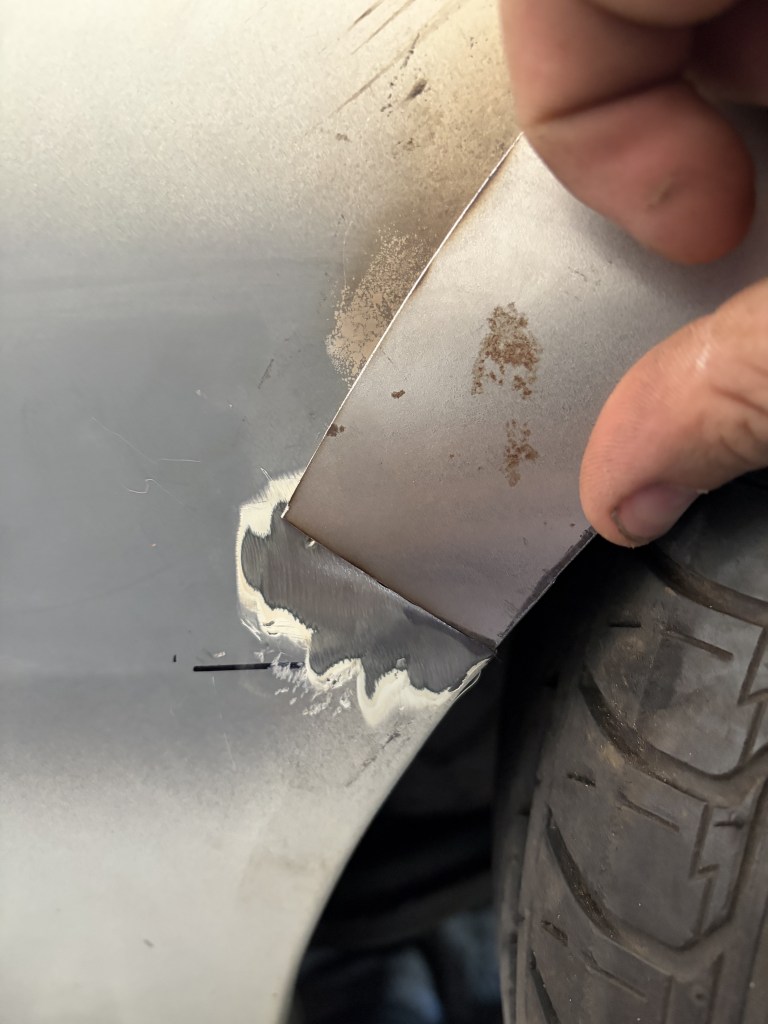

Fender is tack welded in place.

Fully welded. Many repeated tack welds is recommend to prevent heat warpage.

Welds are ground down.

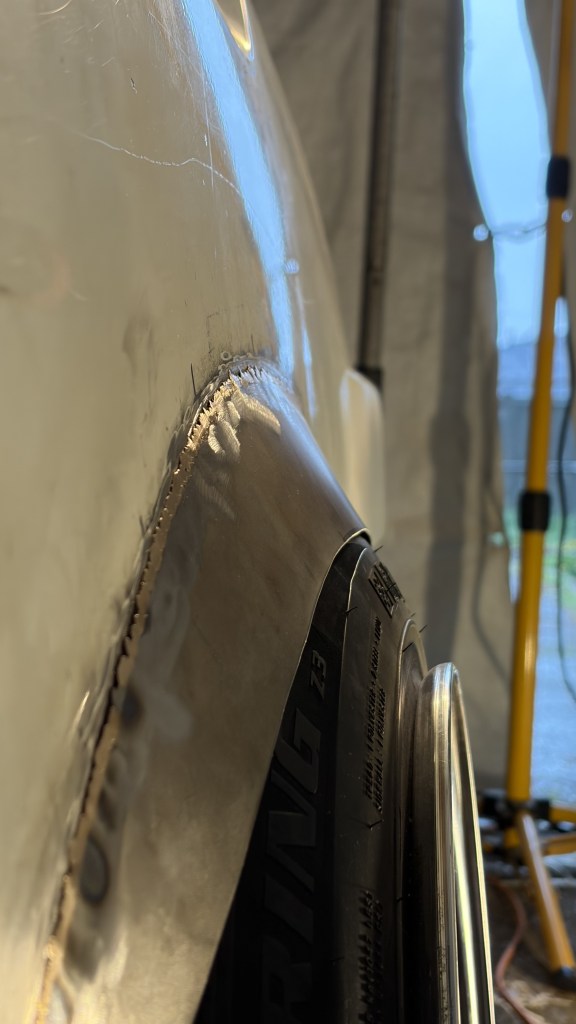
Body work. A thin layer of body filler is applied over the fender and especially in the transition between the metal fender and the body of the car. The body filler is sanded to ensure a smooth transition.


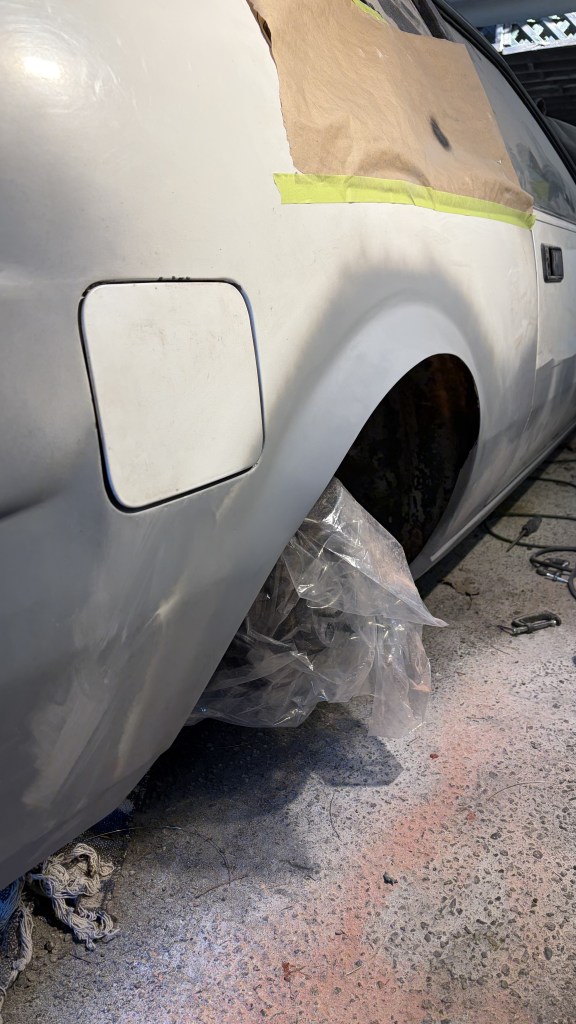
Final fitment.
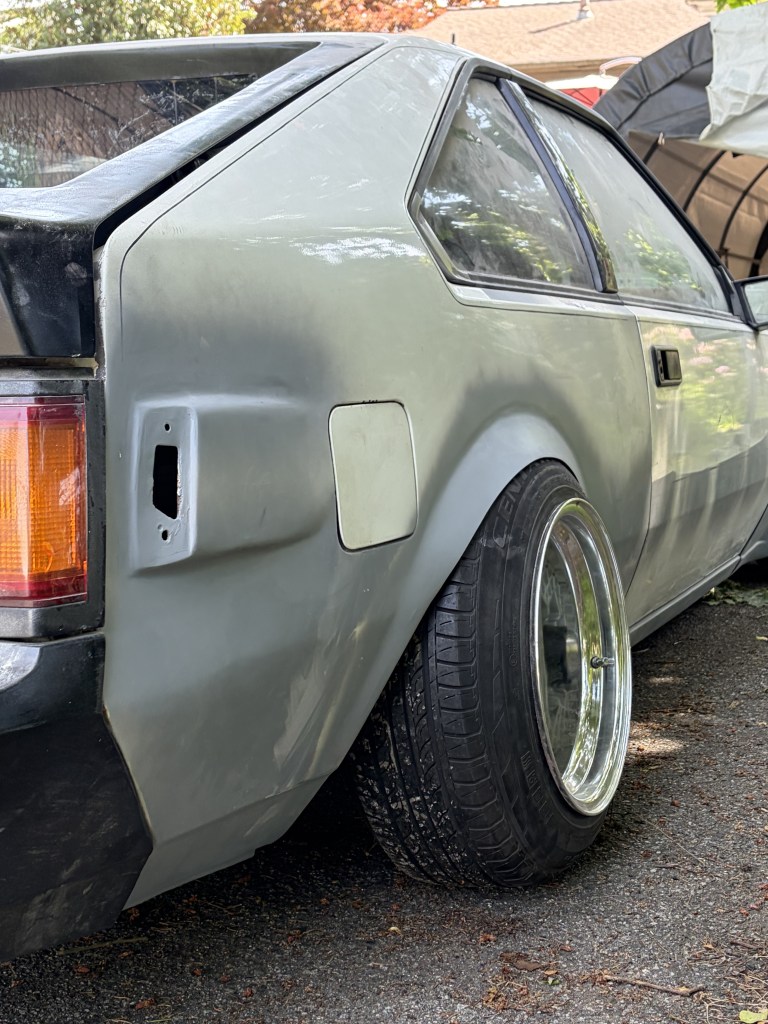
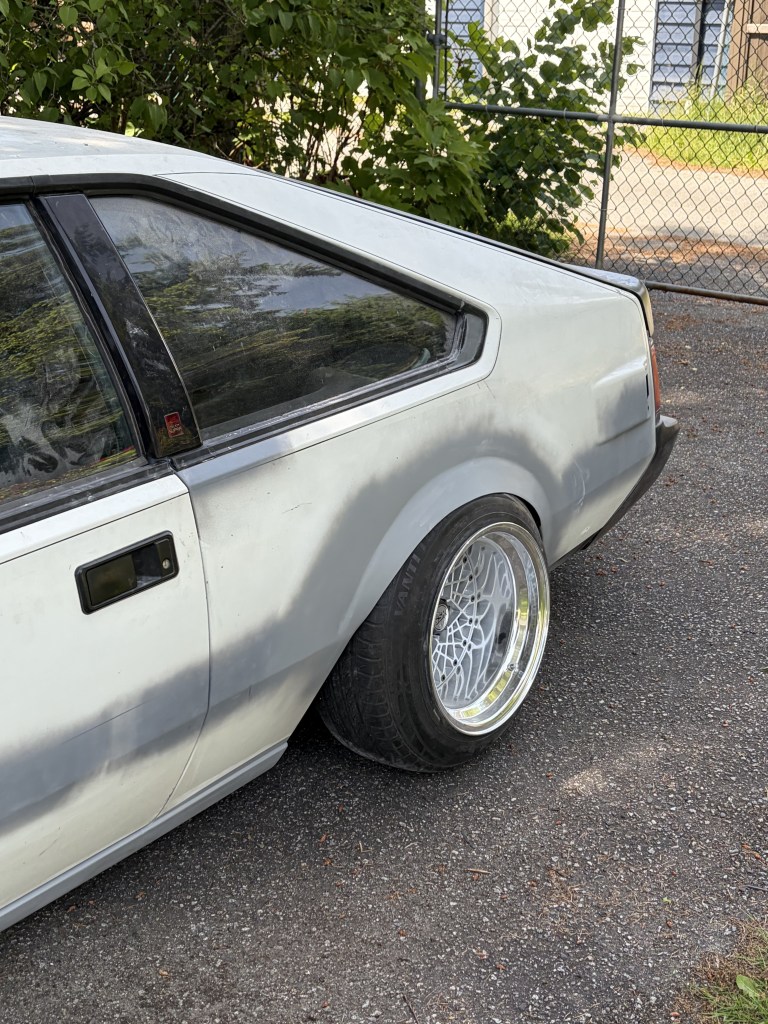
GX61 Eagle Mask (14x?j, 245/30) (Full build thread can be found at https://ameblo.jp/vats4649/theme-10089433130.html)
Initial fender cut.
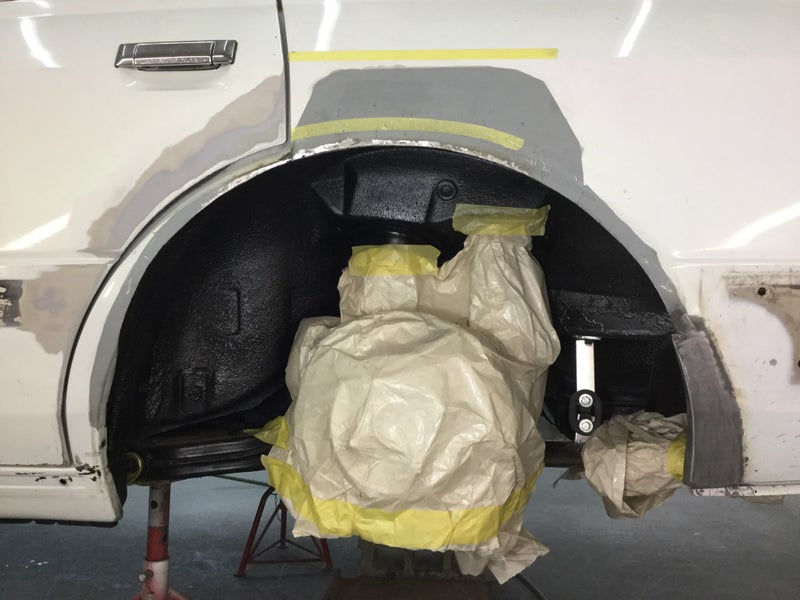
The wheel and tire are mounted, and the car is brought to ride height. A mock up fender is made (in this case, out of some sort of corrugated plastic.)
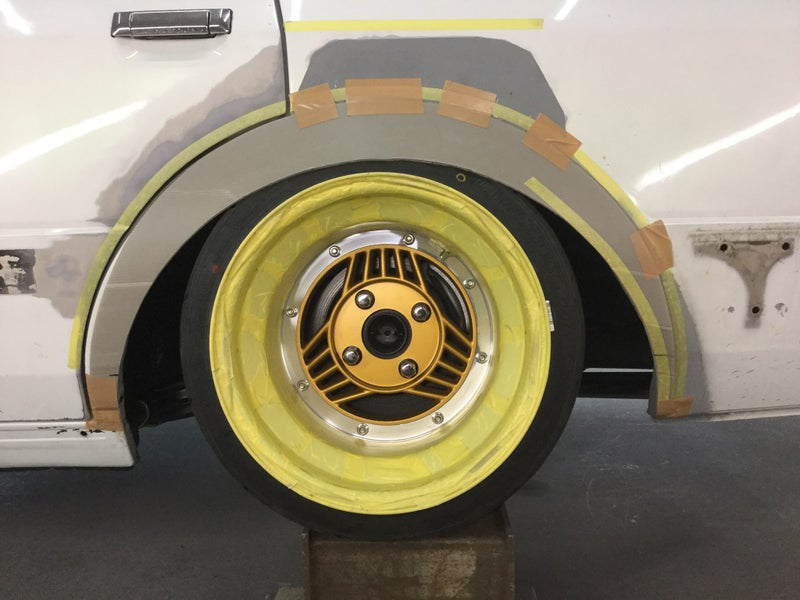
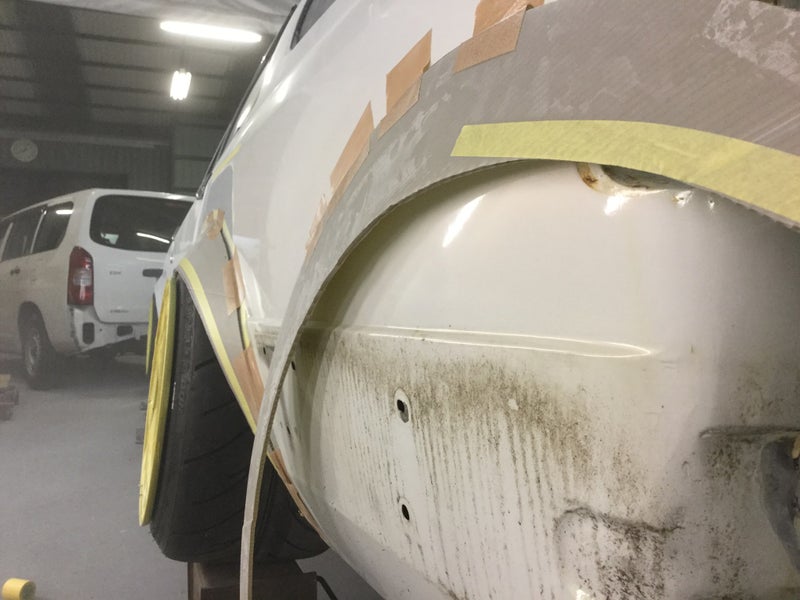
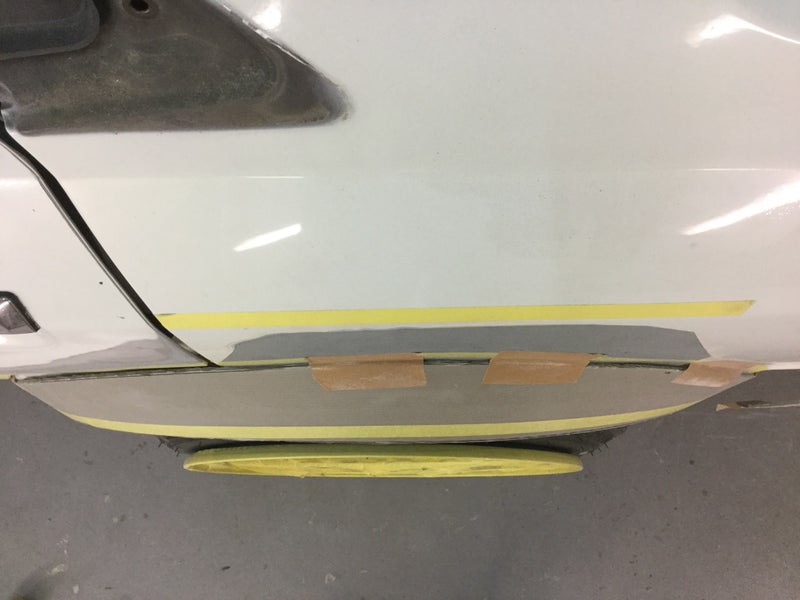
The template is traced on thin gauge mild steel and the metal fender is cut out.
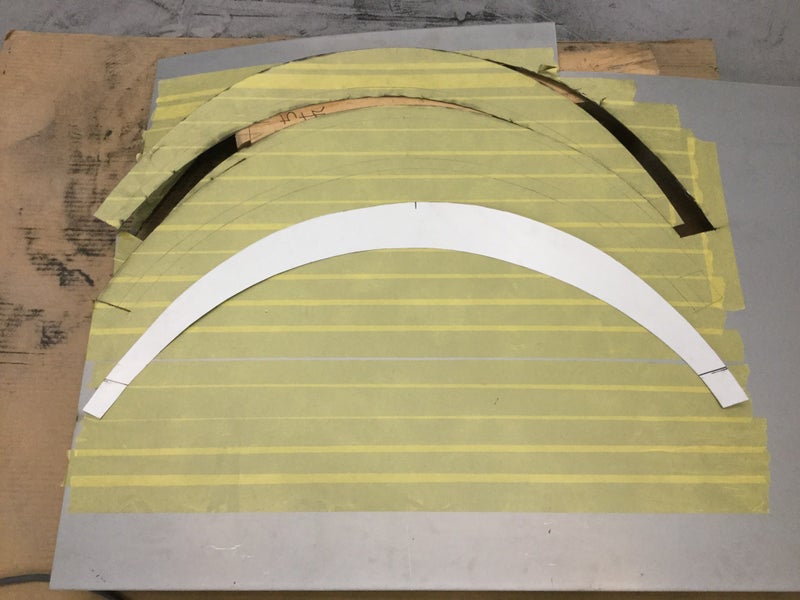
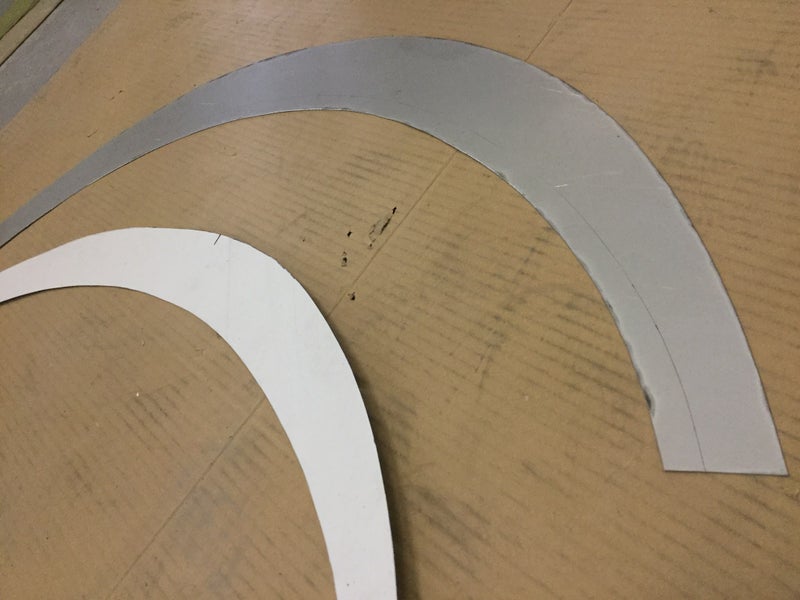
The metal fender is mocked against the tire.
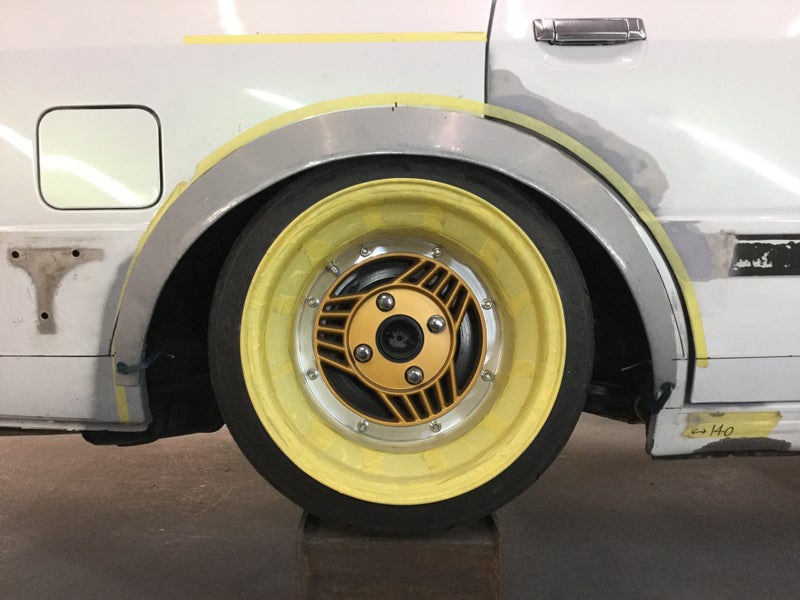
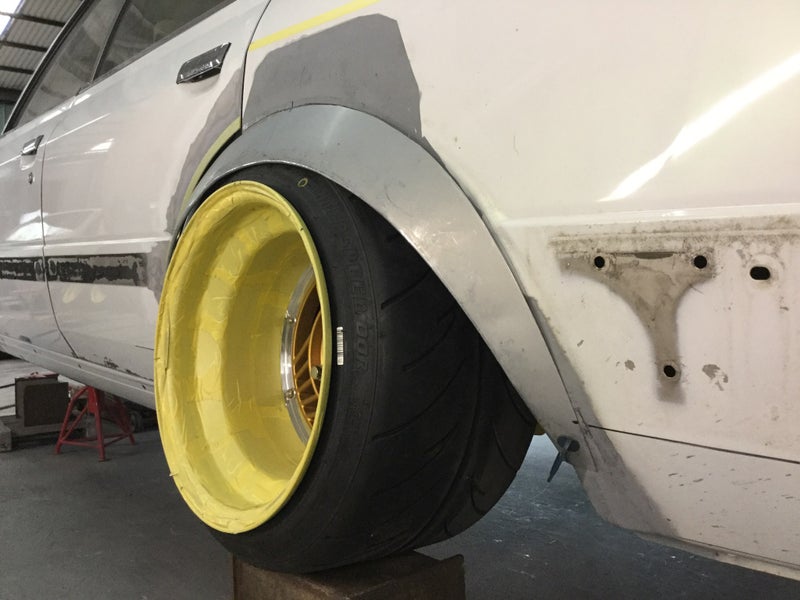
The fender is welded into place.
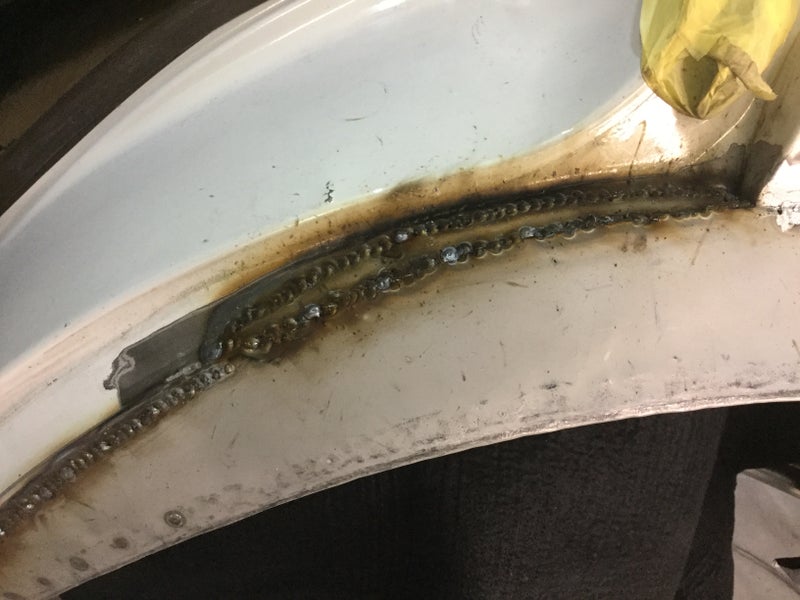
Welds are ground down.
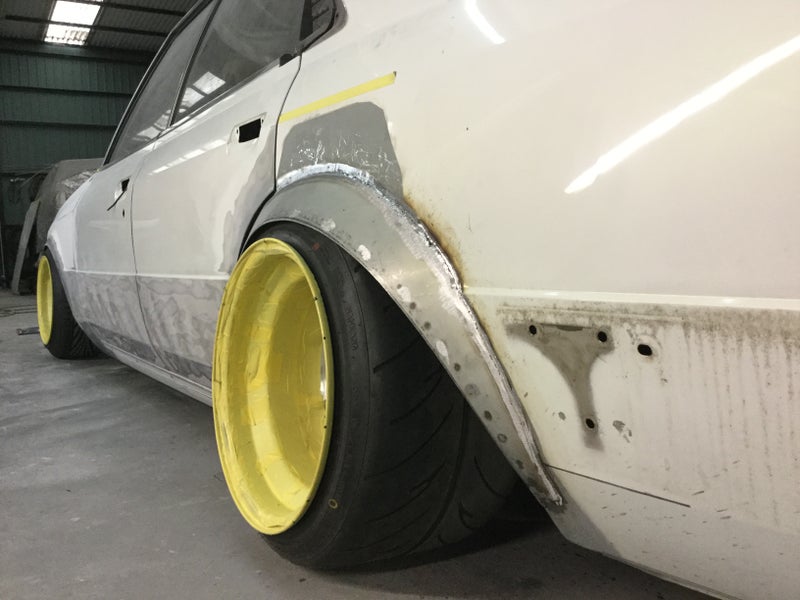
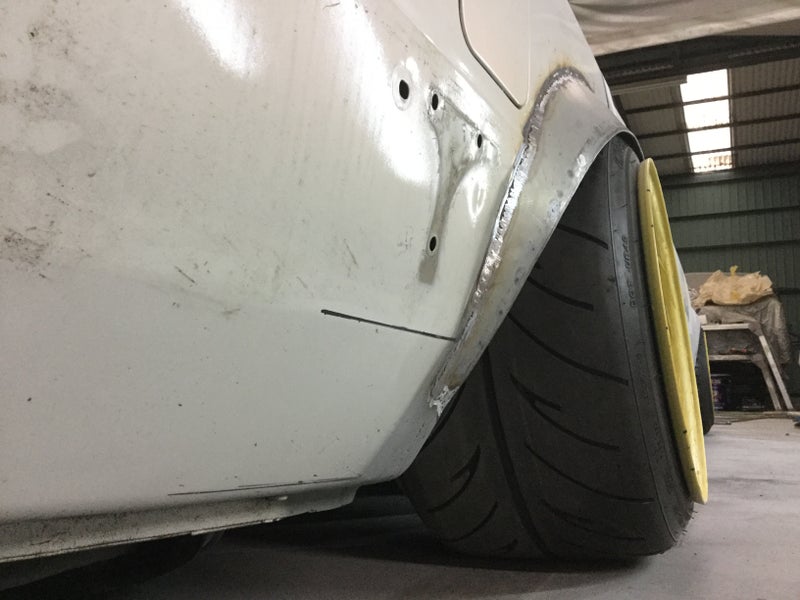
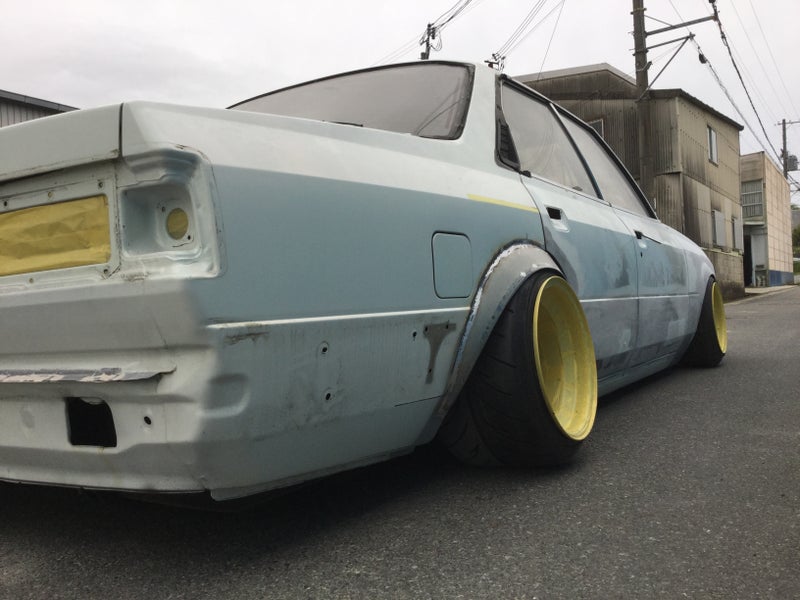
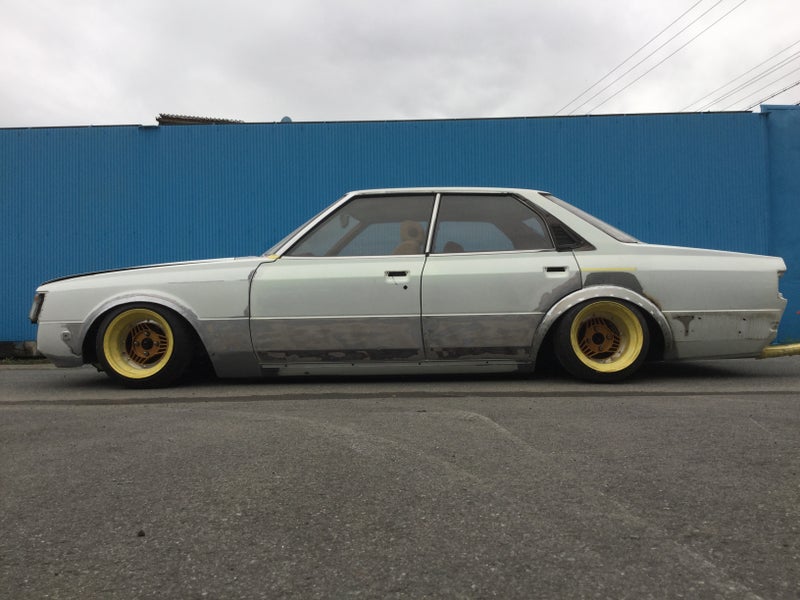
Body filler is applied and sanded.
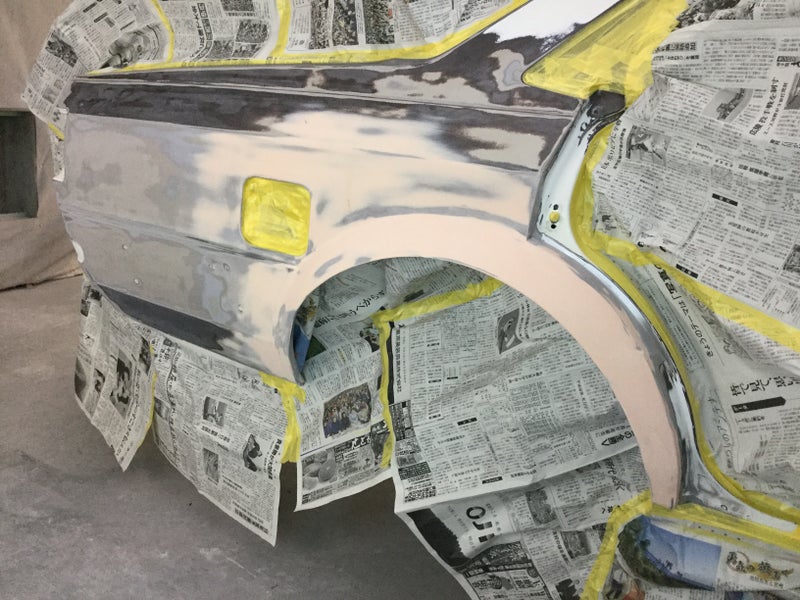
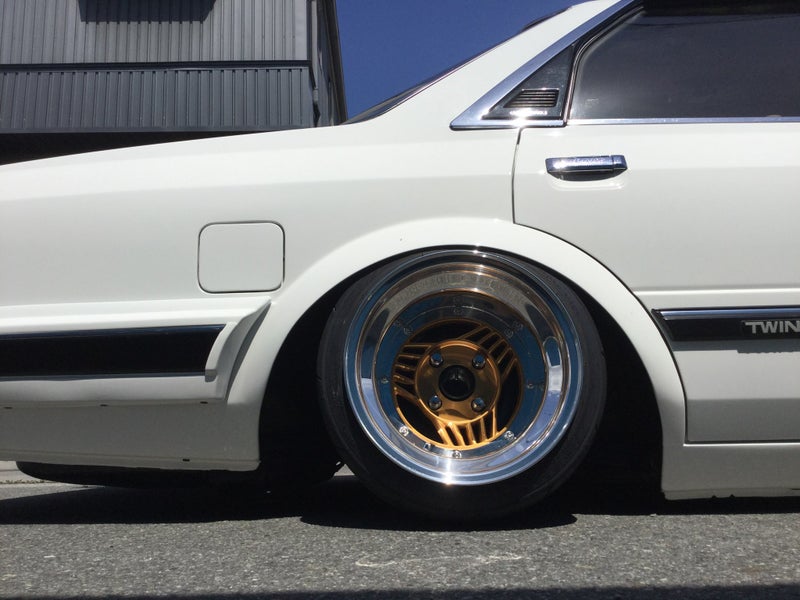
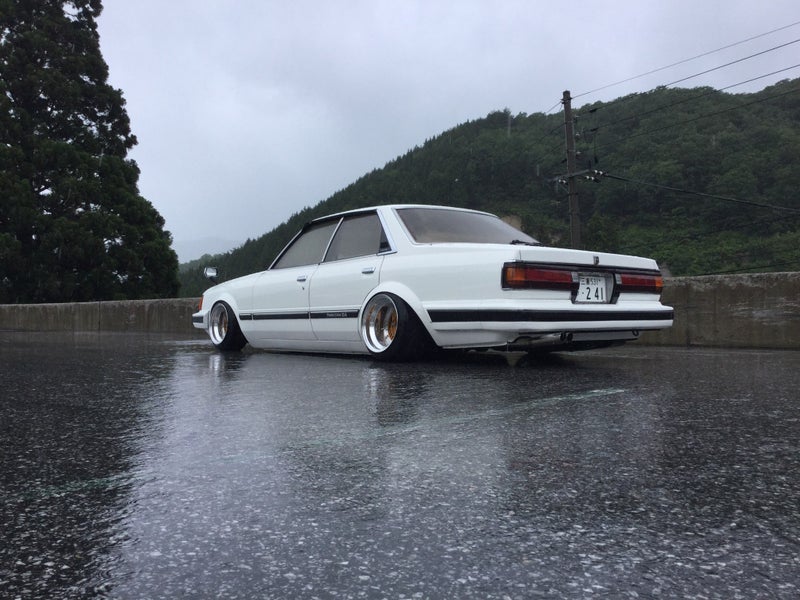
Isamu Miyamoto GX61 (14×10.5j A-type, 185/50)
Initial fender cut along the original door line.
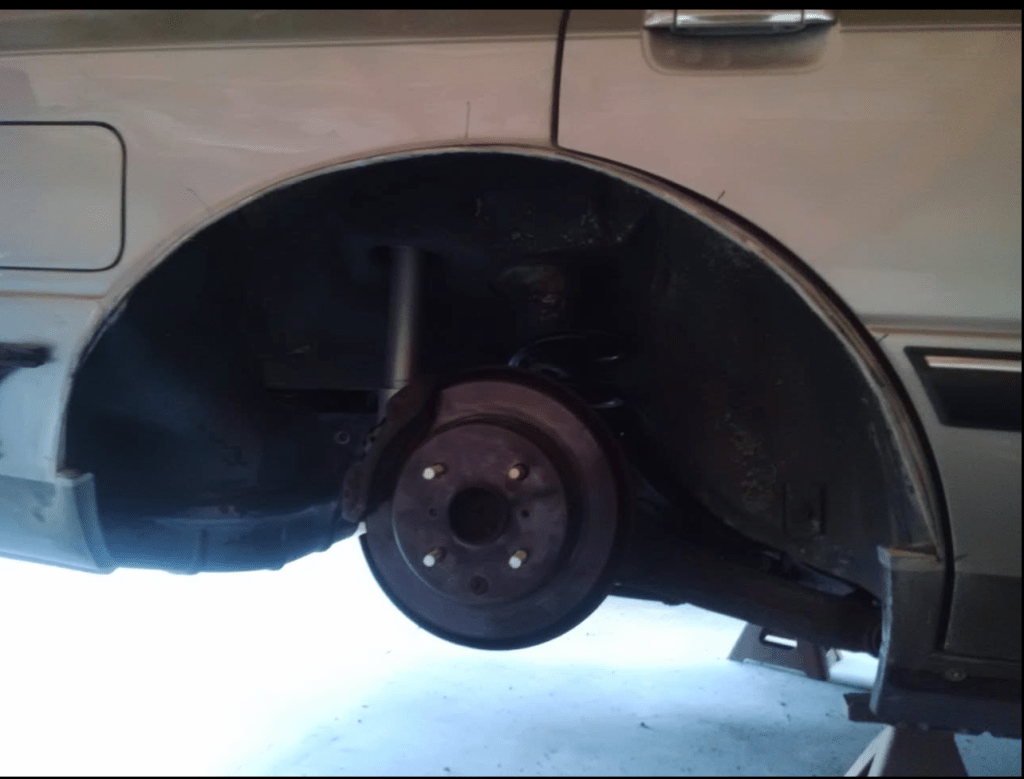
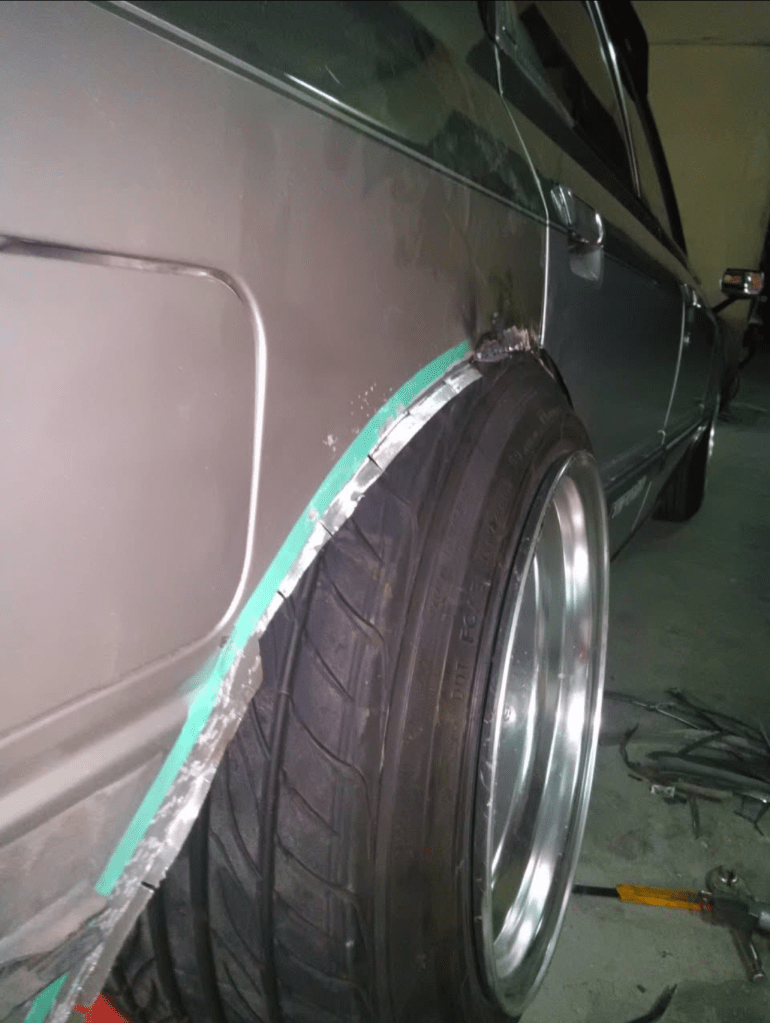
Metal fender is mocked up.
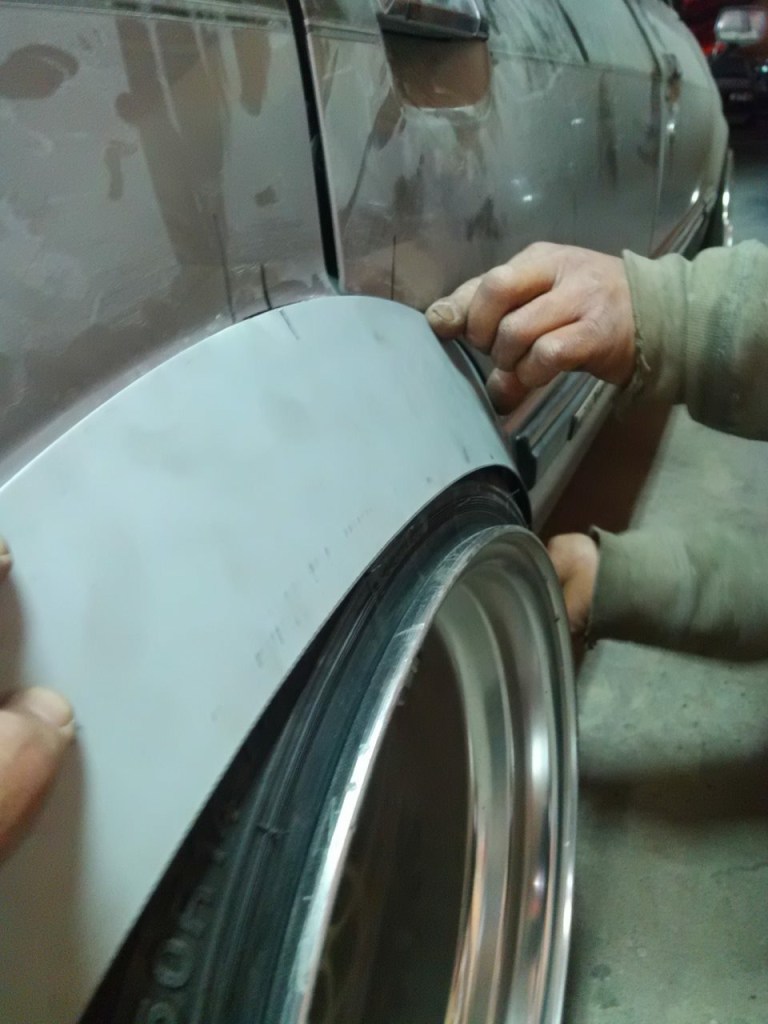
Metal fender is tack welded in place.
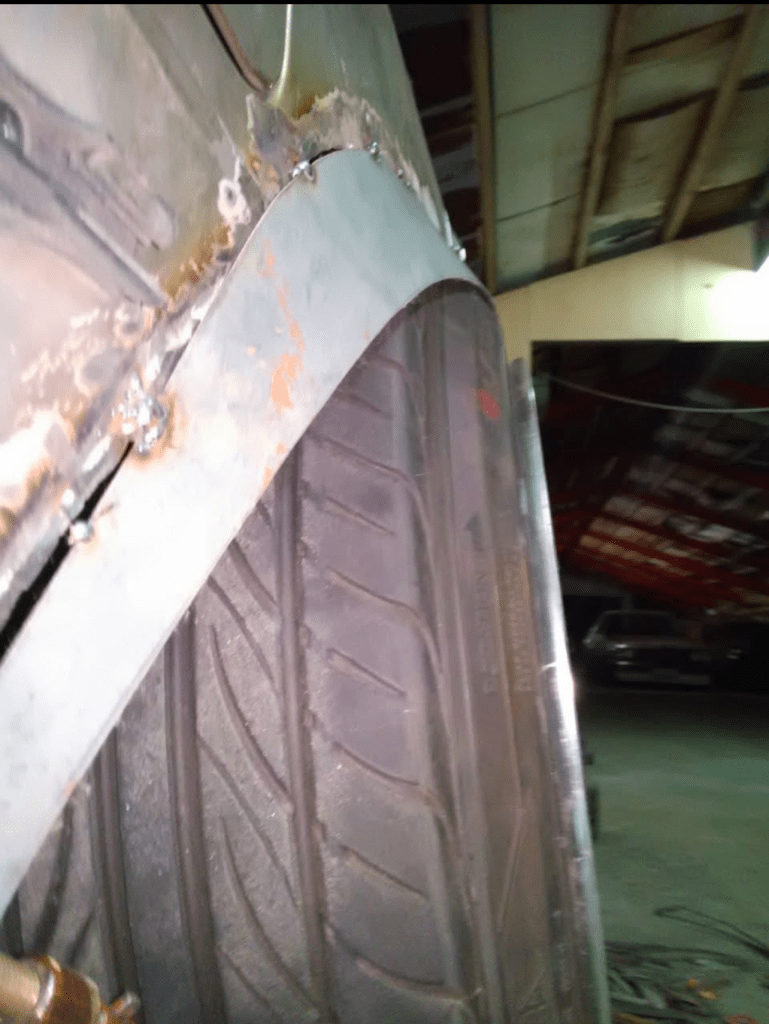
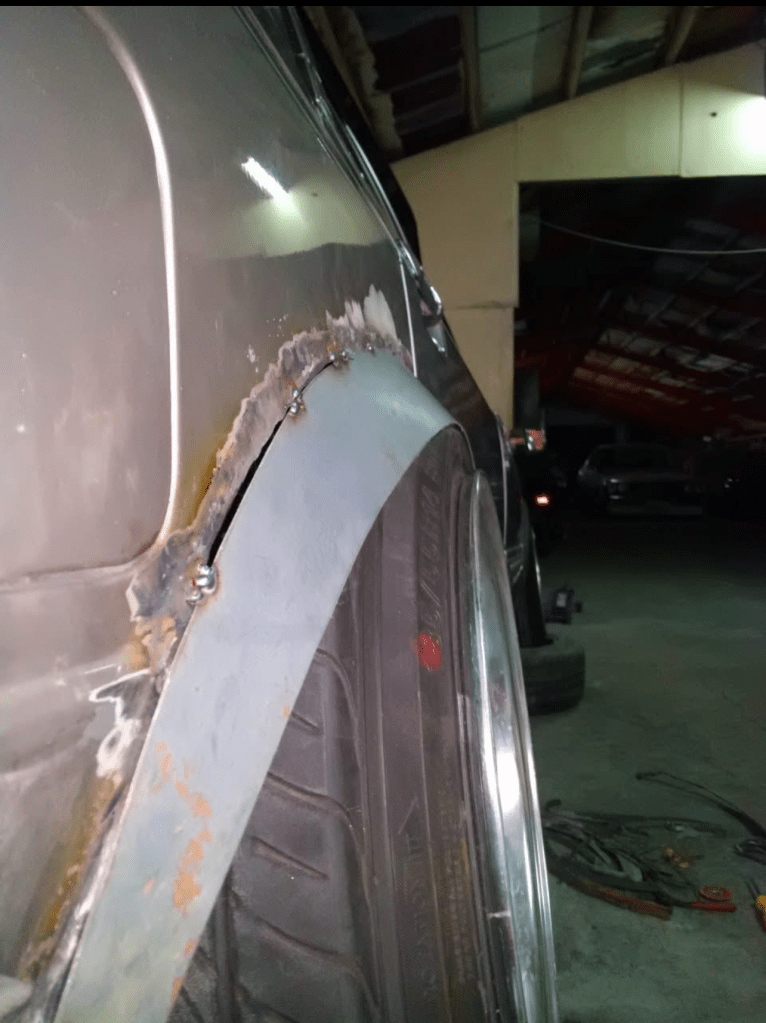
Fully welded and welds are ground down. Square ends (Miyamoto style.)
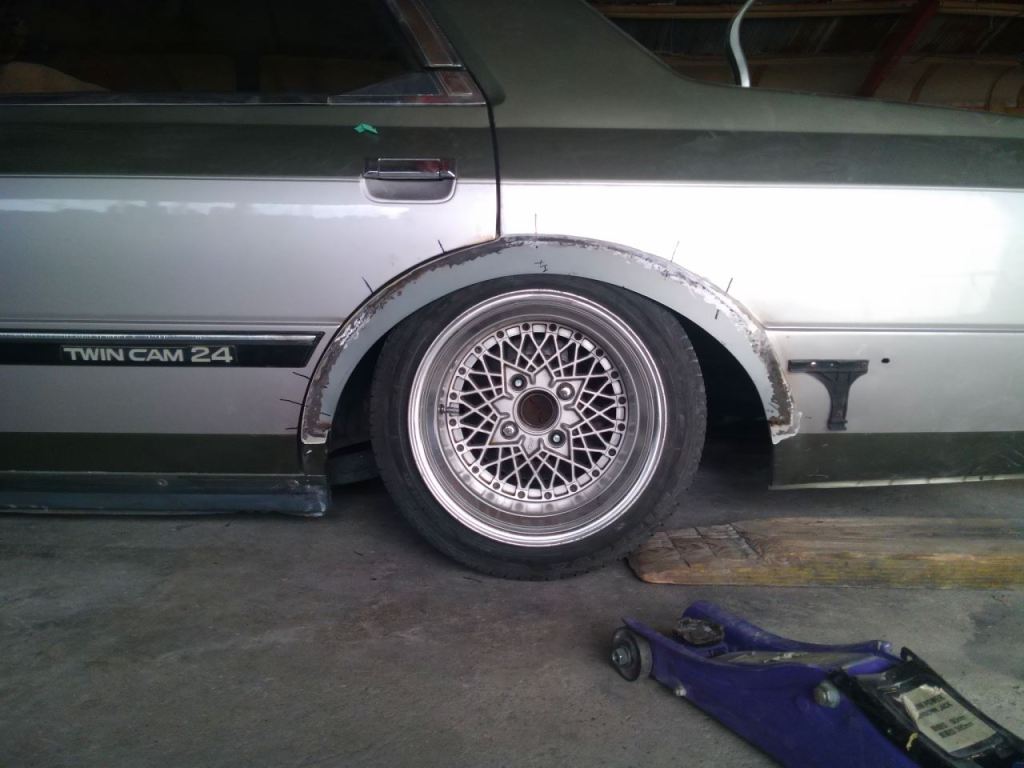
Super tight tsuraichi!
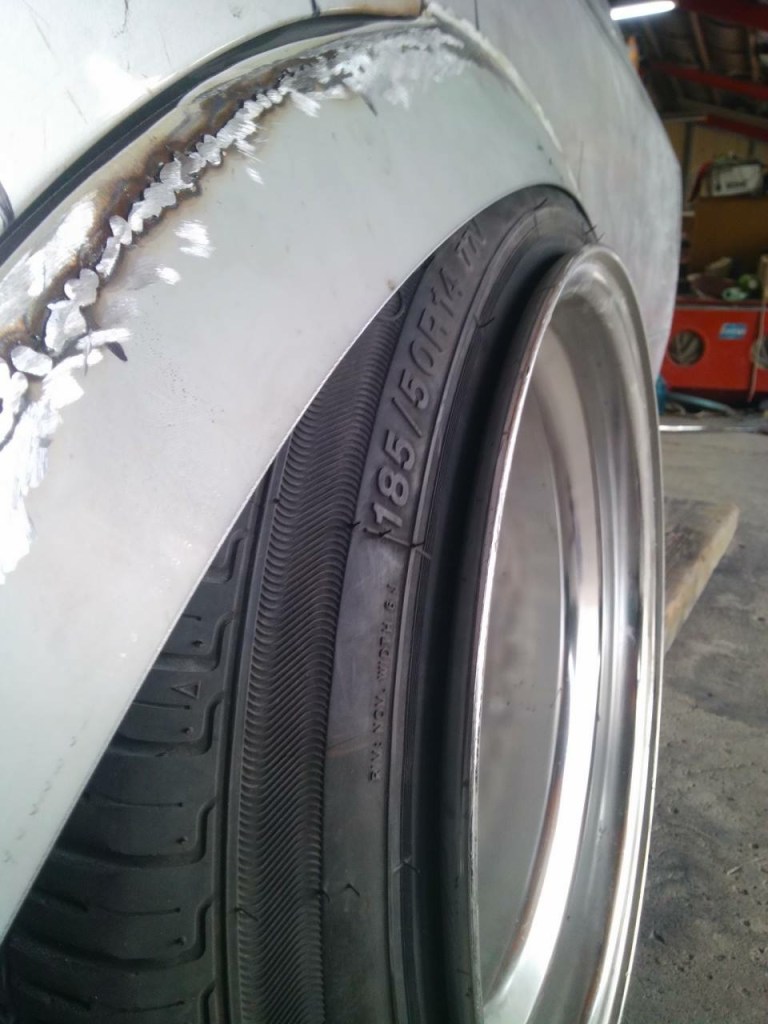

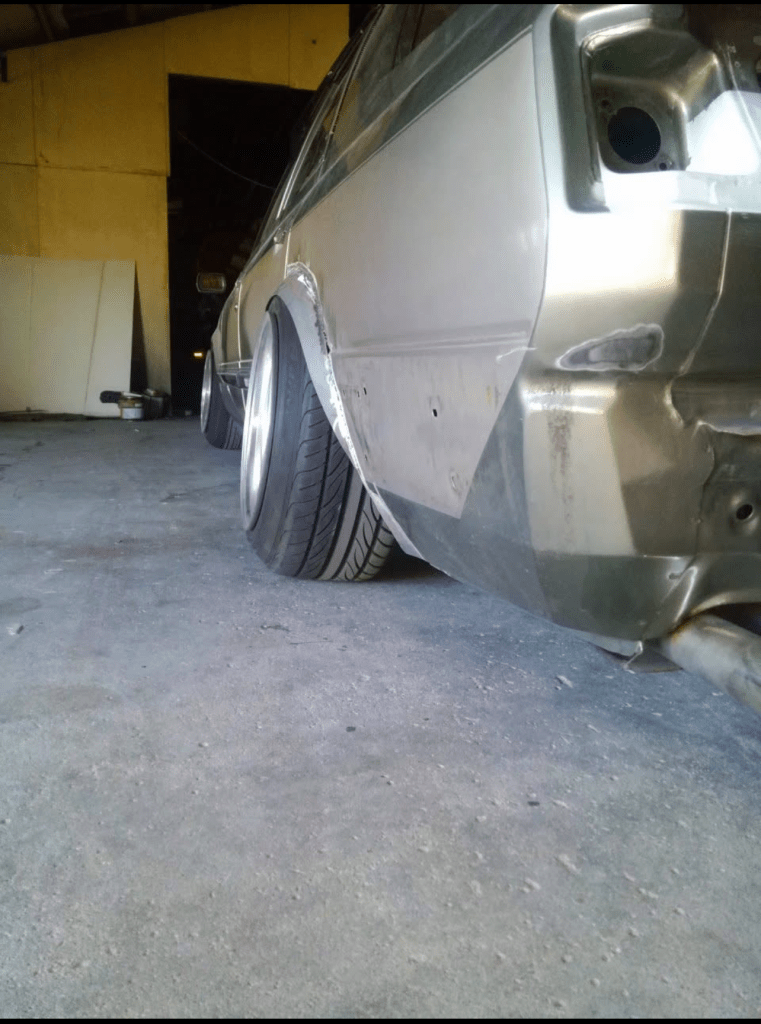
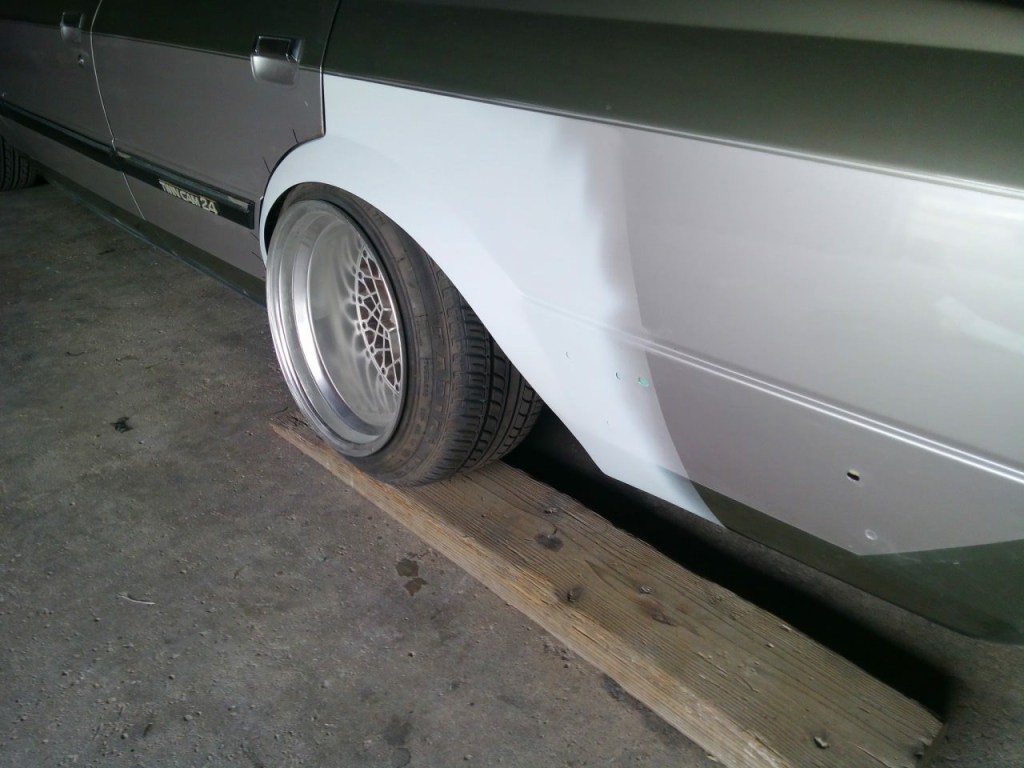
No rubbing!
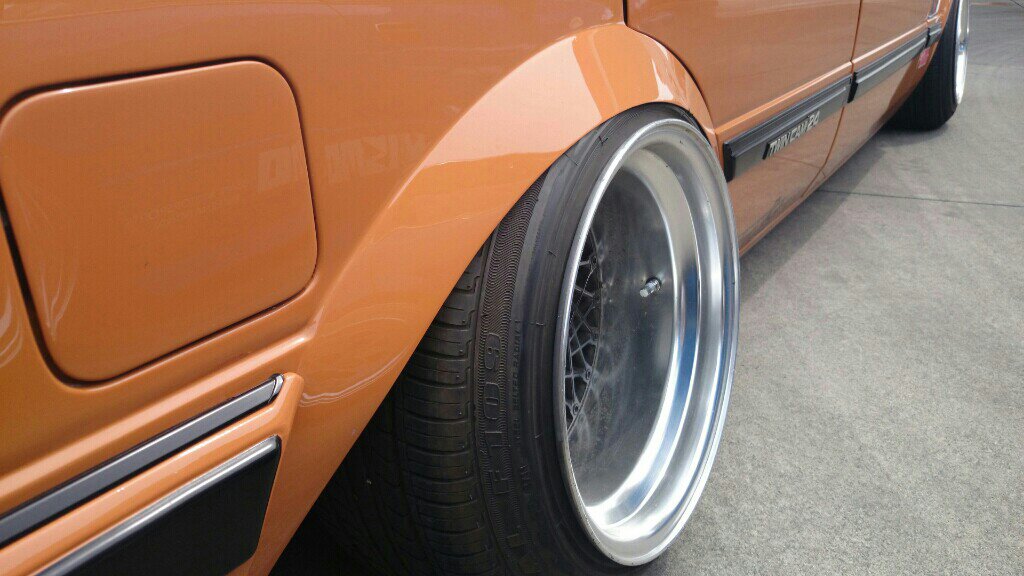
Jackson Hakosuka @blazeitjackson (14x10j A-type, 175/60)
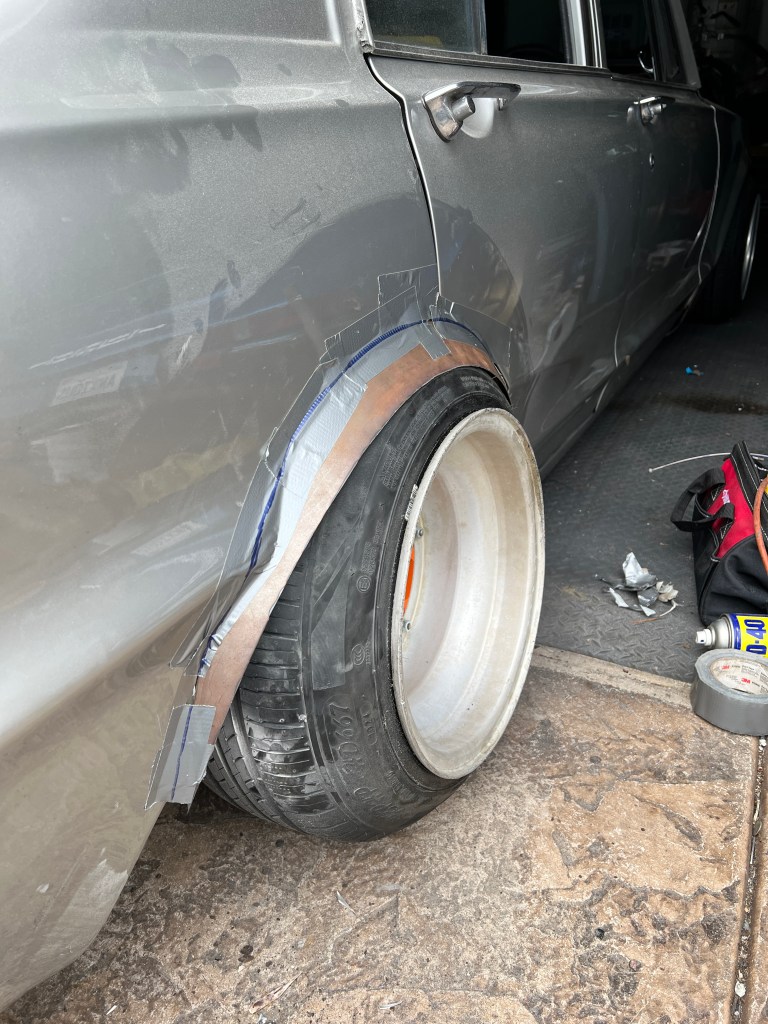
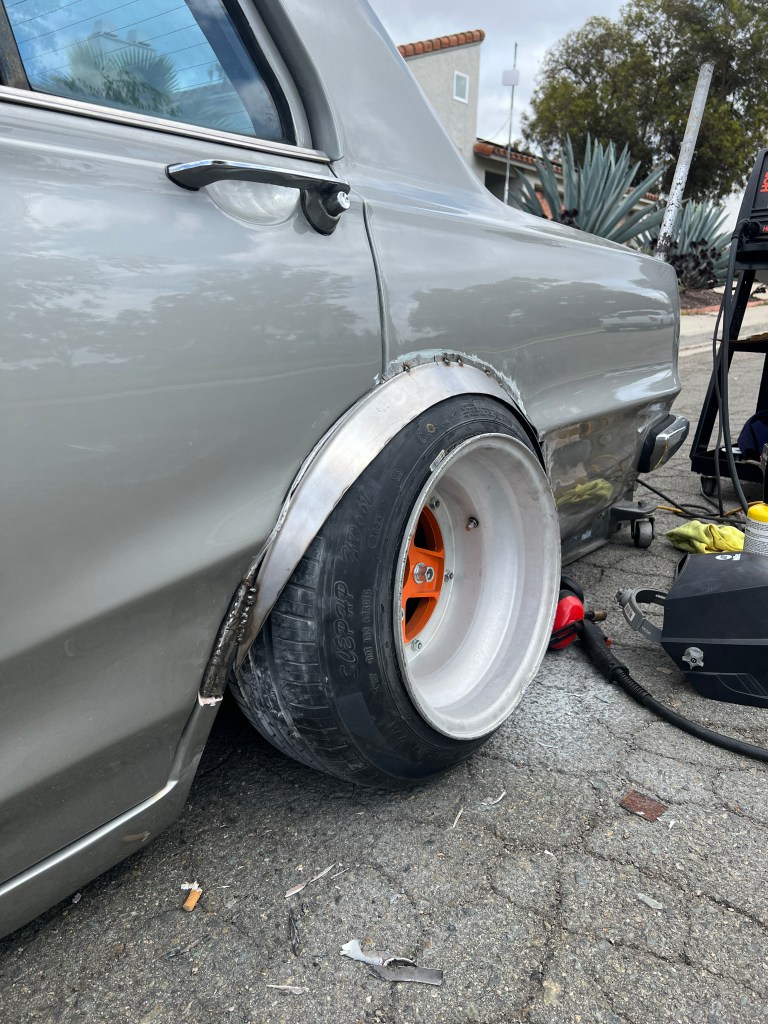
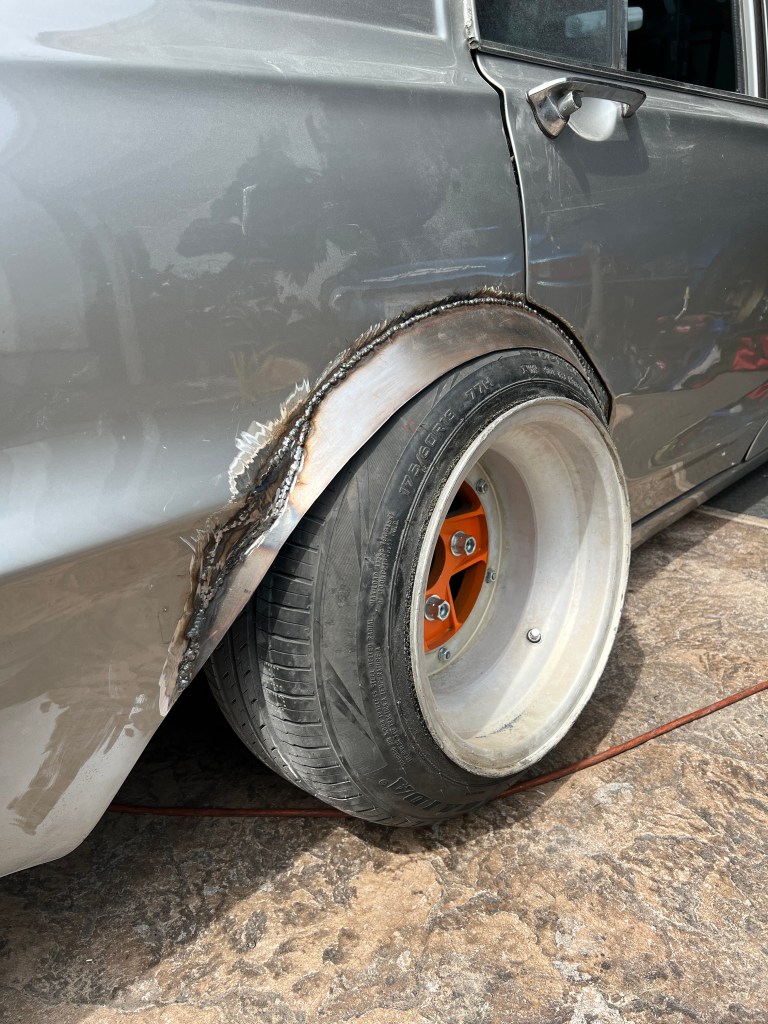
Metal fender is tacked into place.
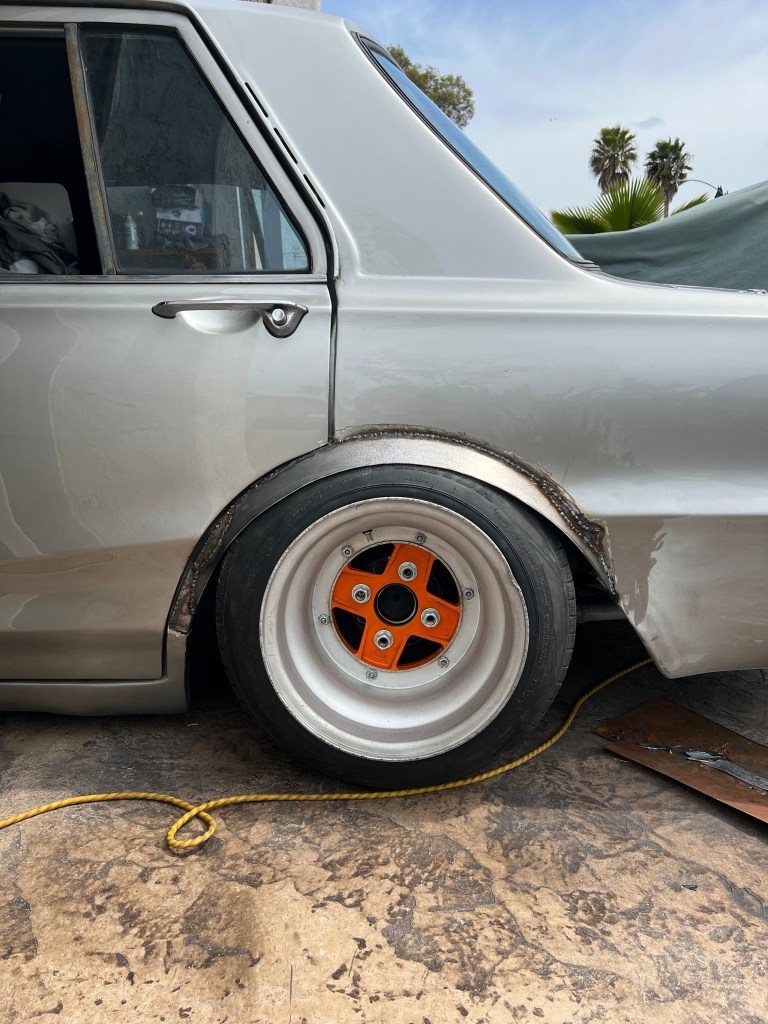
Body filler is applied.
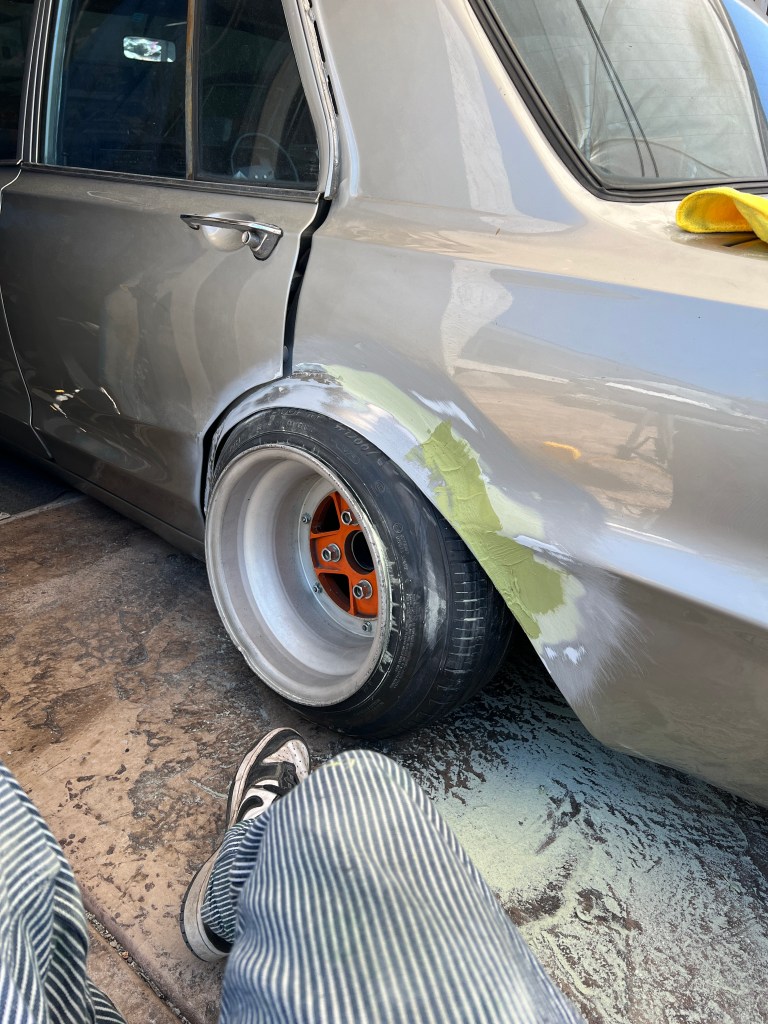
Sanded and primered.
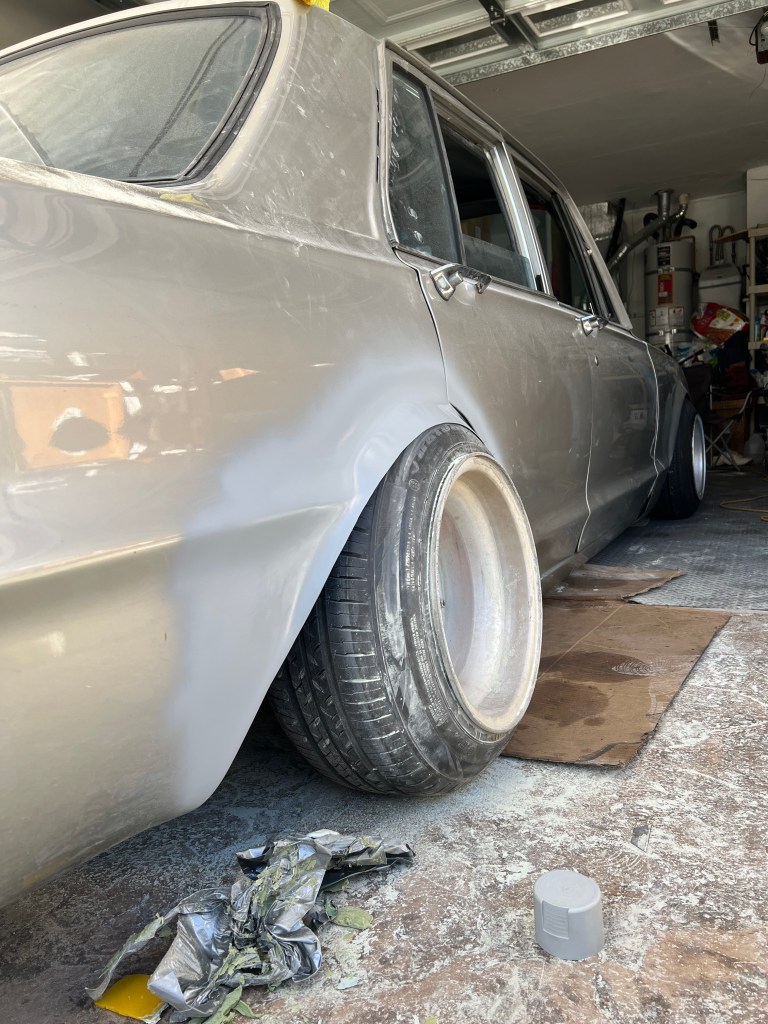
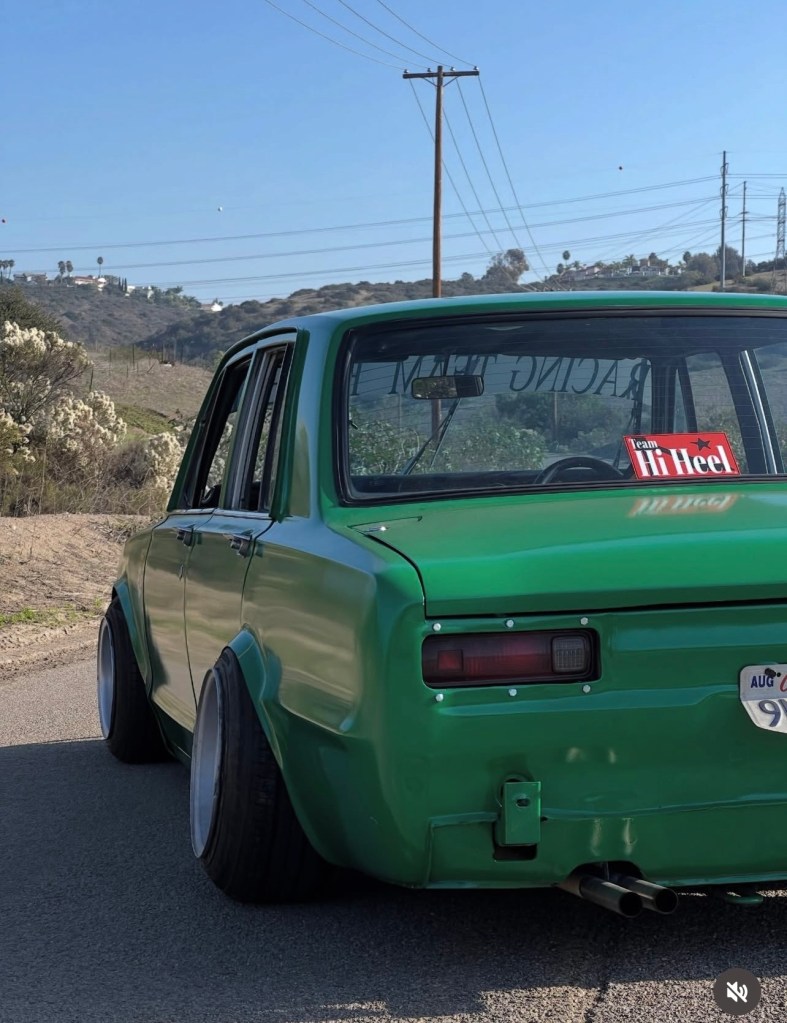
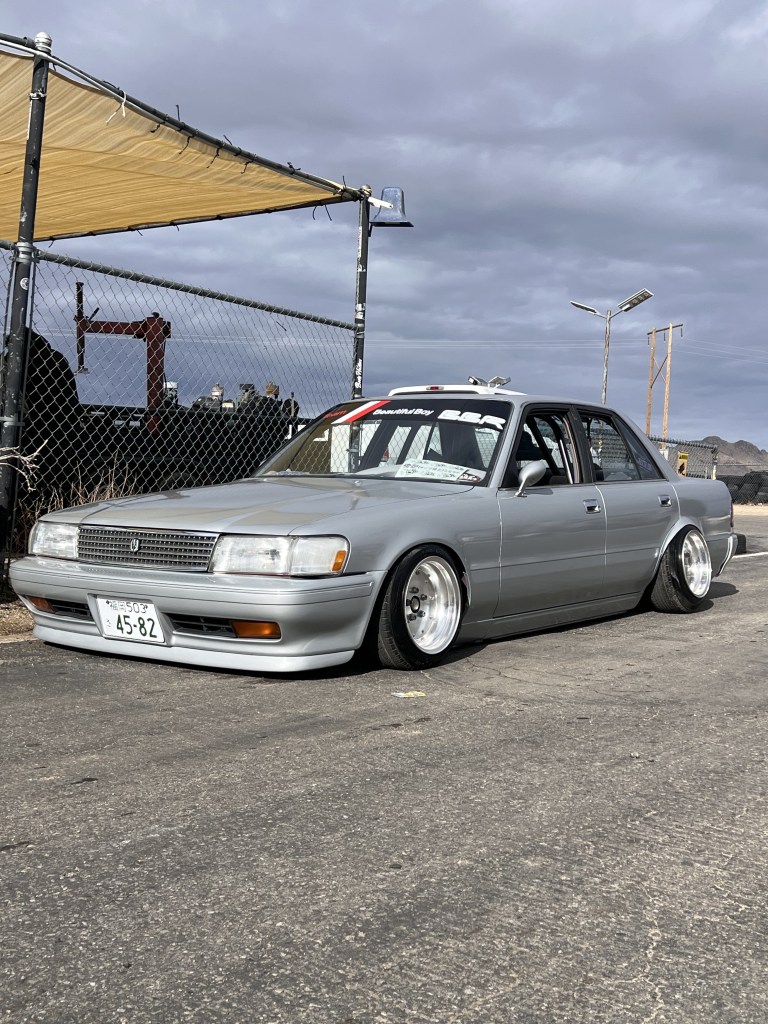
Garlido MX83 @garlido (14x10j A-type, 175/60)
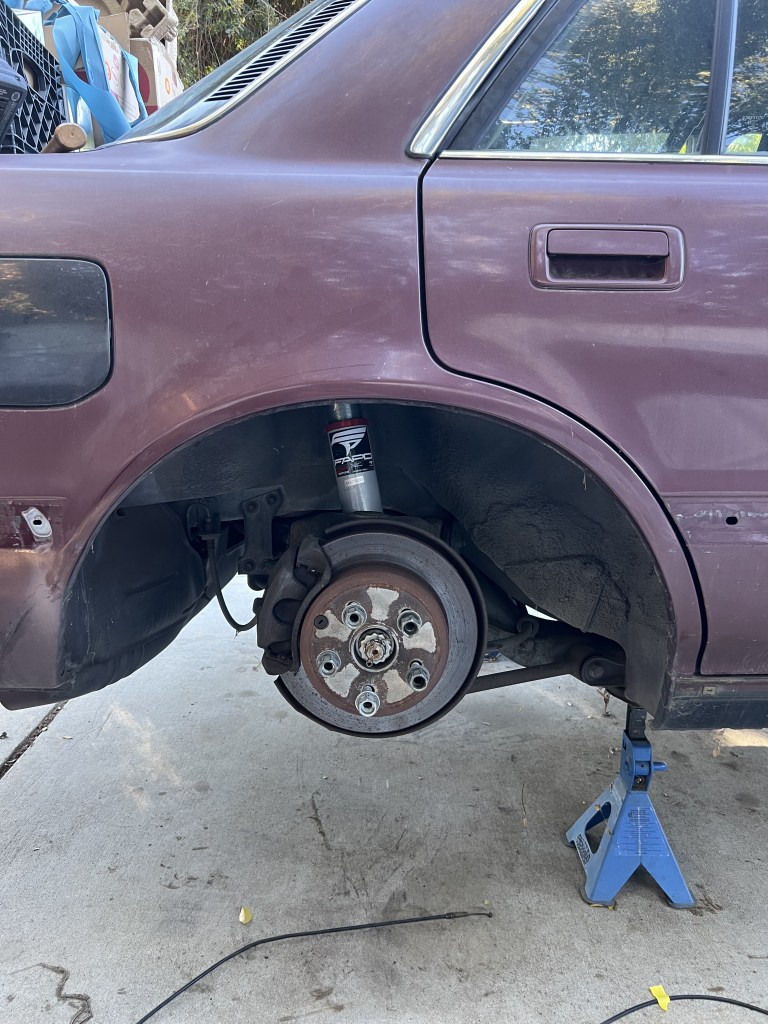
Fender is cut along the door line with pointed ends.


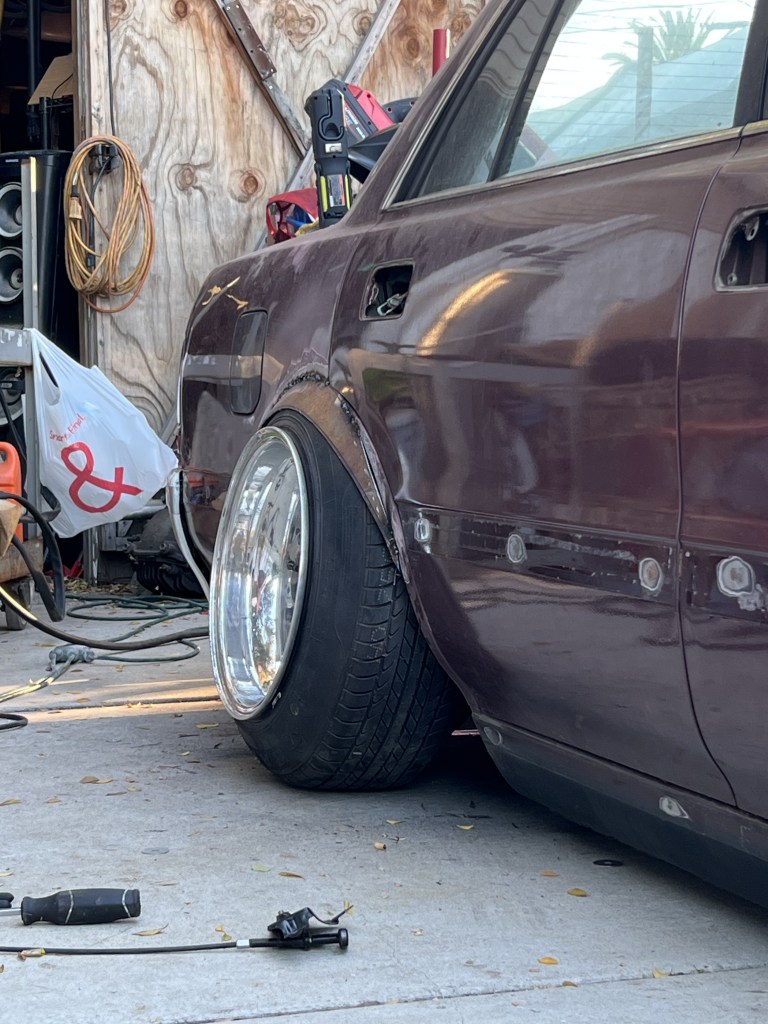
Fender is fully tack welded.

Body filler is applied and sanded.

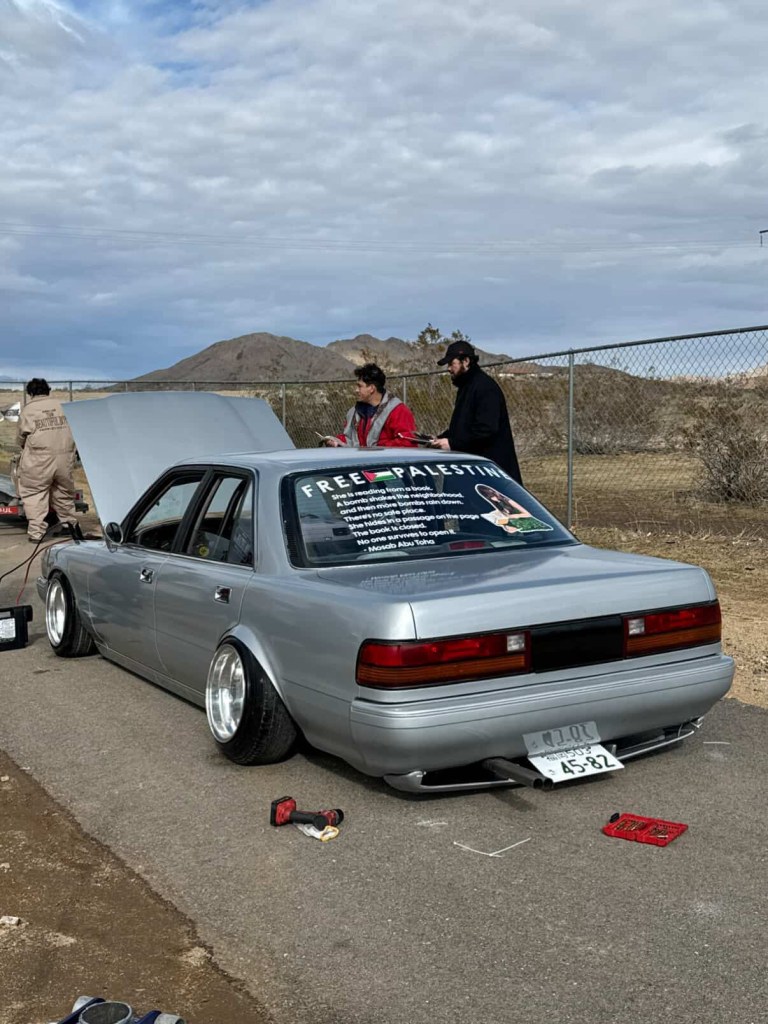
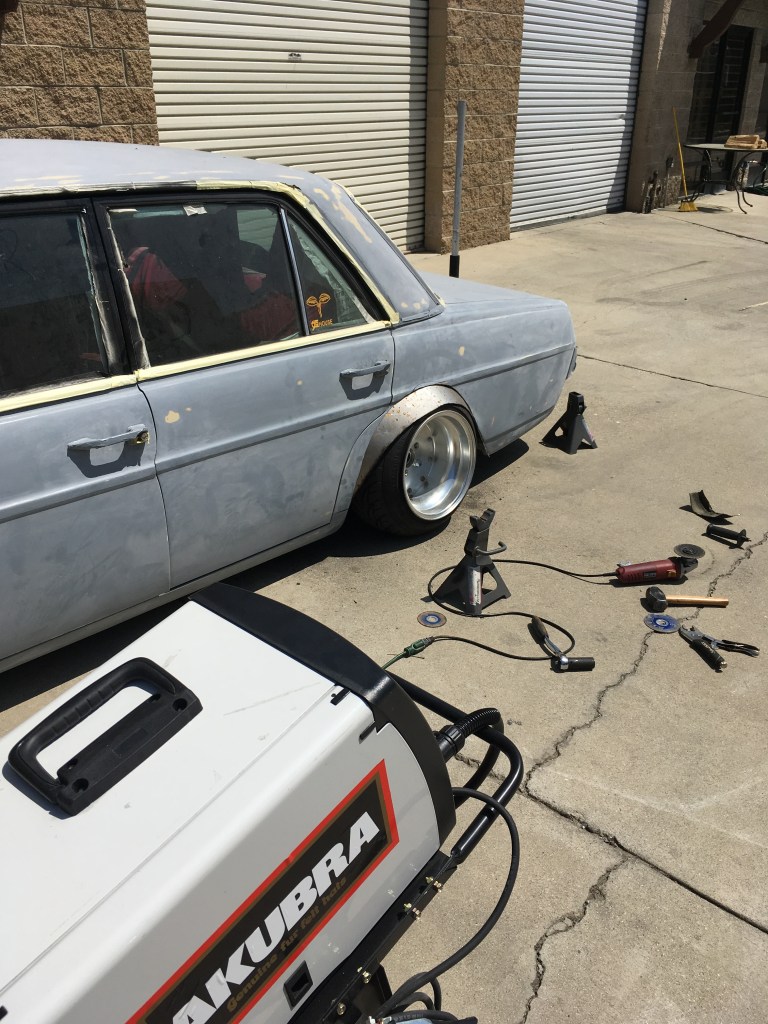
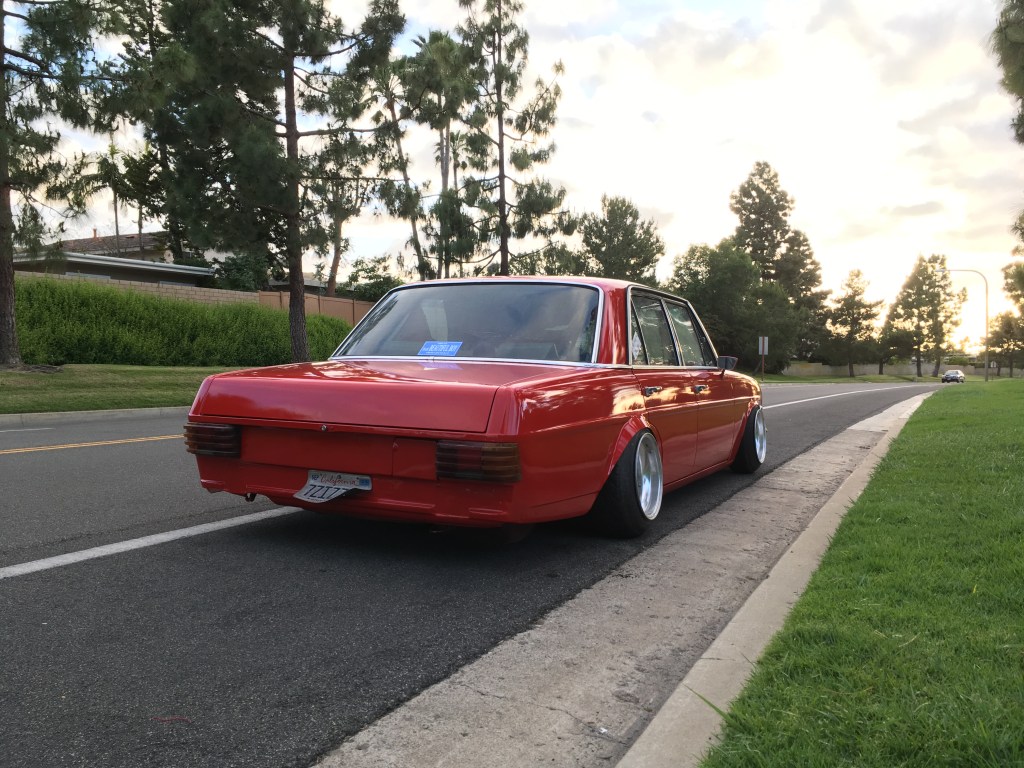
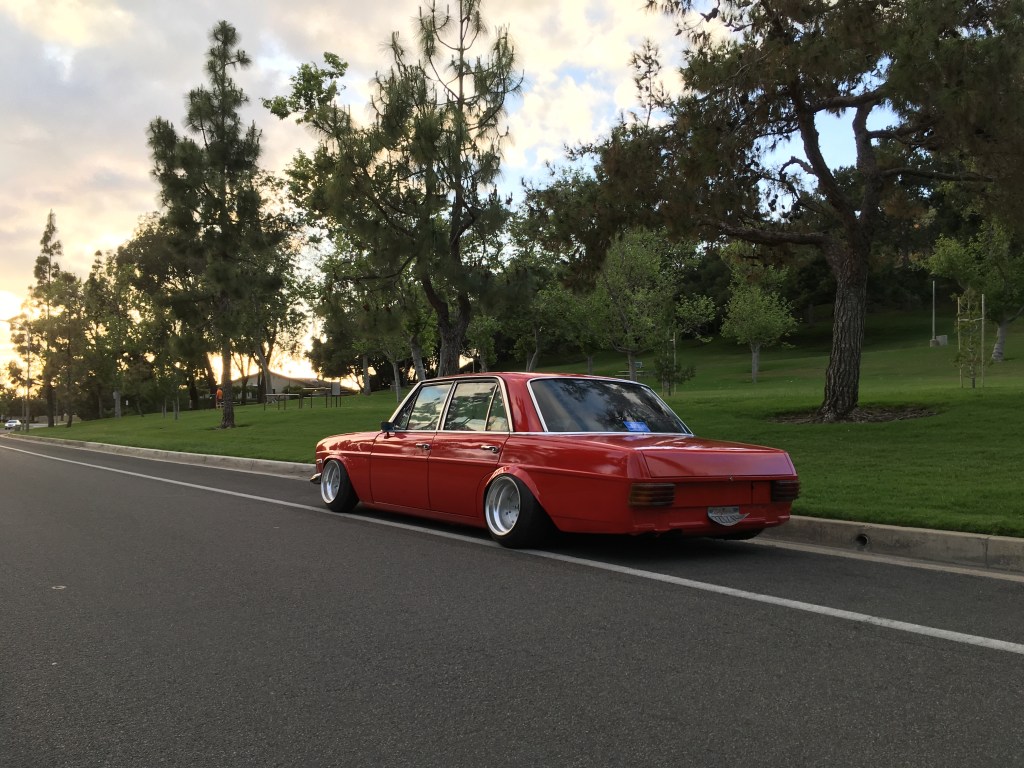
Blackwood Mercedes @blackwood_ryan (14x10j A type, 185/55)
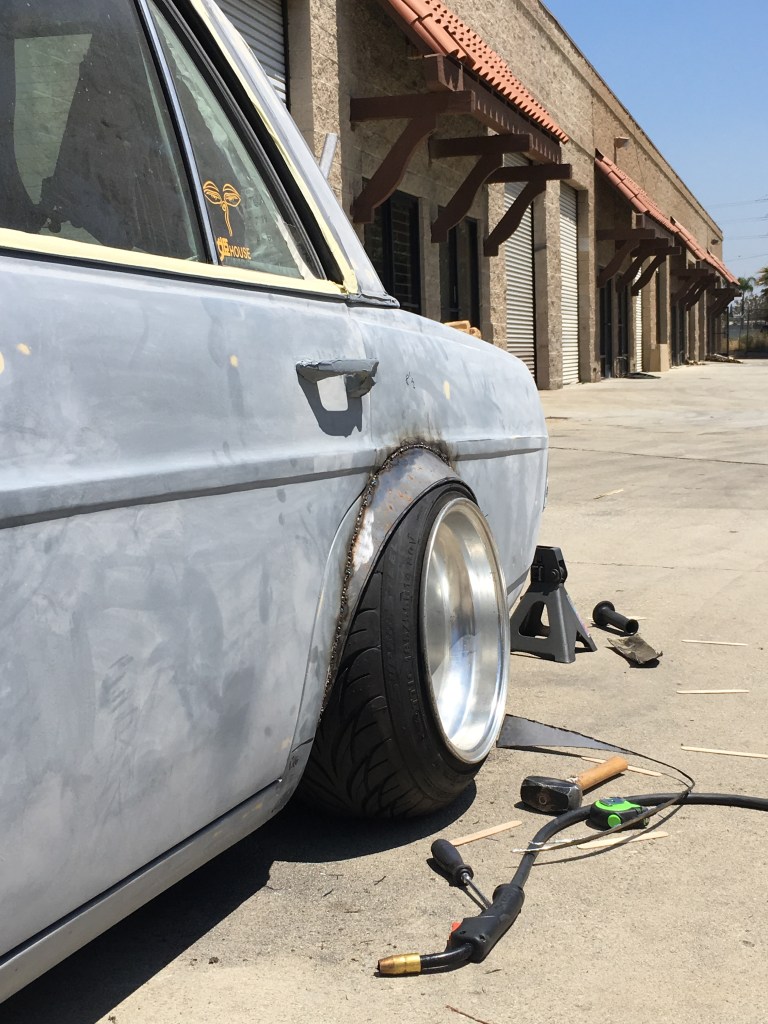
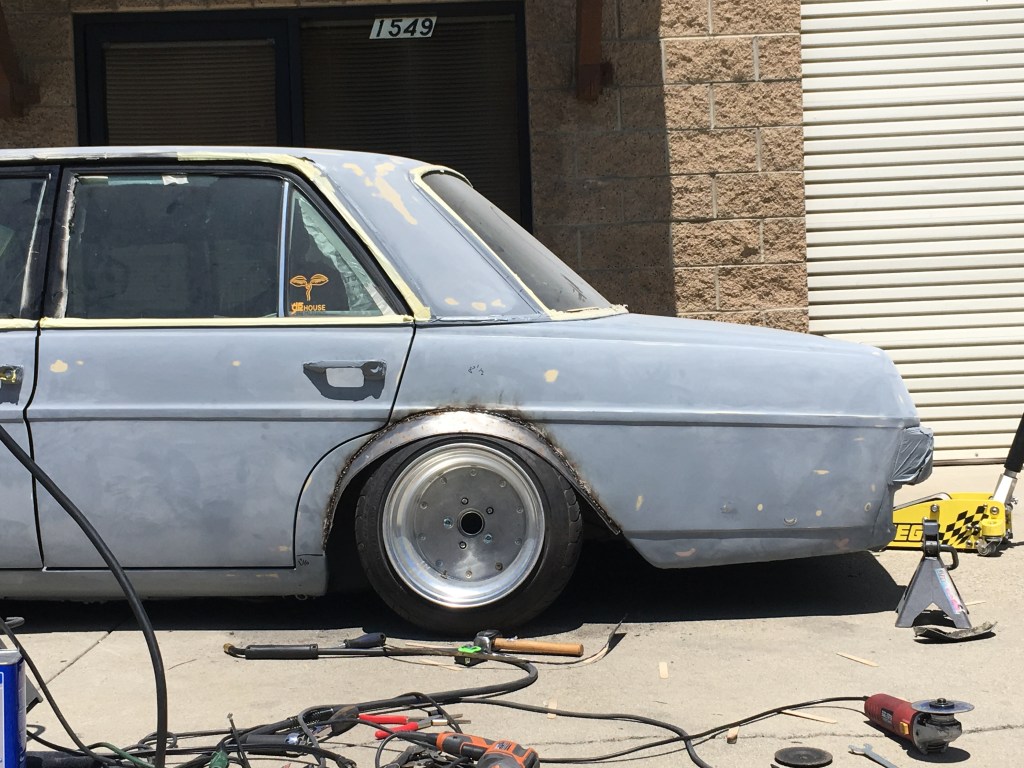
Oversized fender is applied, which will later be trimmed down. A thin steel rod can be used to draw the desired arc of the lower fender. This line can be cut with a cutoff wheel on a grinder.
Fender is cut to shape and welded to the car.
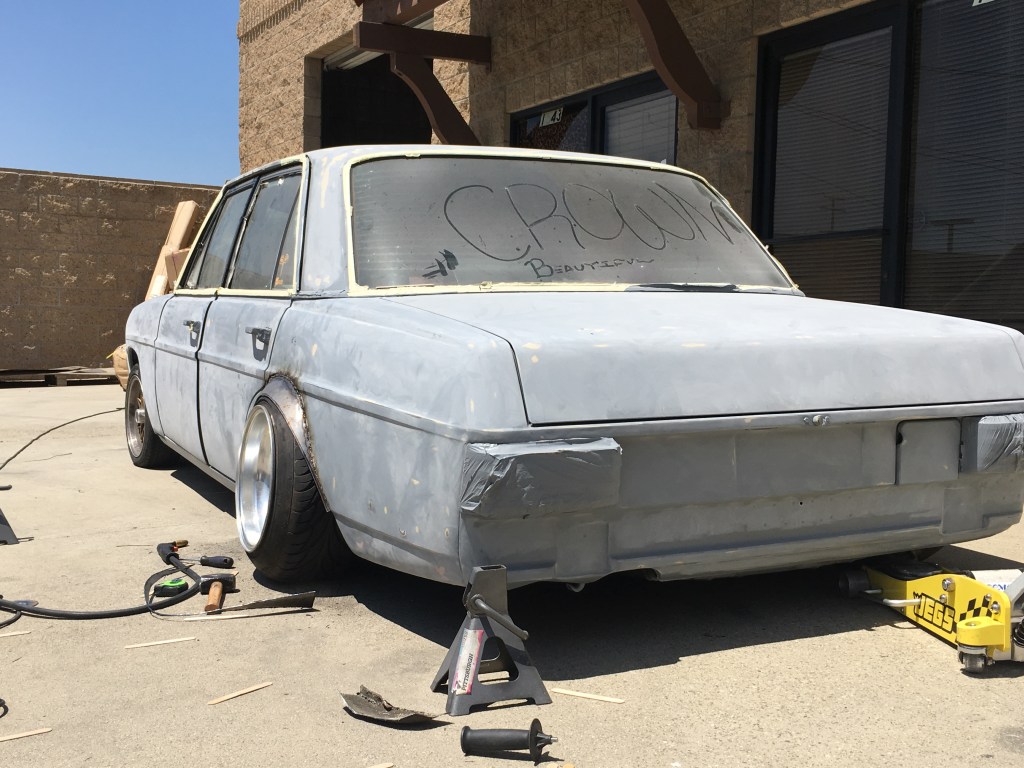
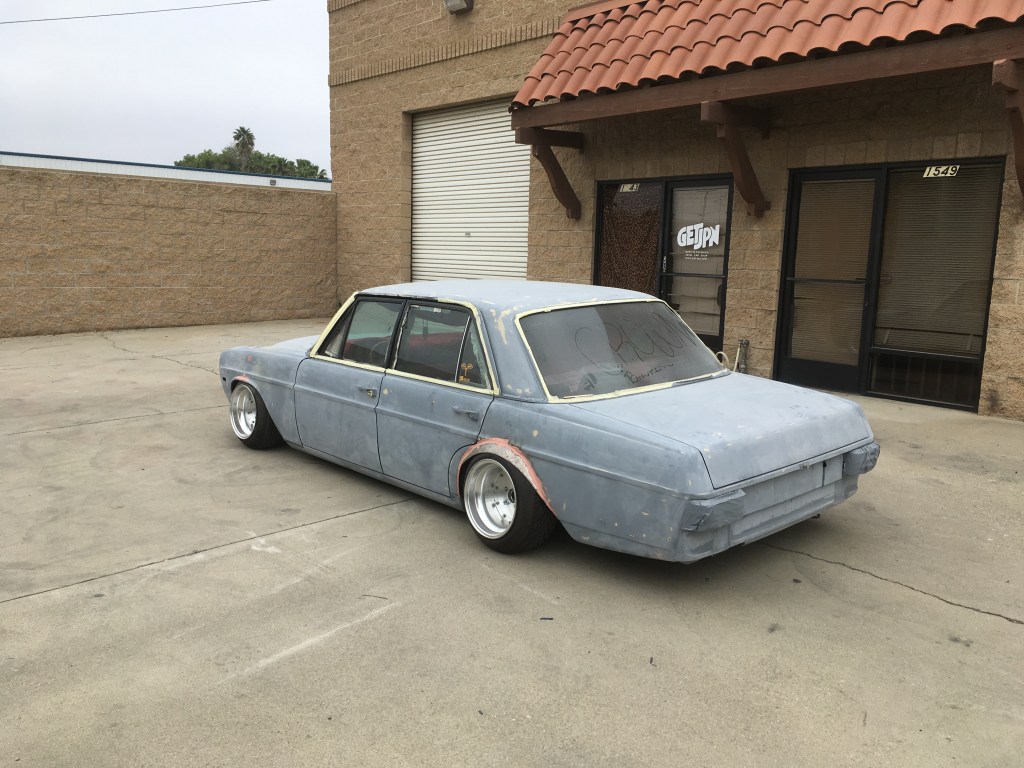
Note the unusual arch cut for an unusual base car. It does not follow the door line and cuts directly into a body line.
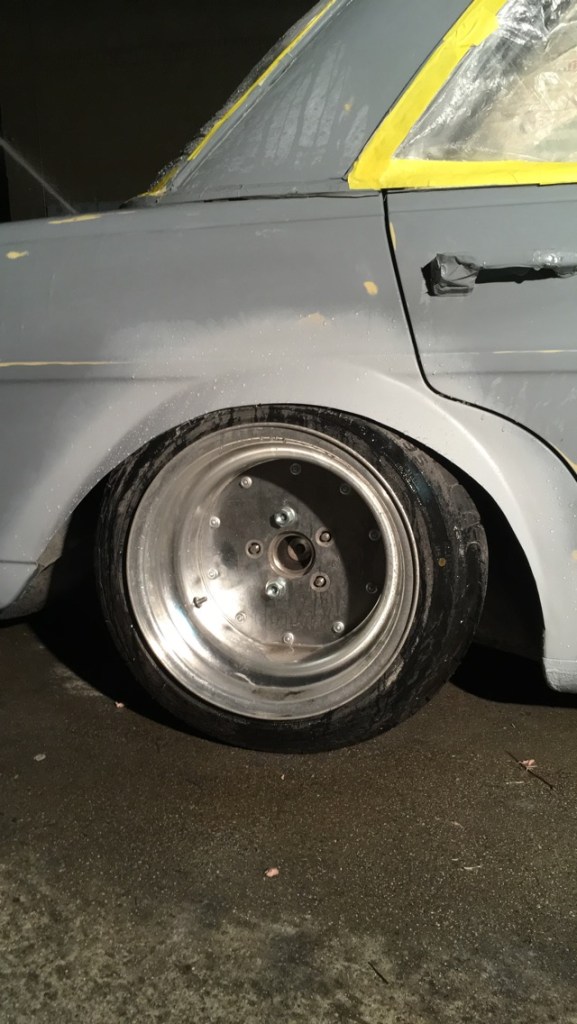
Body filler.
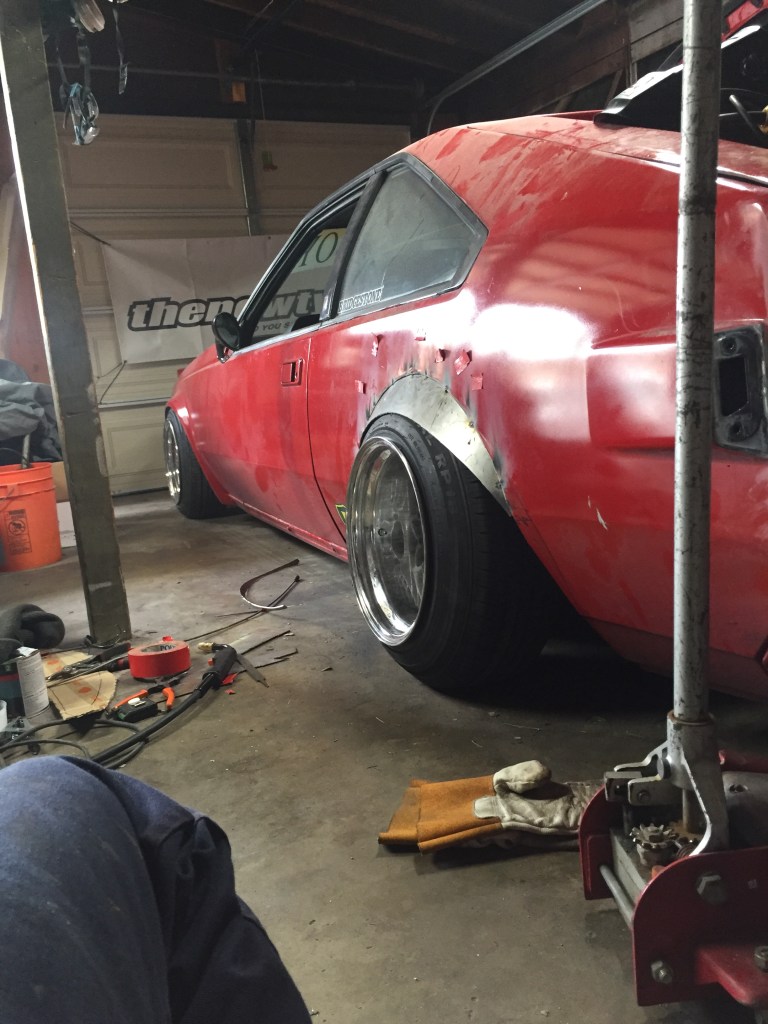
Nathan MA61 @nathanwohlander (14×10.5j A type, 185/60)
Fender is welded.
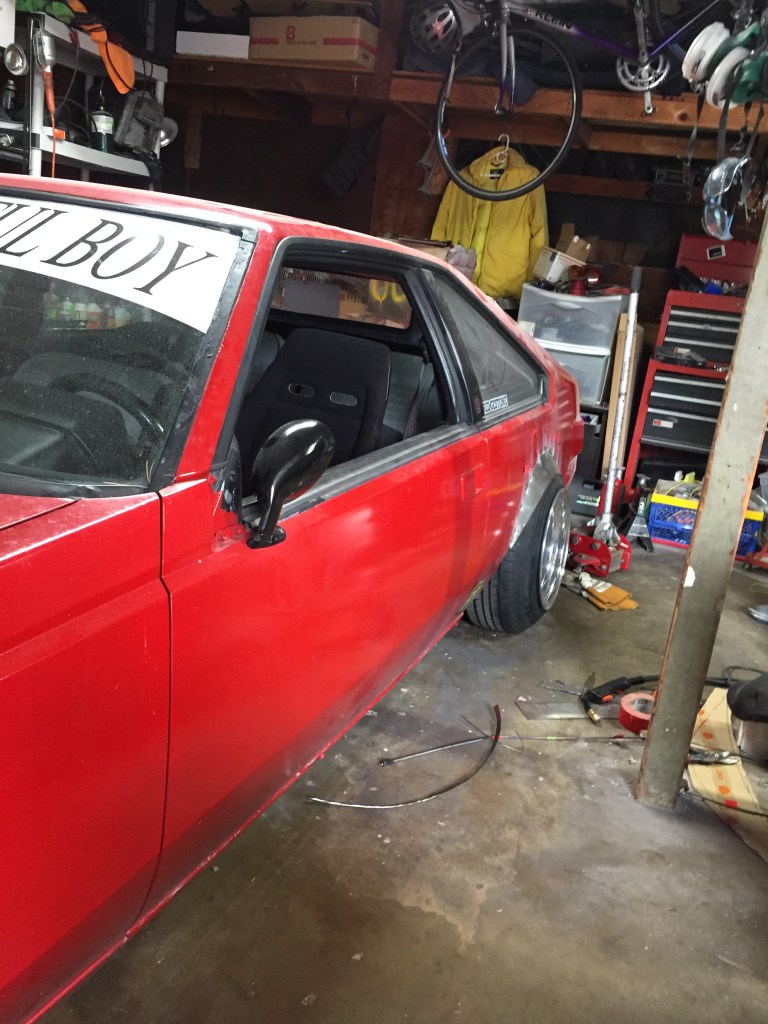
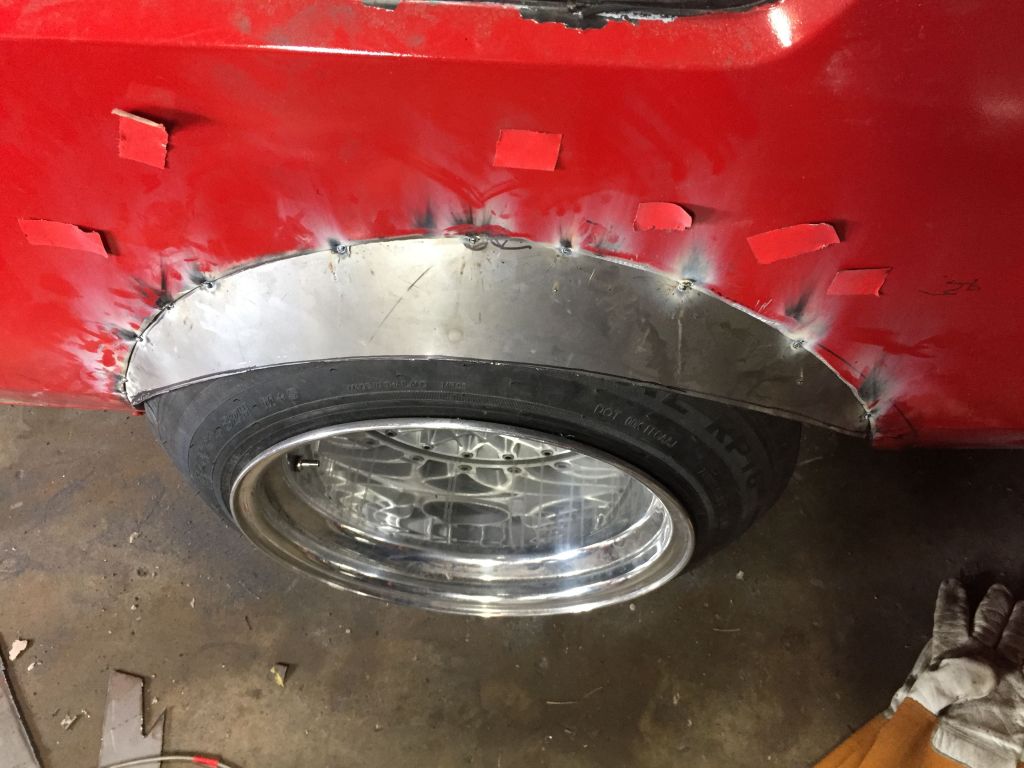
Body filler.


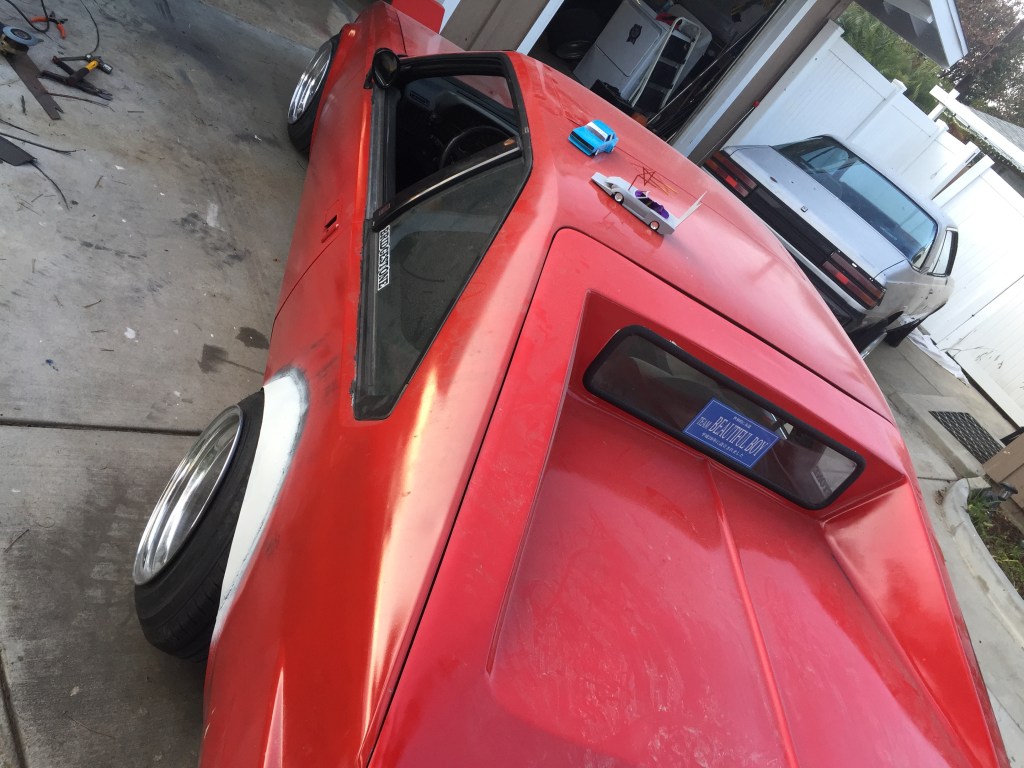
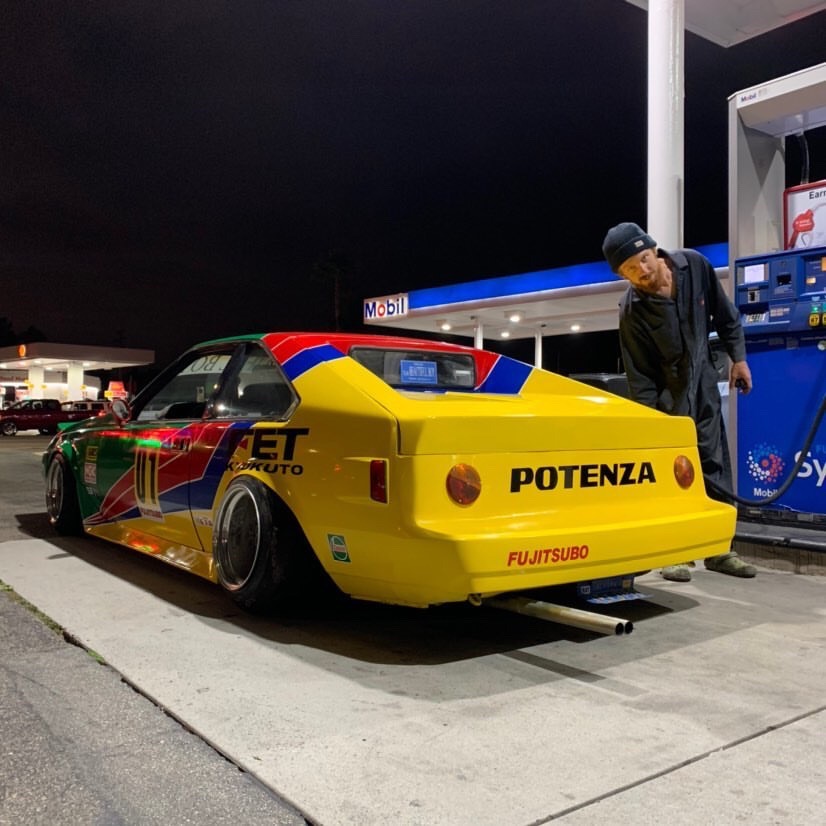
Bojangles MA61 @bojanglesdavid (14x10j A-type, 185/60)
Initial cut line. It follows the natural fender body line for the celica supra.
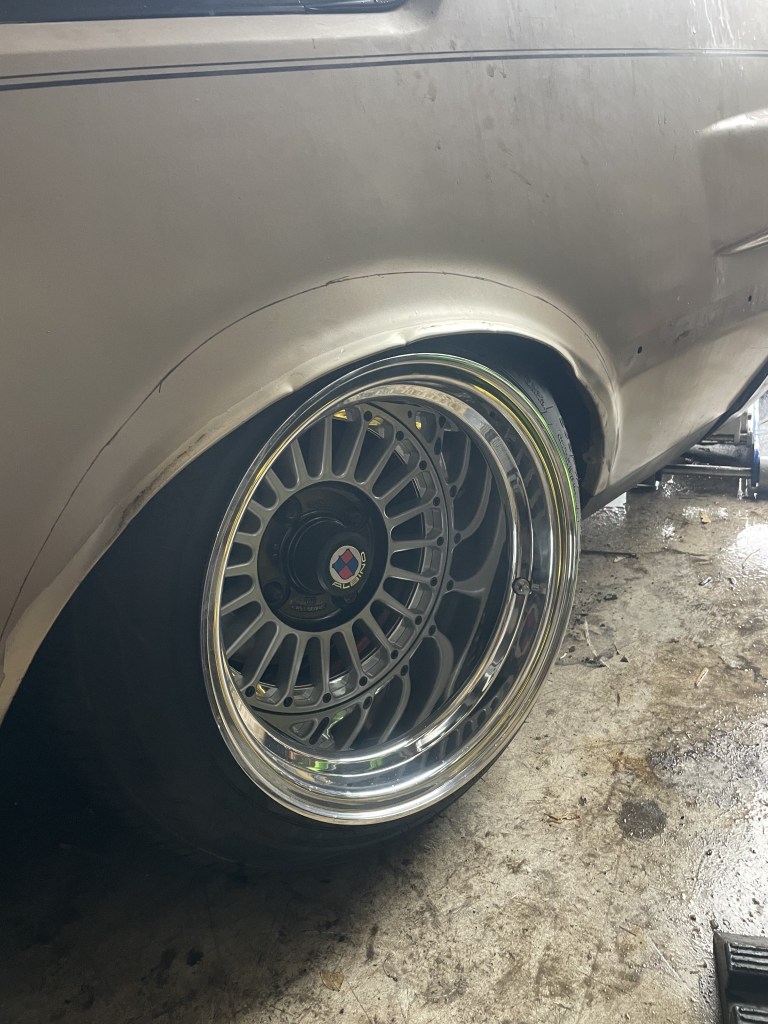

Fender is tack welded into place. Square cut ends and the fender comes far down the body lines, closer to the ground (Ralph style.)
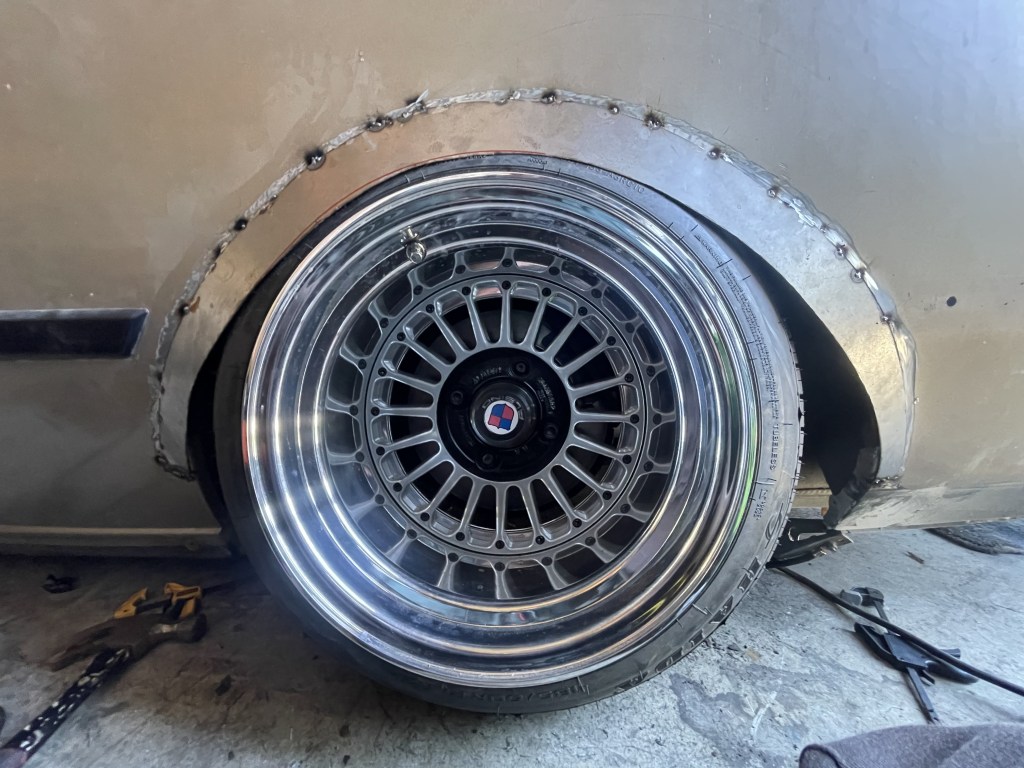
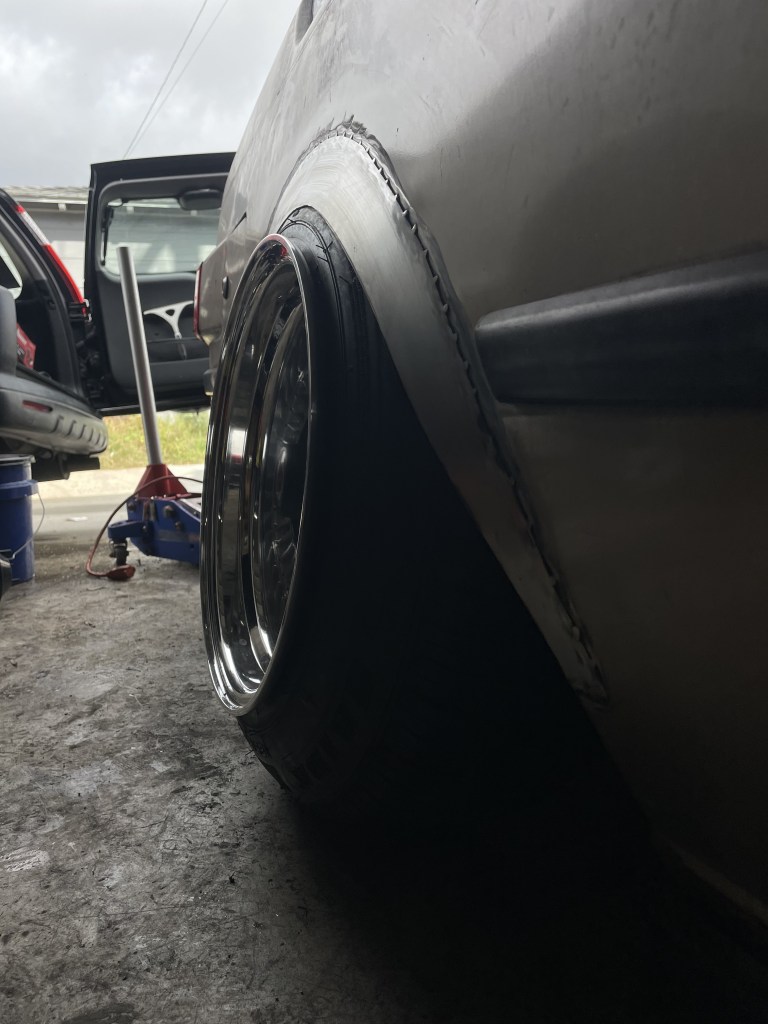
Body filler.
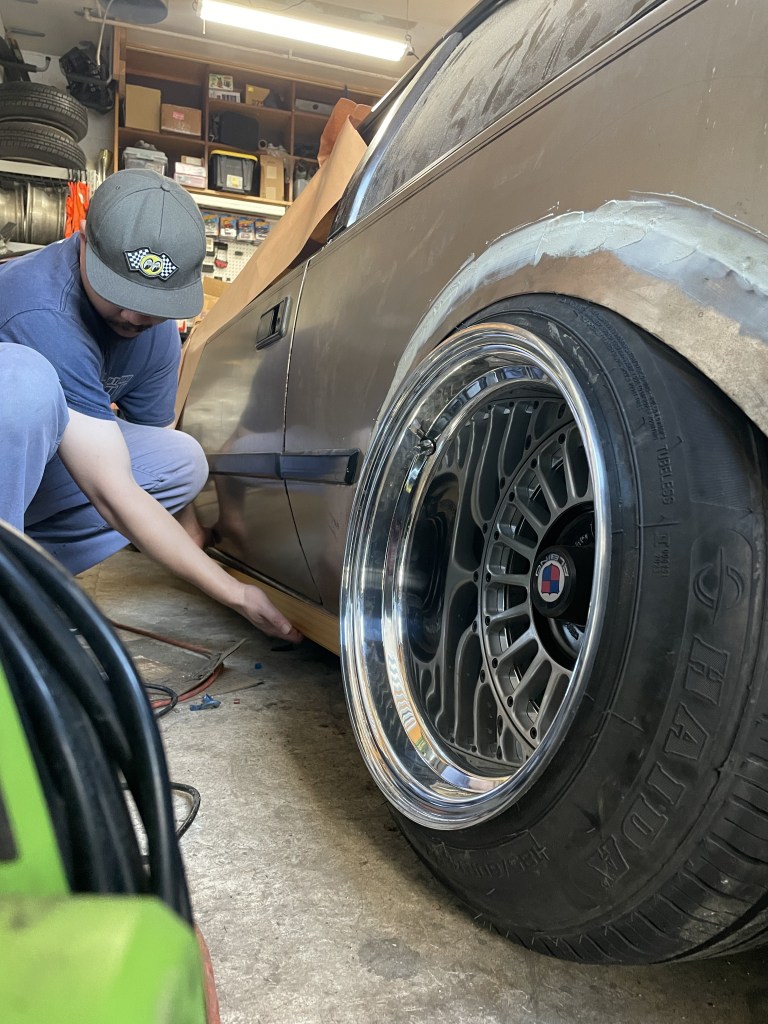
Jefree MA61 @jefree_82 (14x10j A-type, ?)
Initial fender cut.
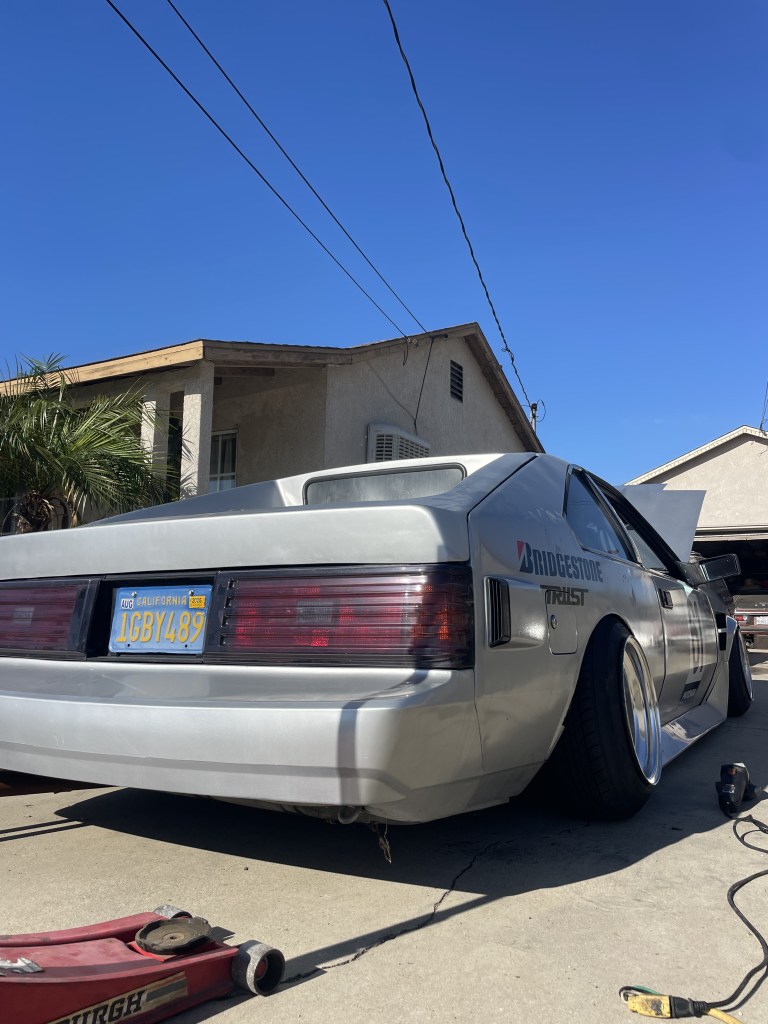
Shallow angle fender.
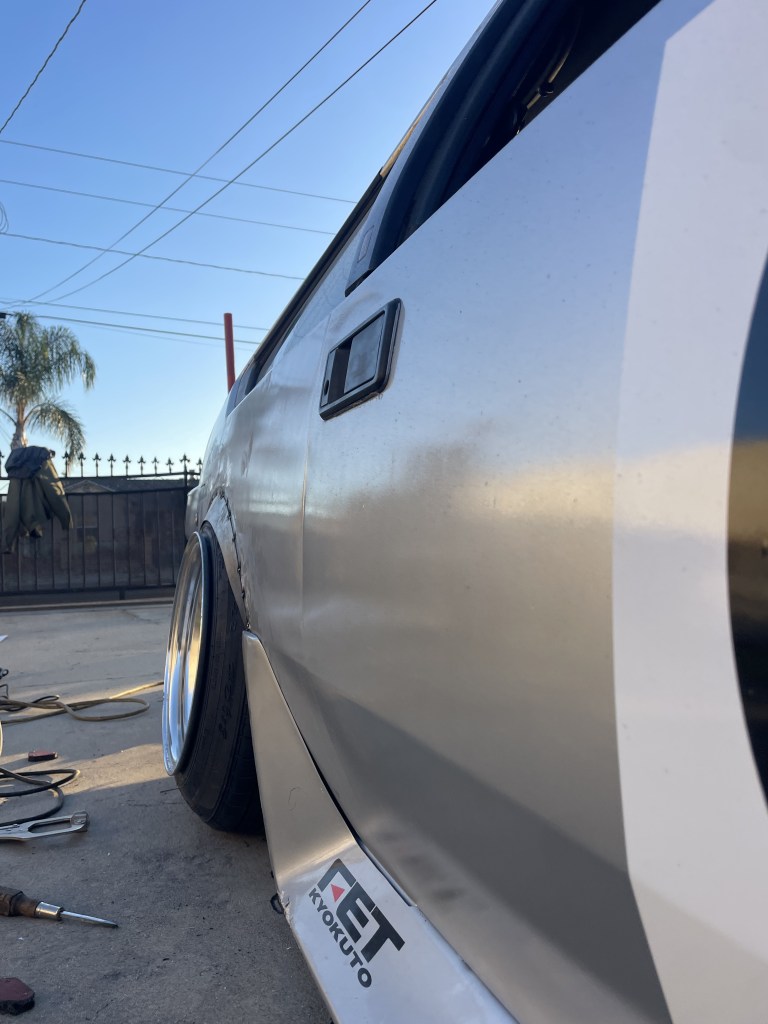
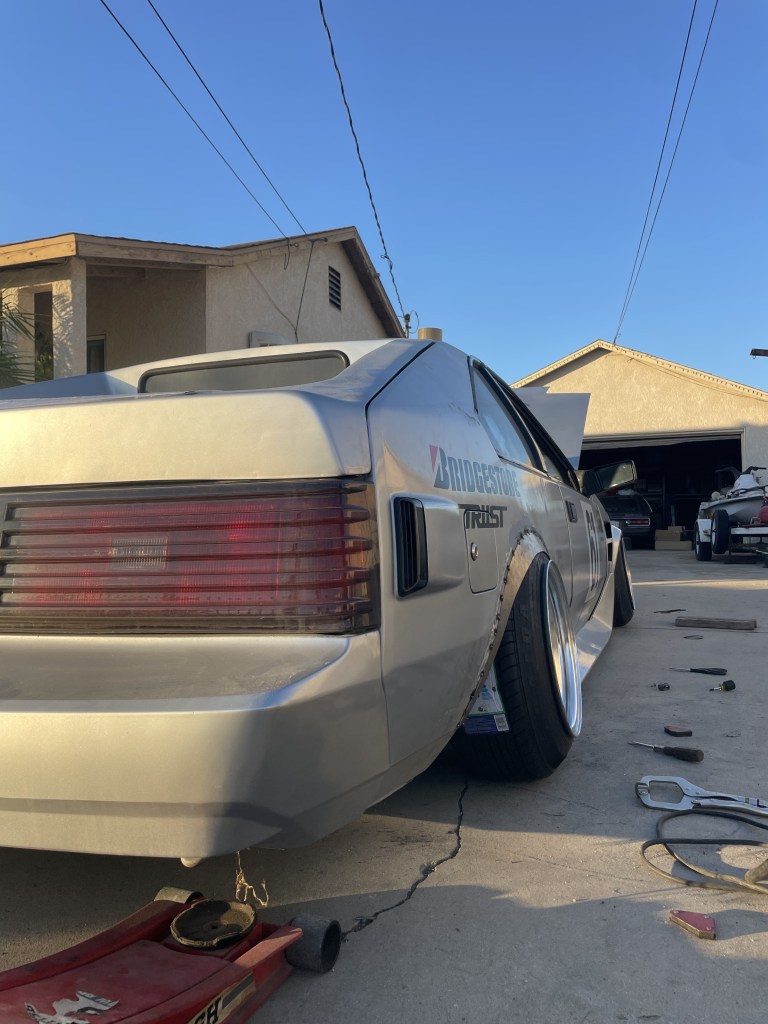
Fender comes down the body closer to the ground (Ralph style.)
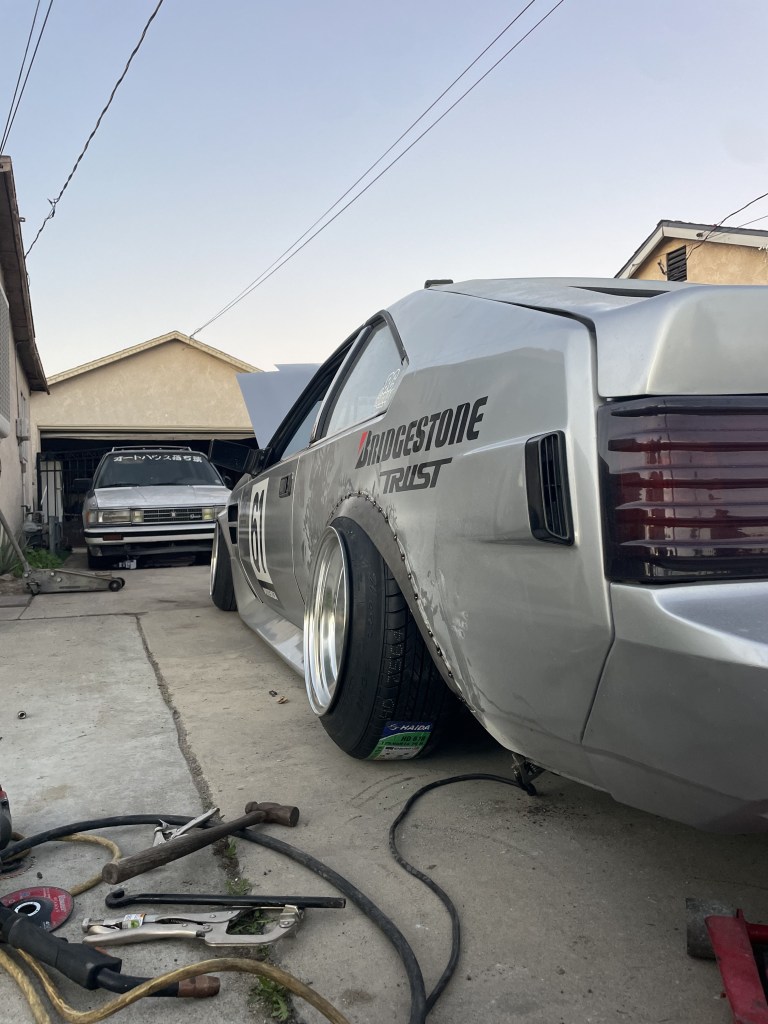

Ralph MZ11 (14×10.5j A-type, 175/60)
Square cut ends.

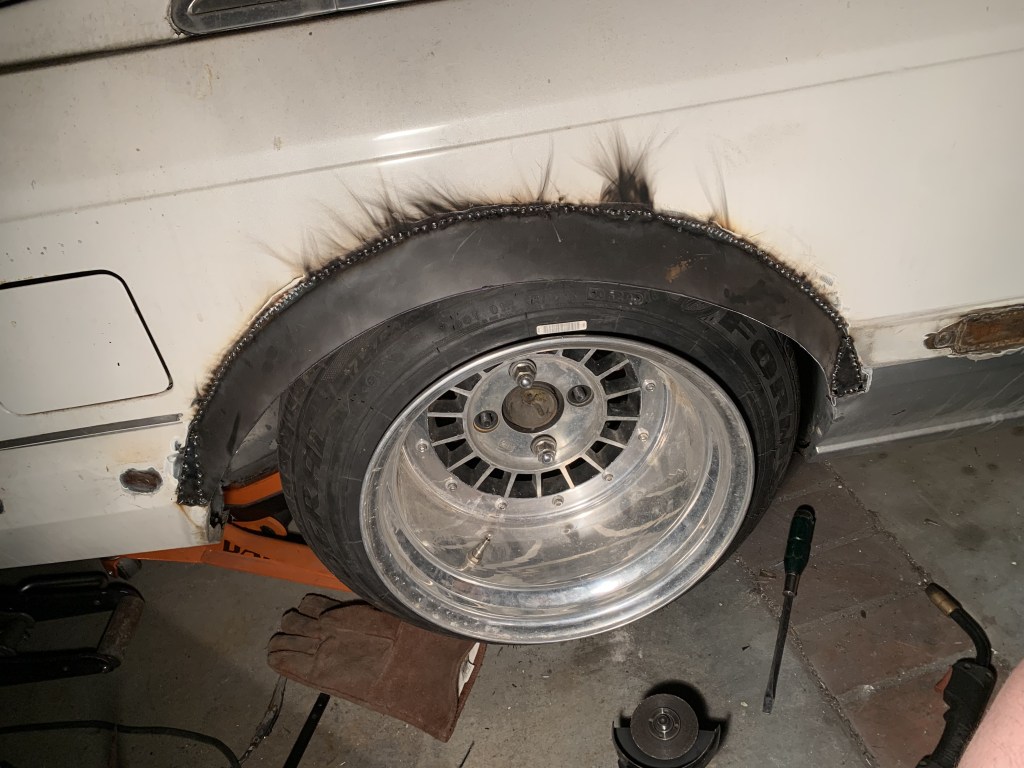
Fender is welded into place.
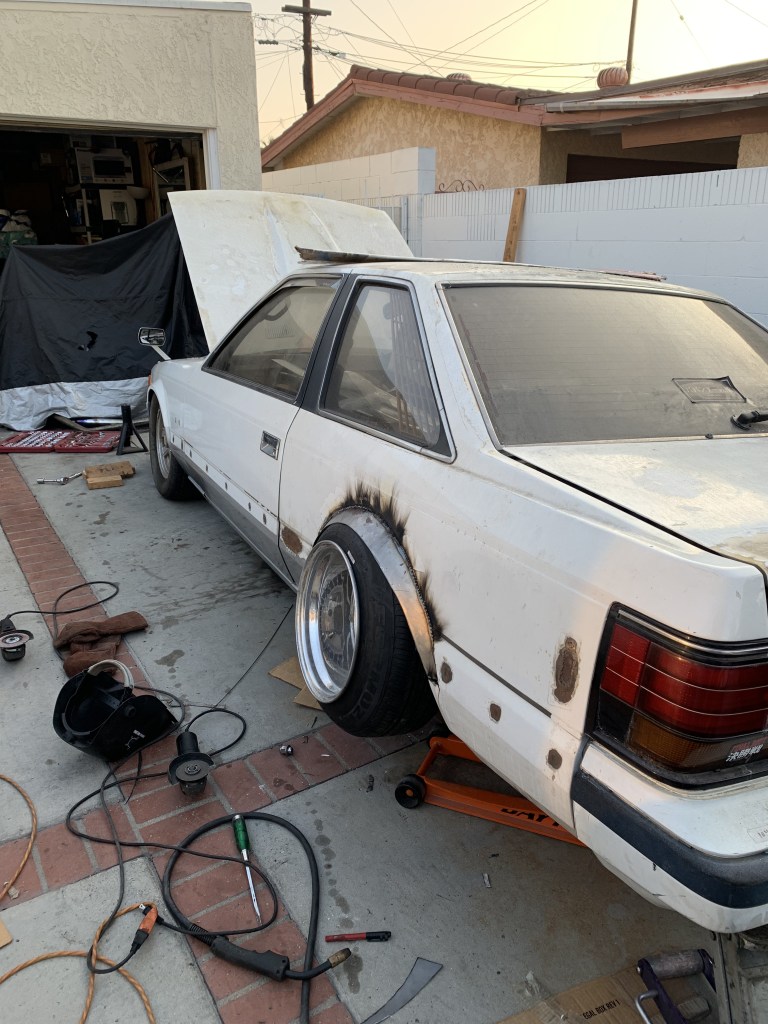
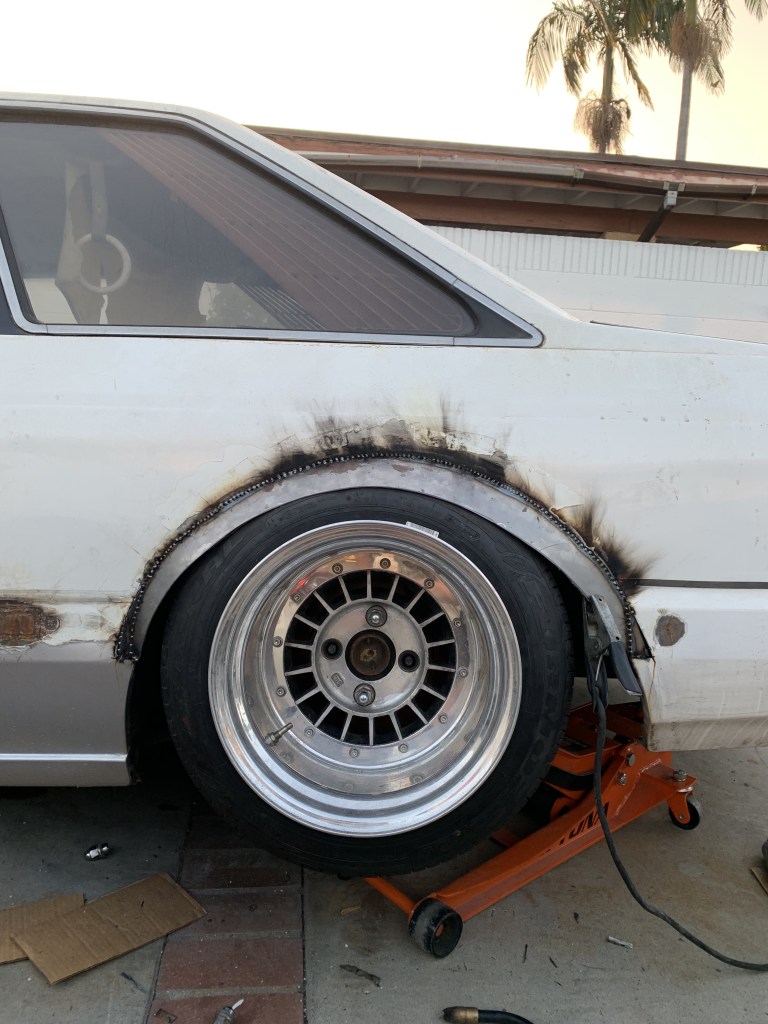
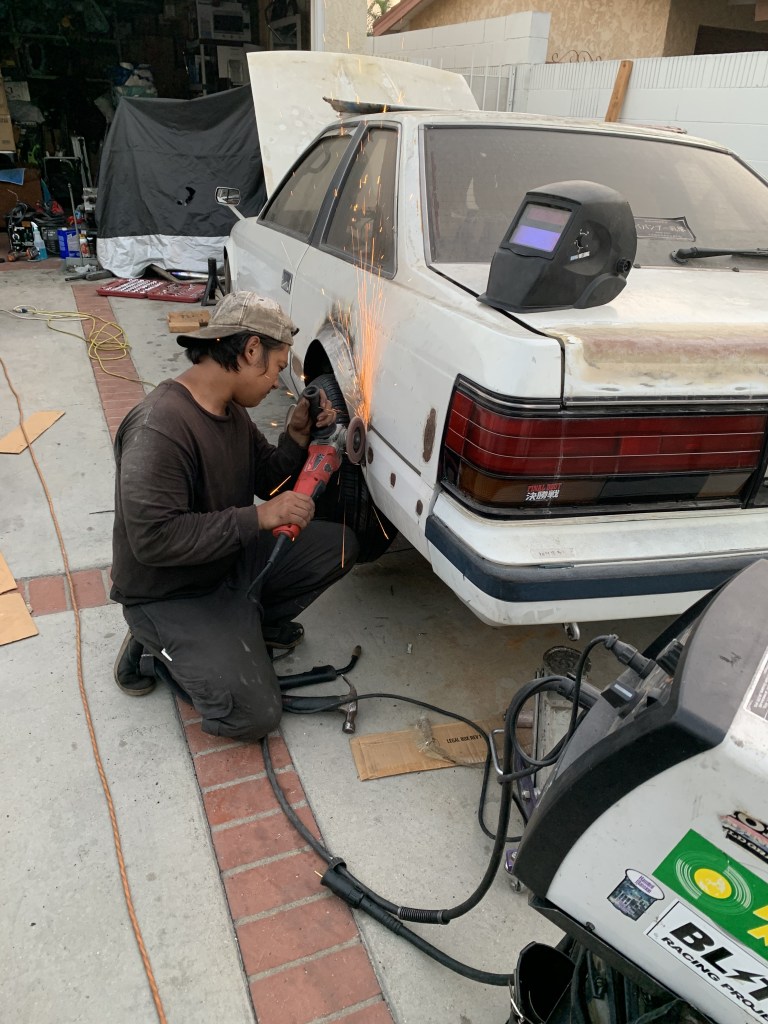
Grinding welds down (flap-disk recommended.)
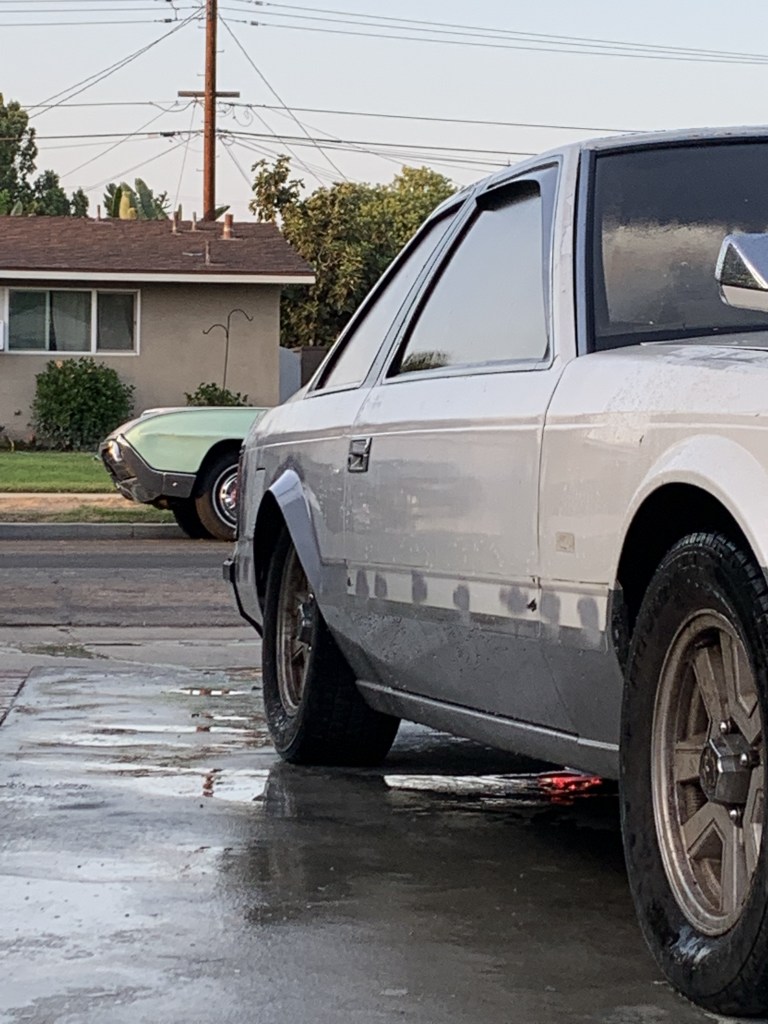


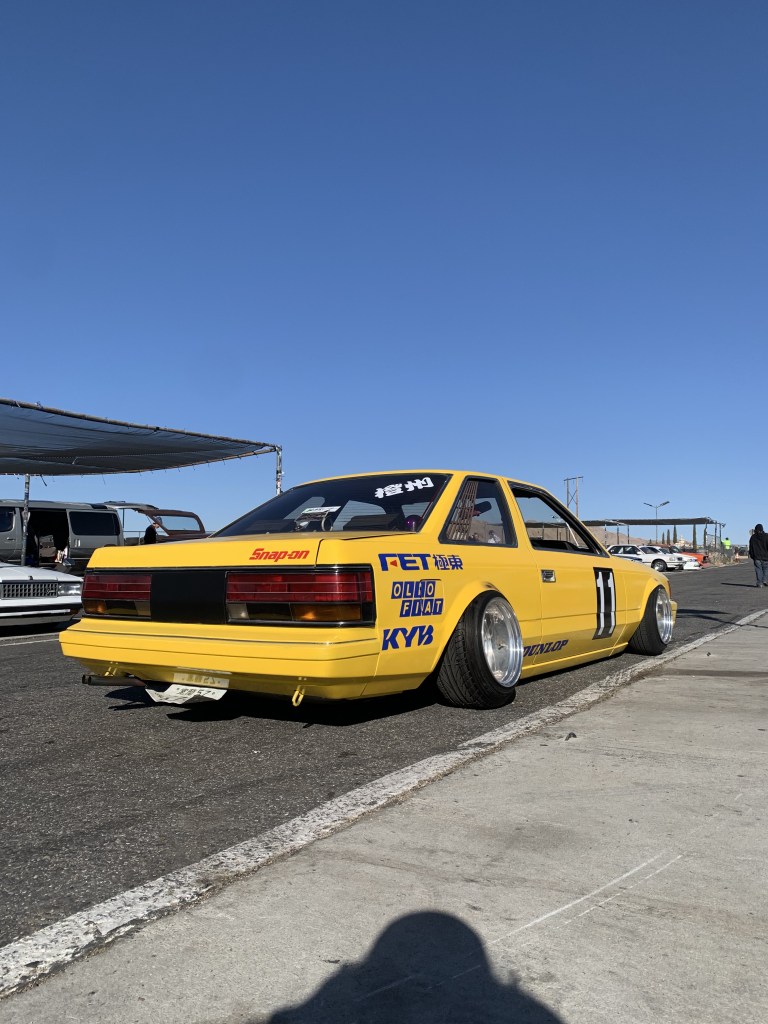
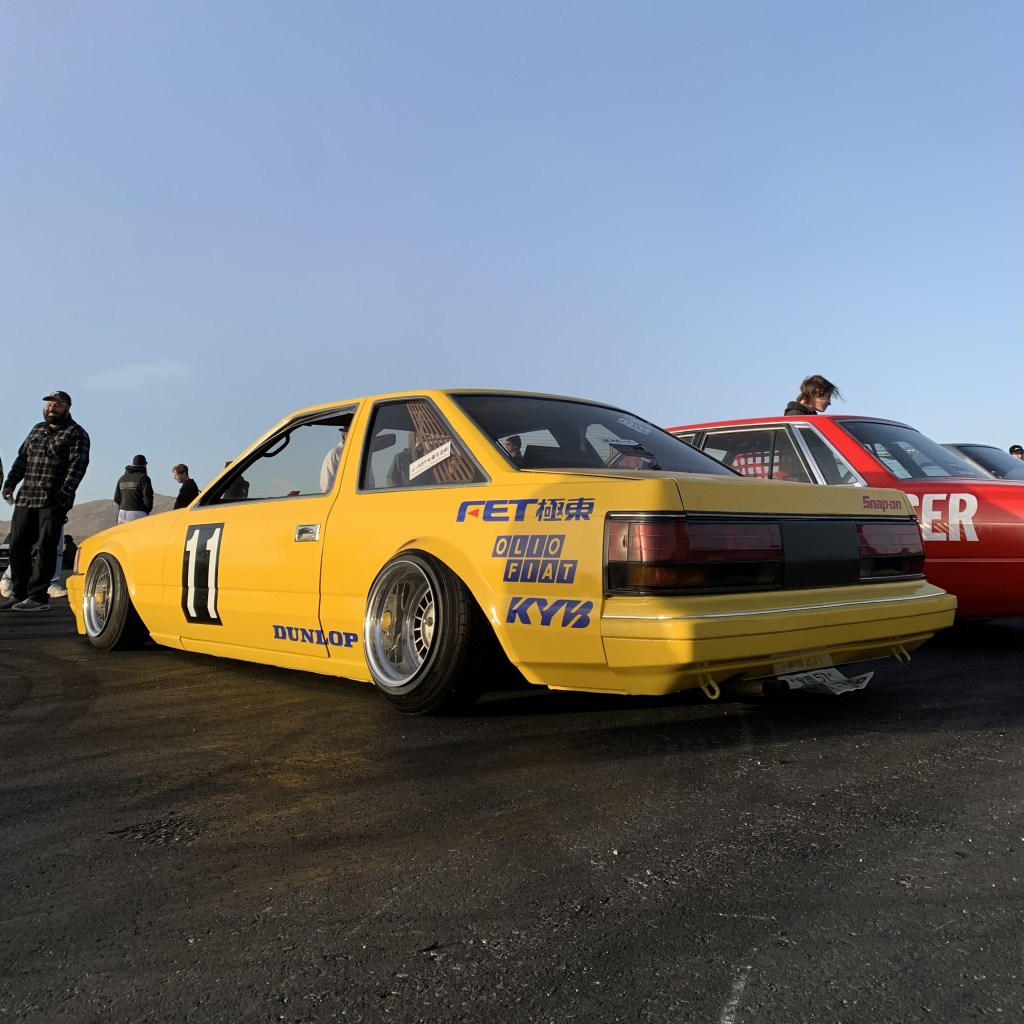
Ryo Endo GZ10 (14x10j A-type, 175/60)
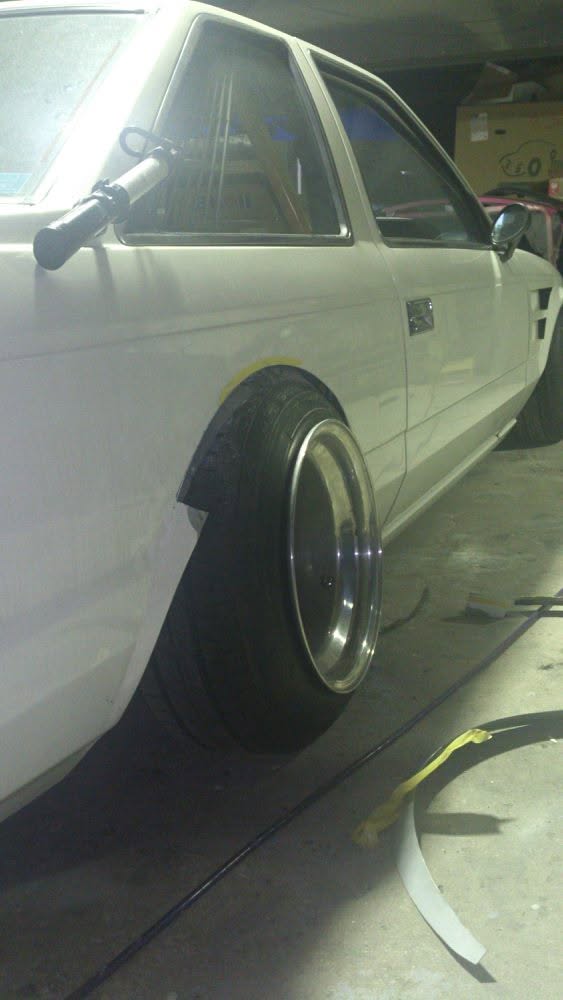
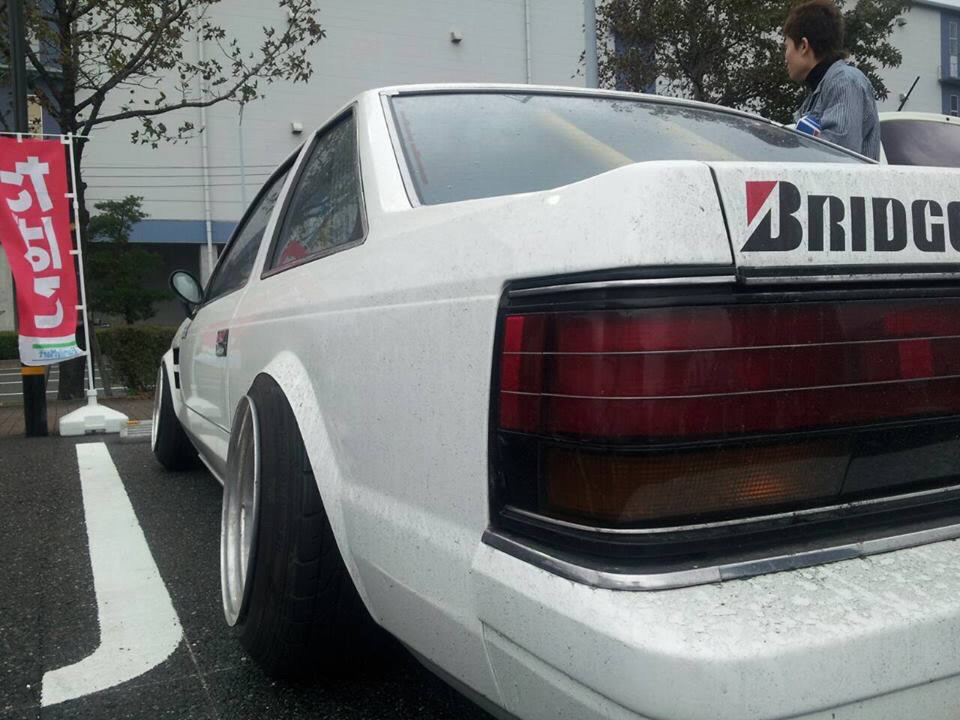
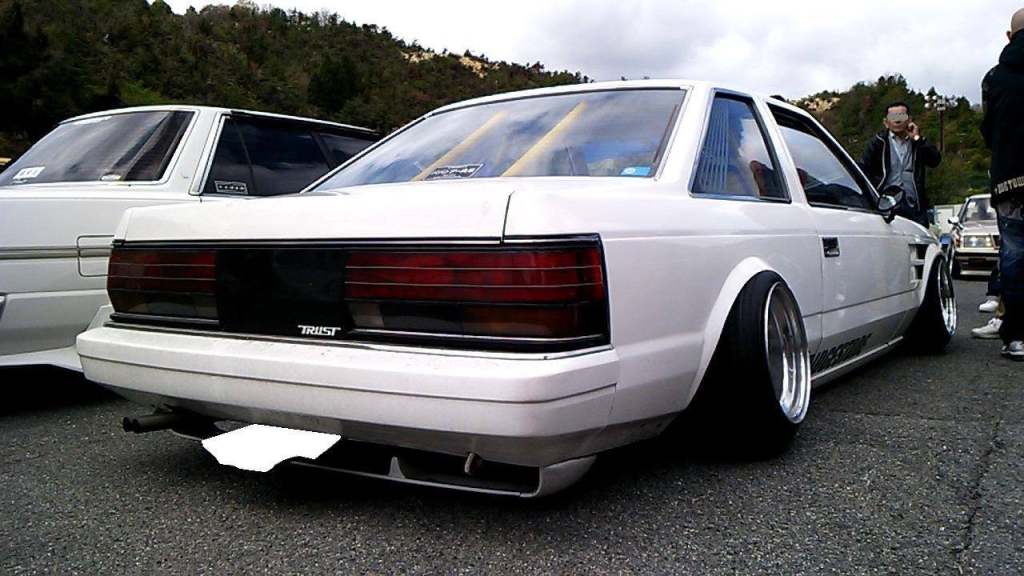
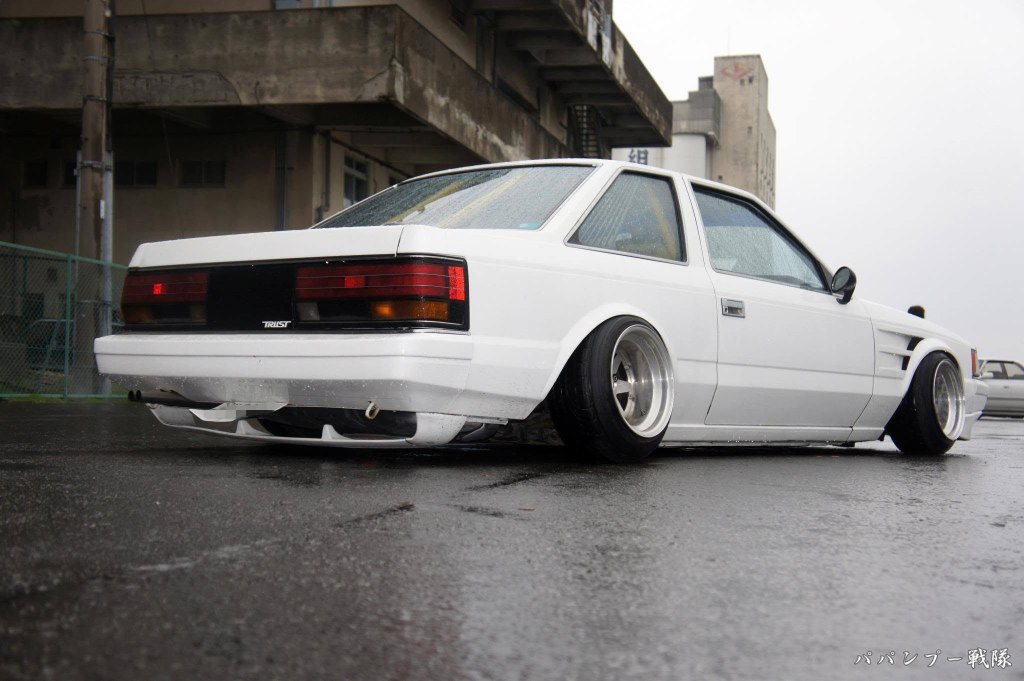
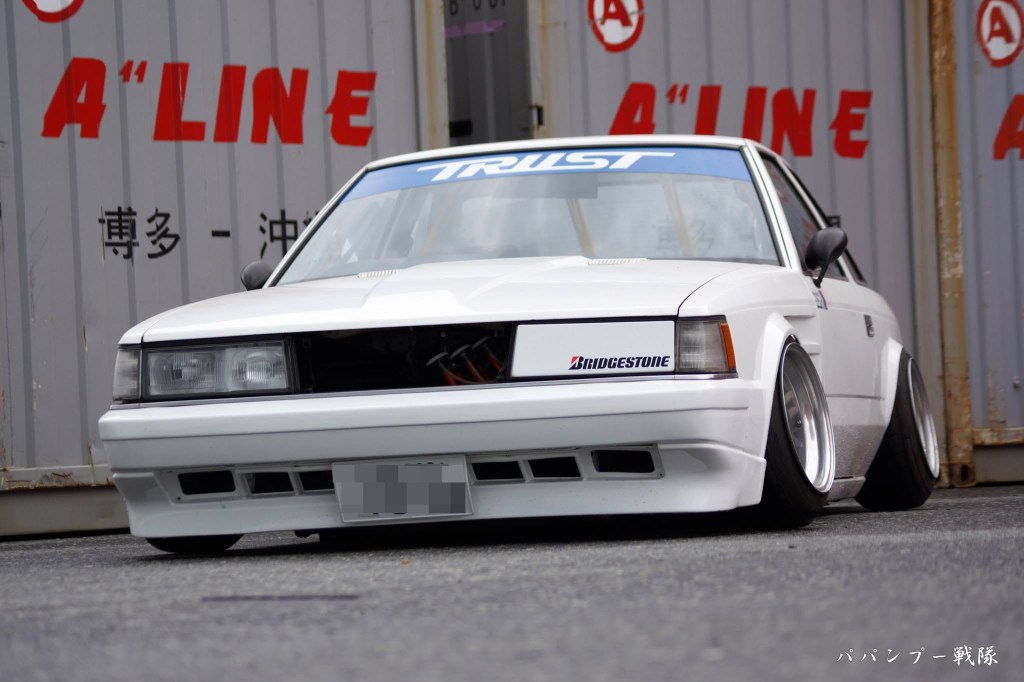
Yuuichirou Momoki GX81 @gx61yuuichirou (14x10j A-type, 175/60)
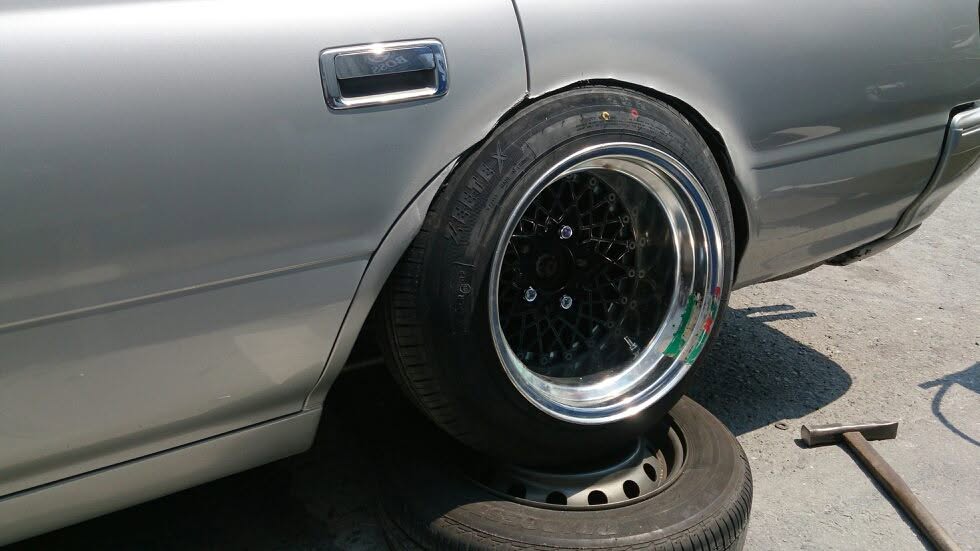
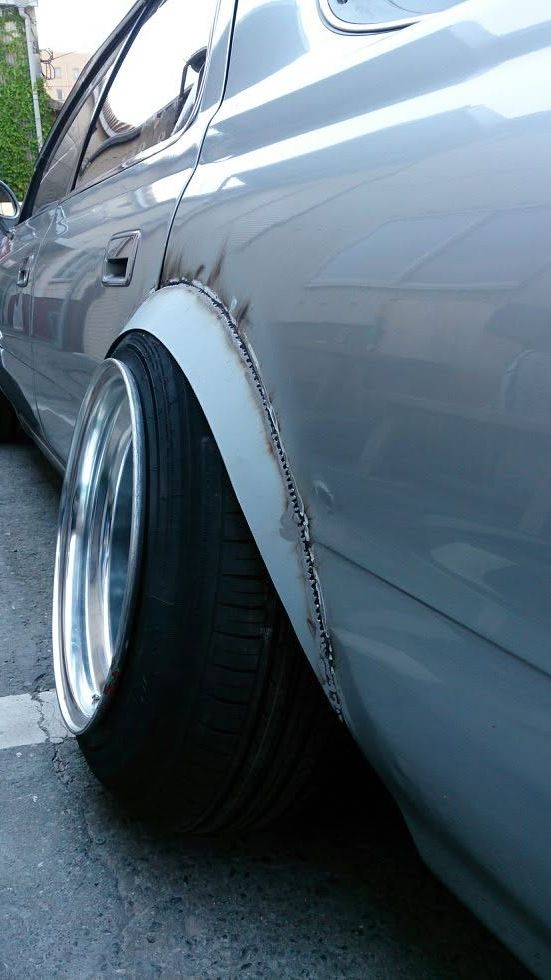
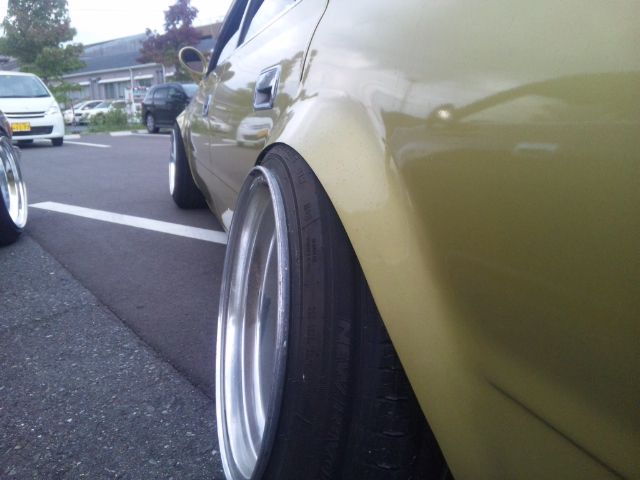
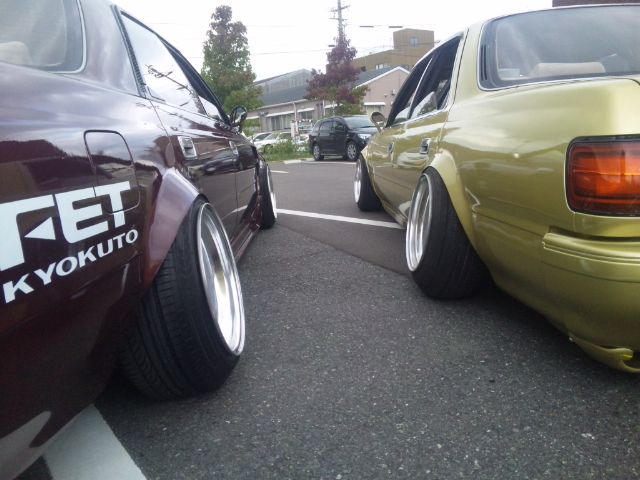
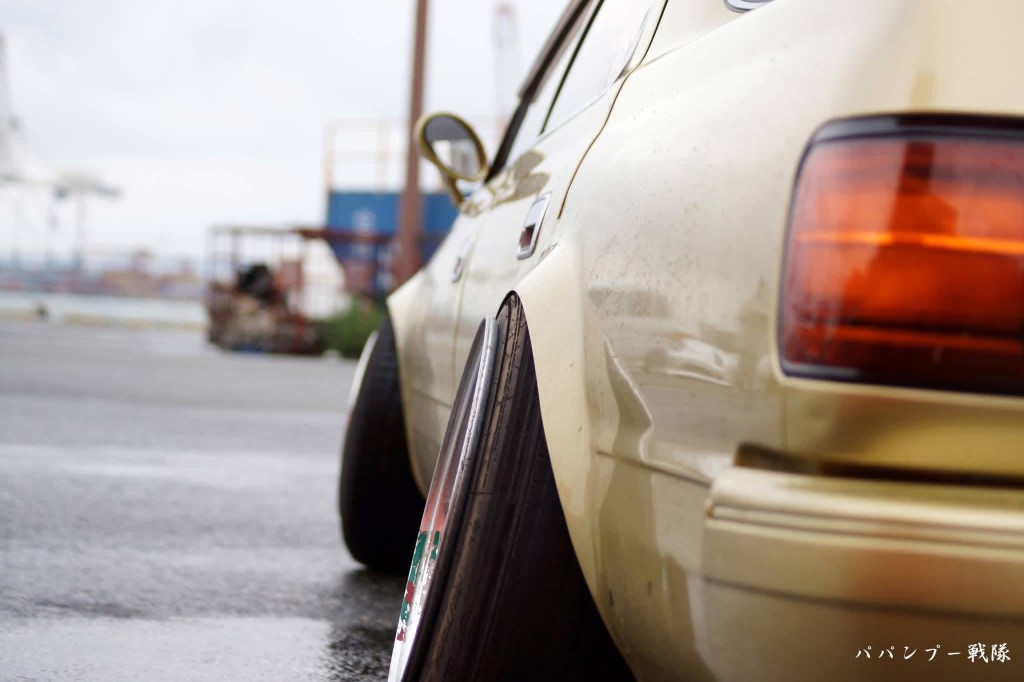
The following examples are of high cut アーチ上げ metal fenders
Ryo Endo GX61 (14x12j B-type, 205/60)
Fender is cut well above the door line.
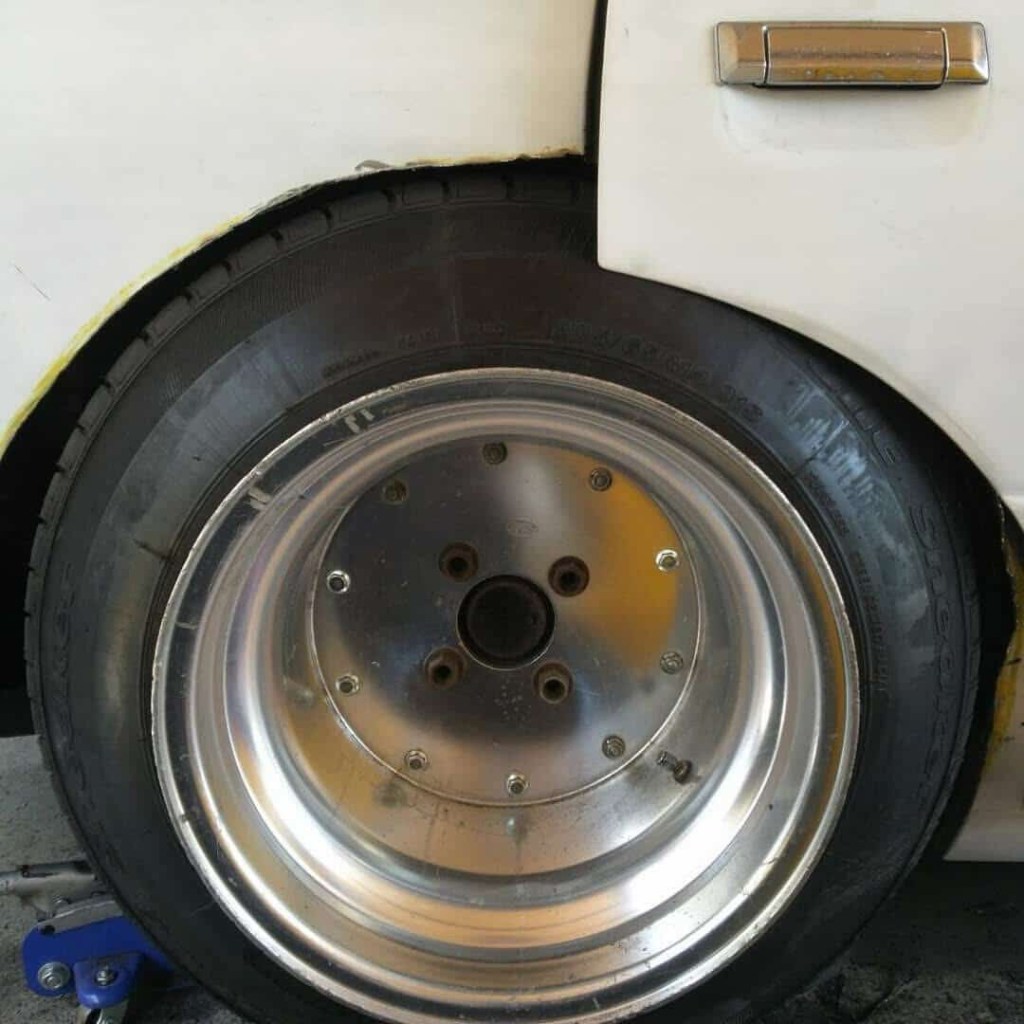
Inner door jamb is cut for tire clearance.
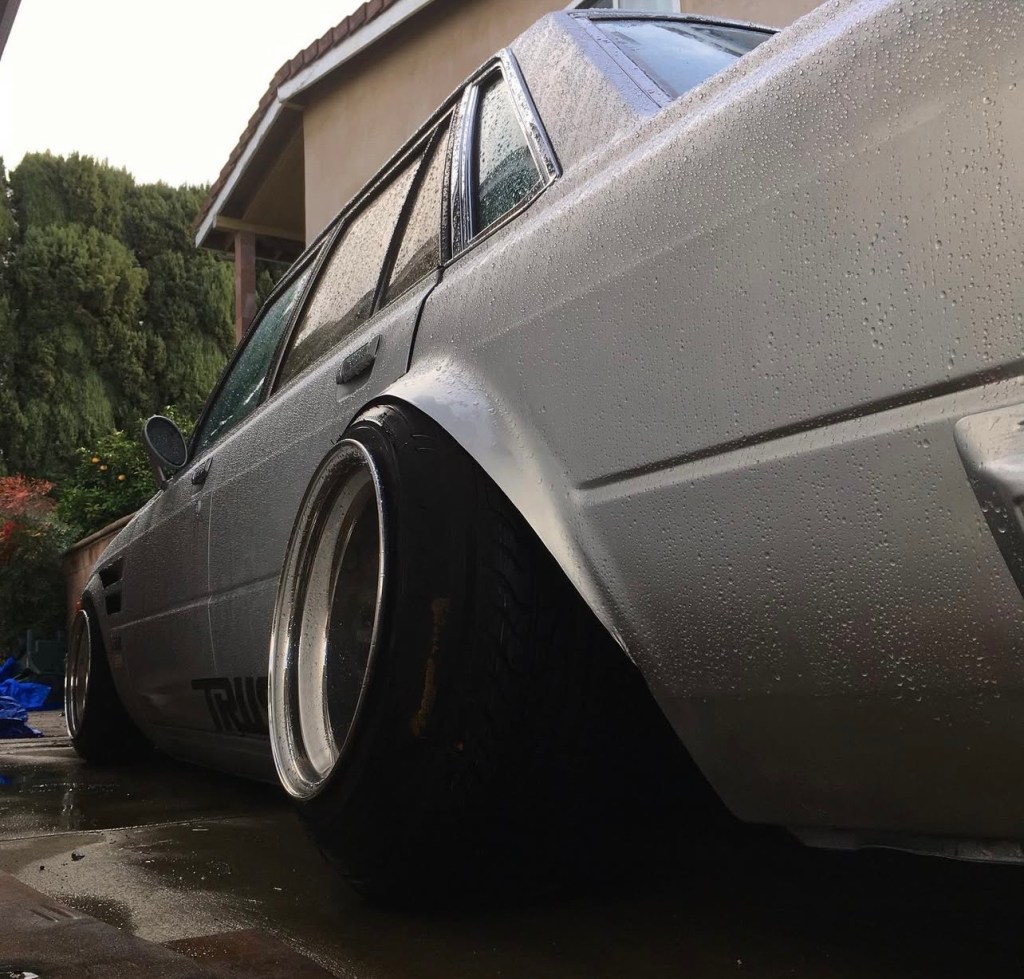
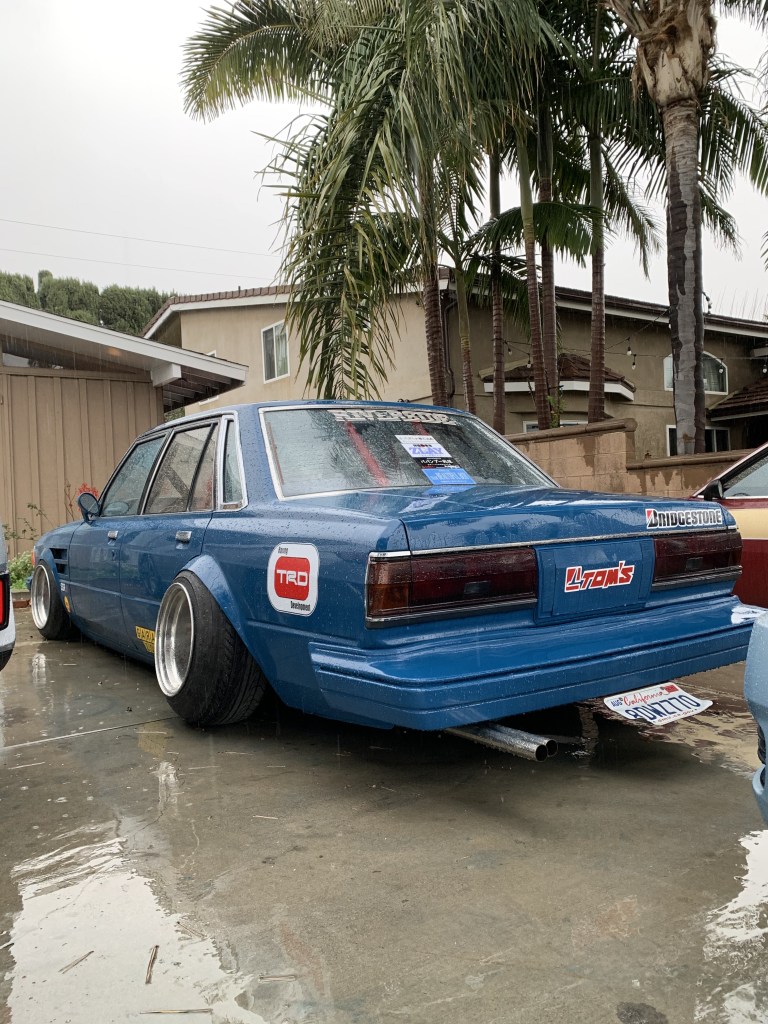
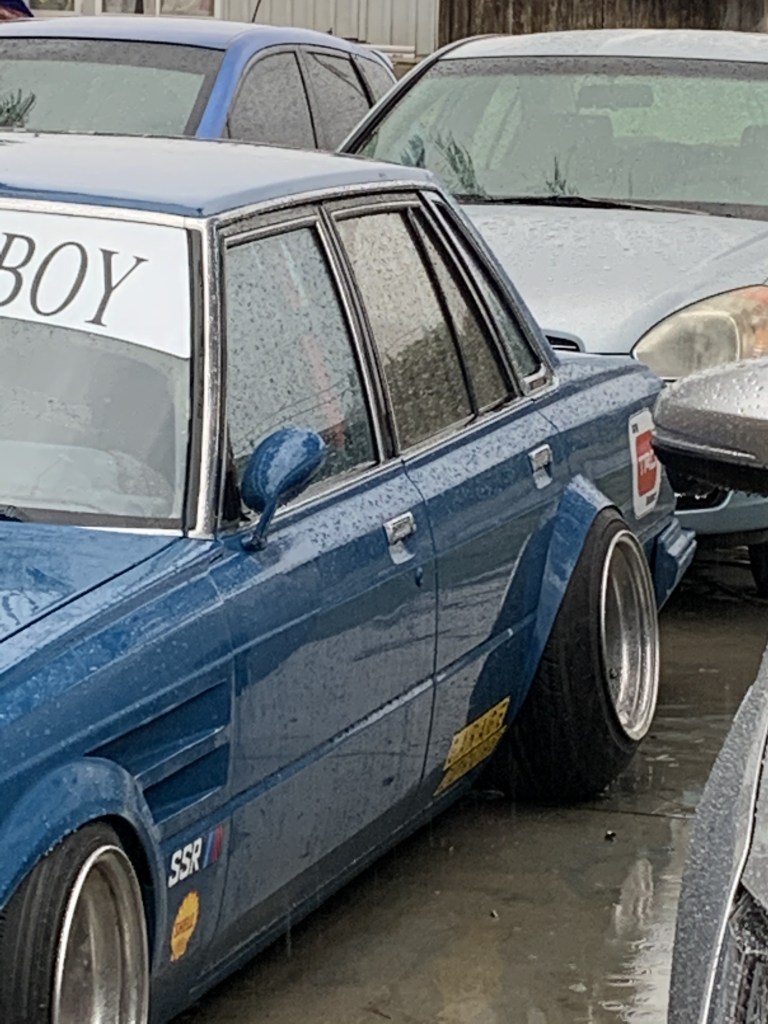
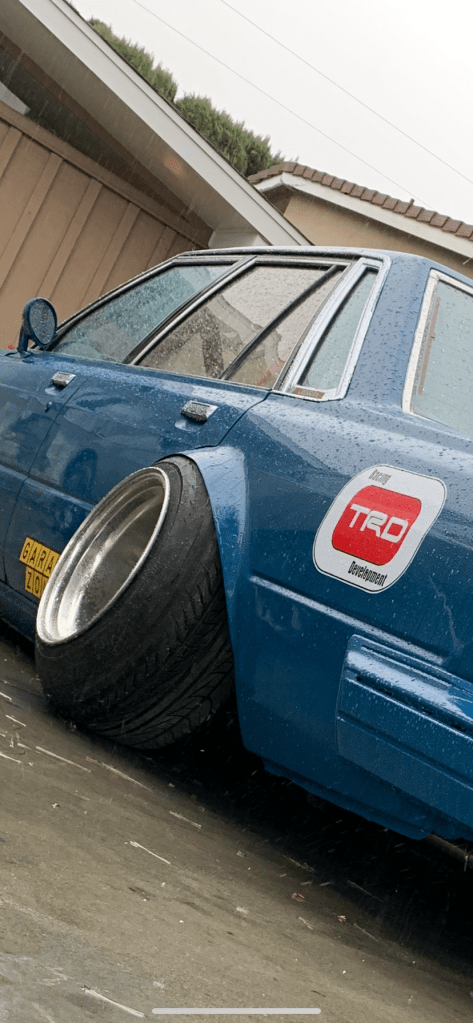
Garlido MX63 @garlido (14x12j A-type, 205/60)
Directly inspired by Ryo Endo GX61. High cut.
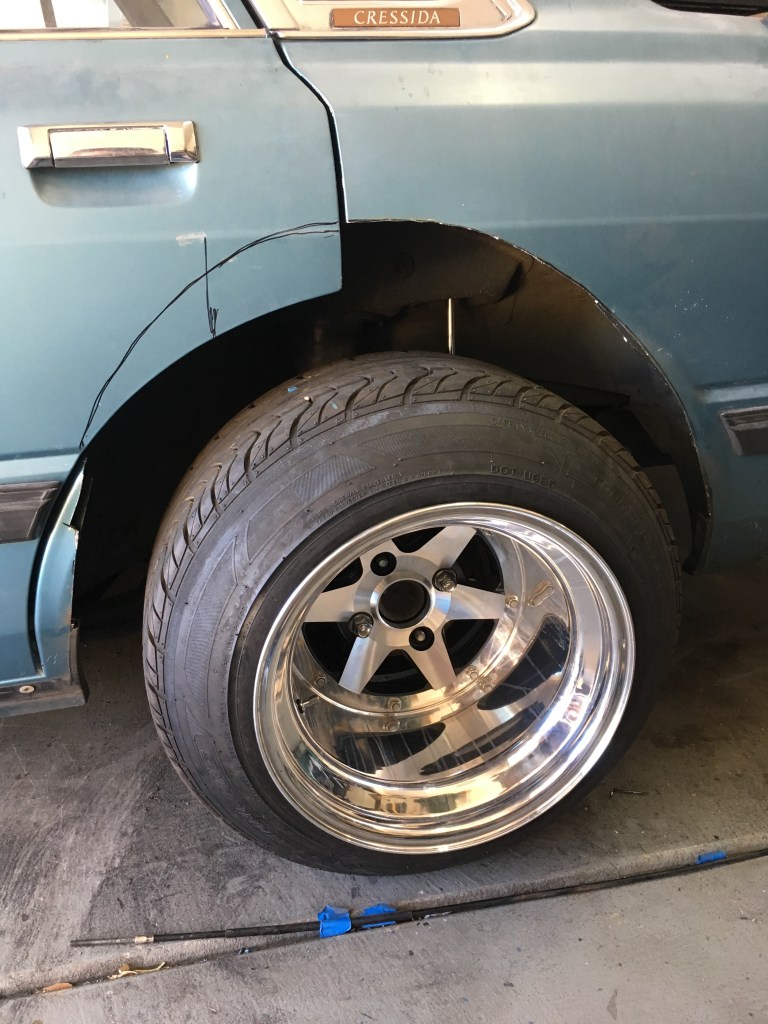

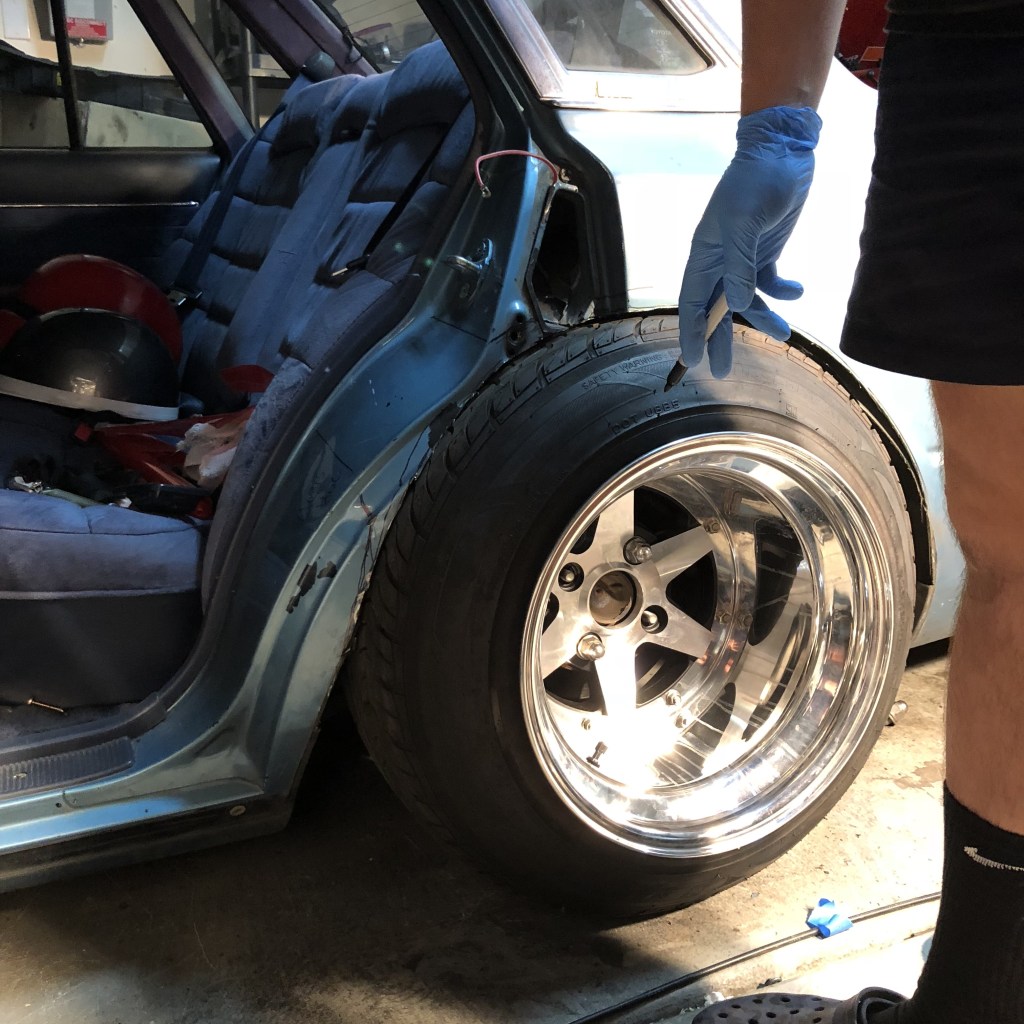
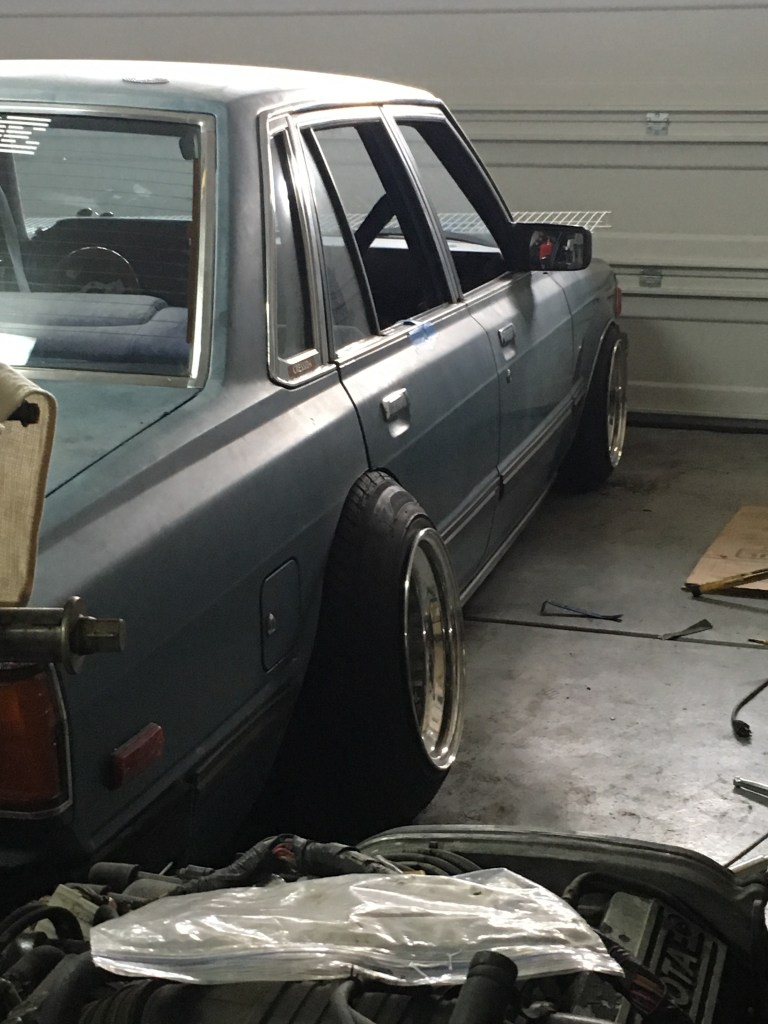
I often use cardboard as my template, although in the future I will probably use paper or some sort of card stock. Cardboard is stiff and hard to bend smoothly.

Initial small fender,
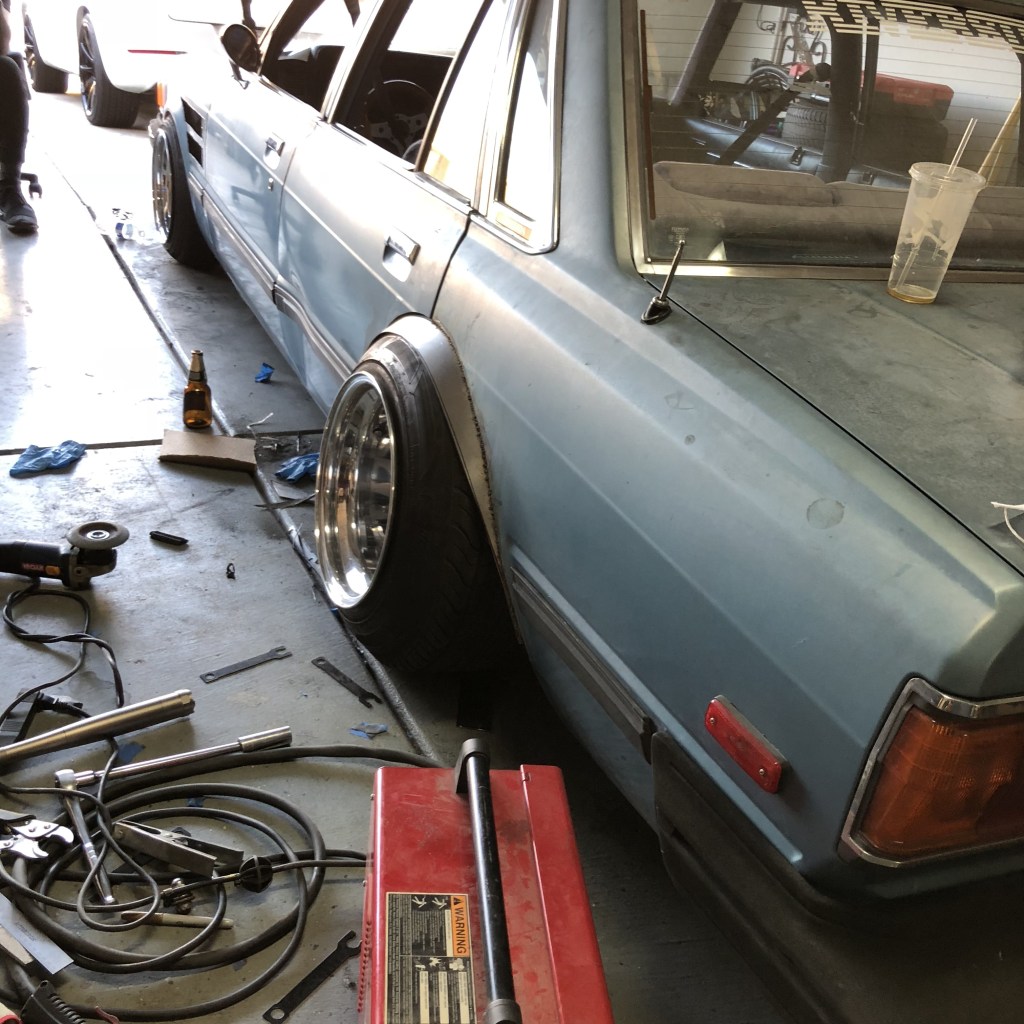
I later cut the fender off to make it larger.
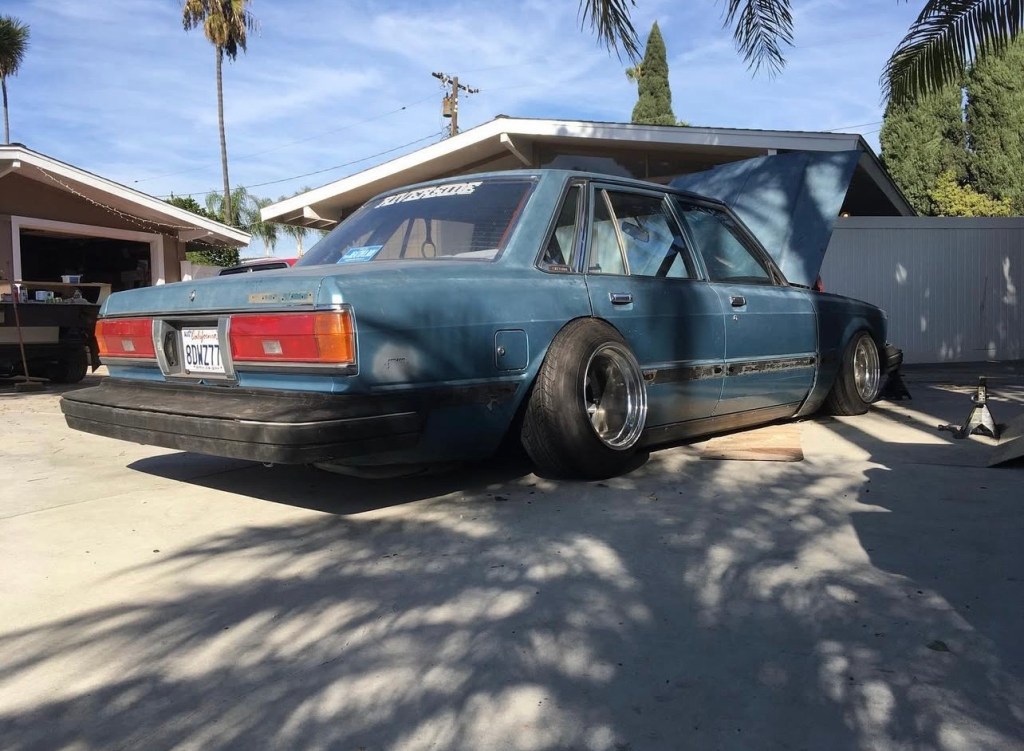
Redone taller fender.


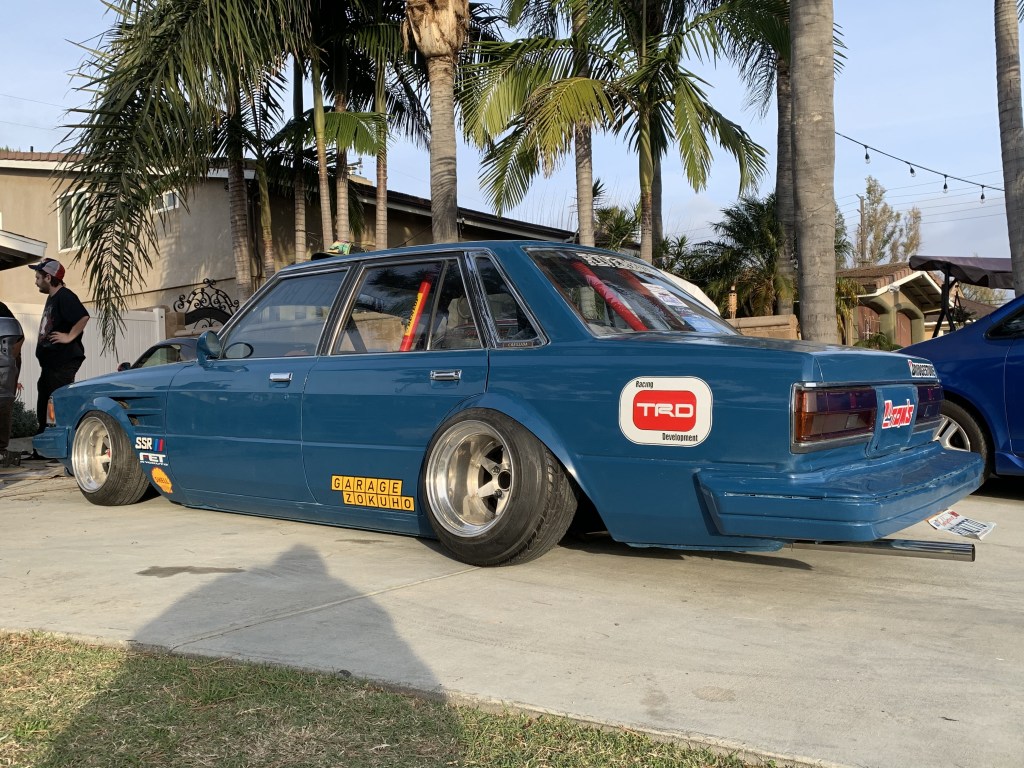
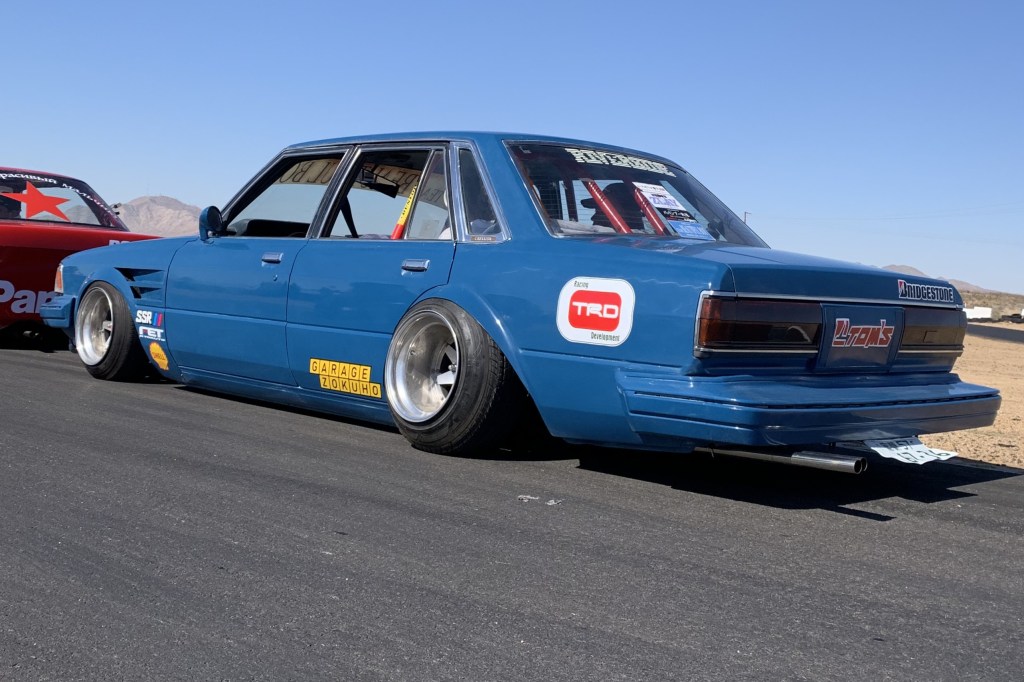
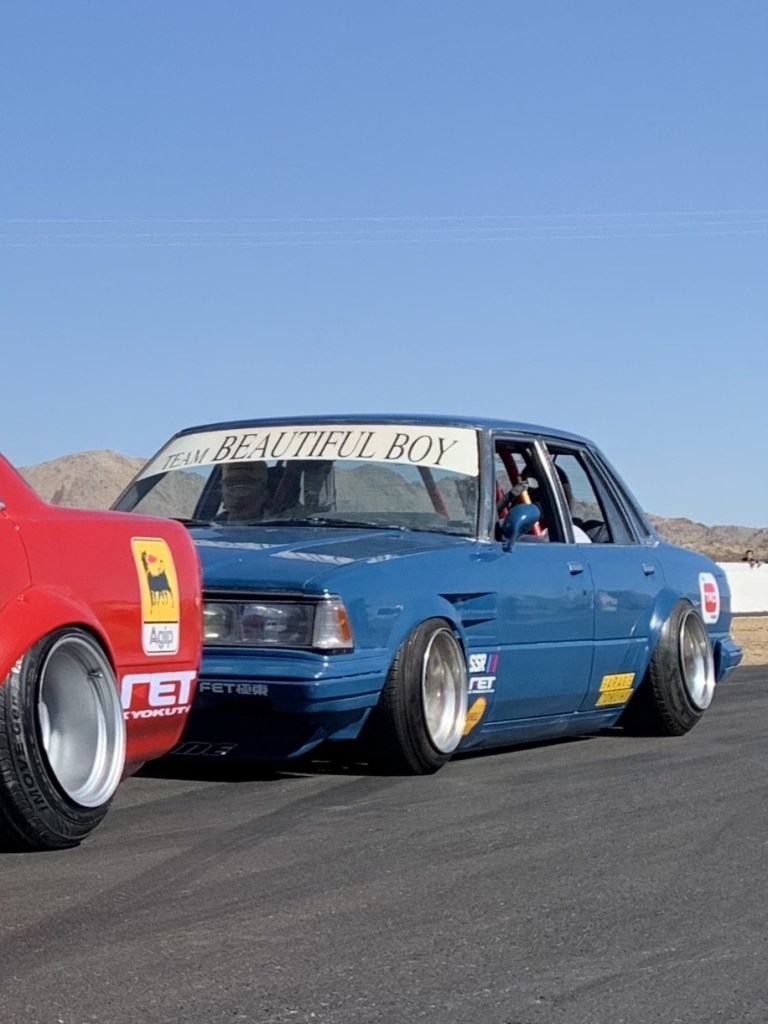
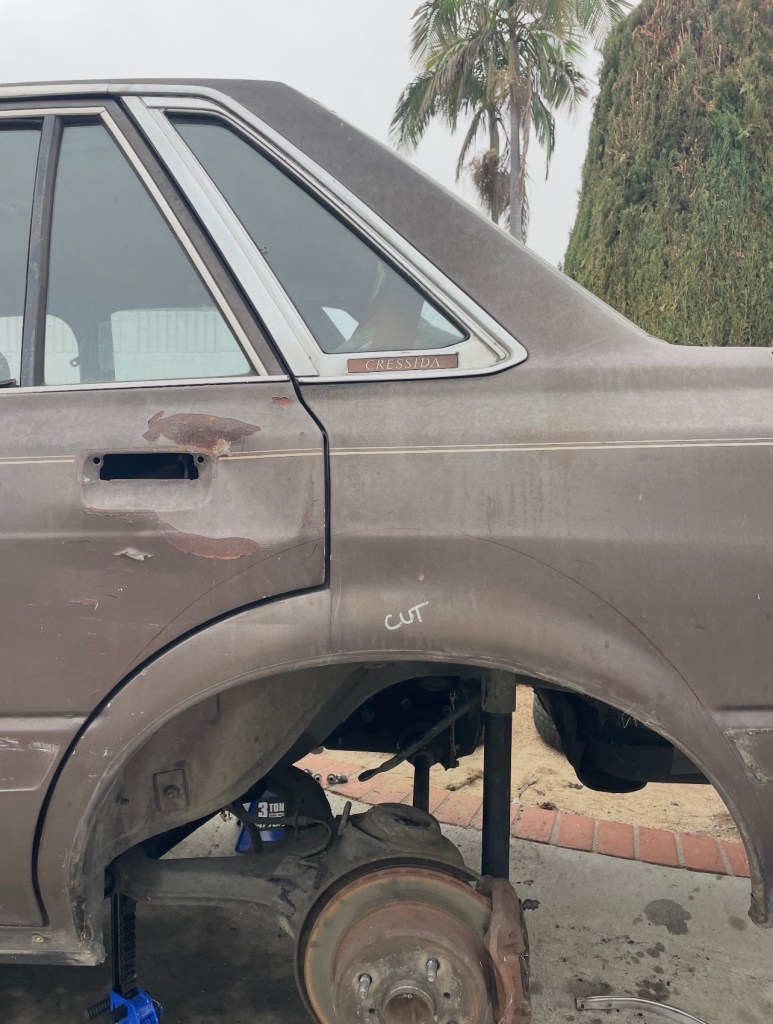
Ralph MX63 (14x?j A-type, 205/60)
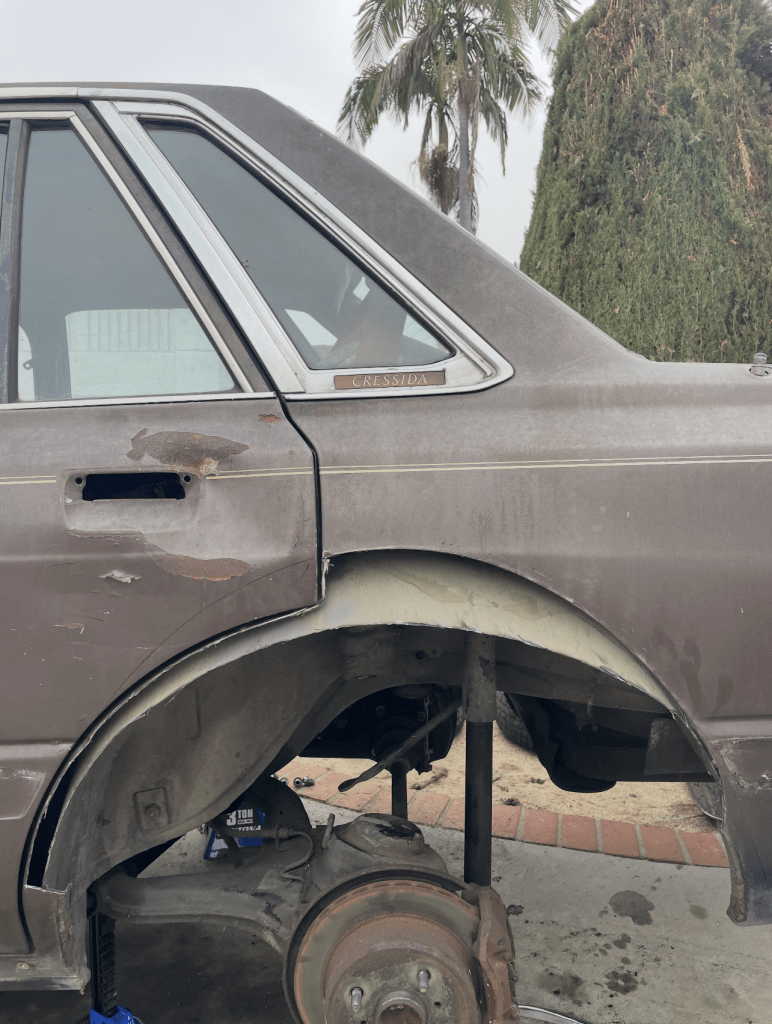
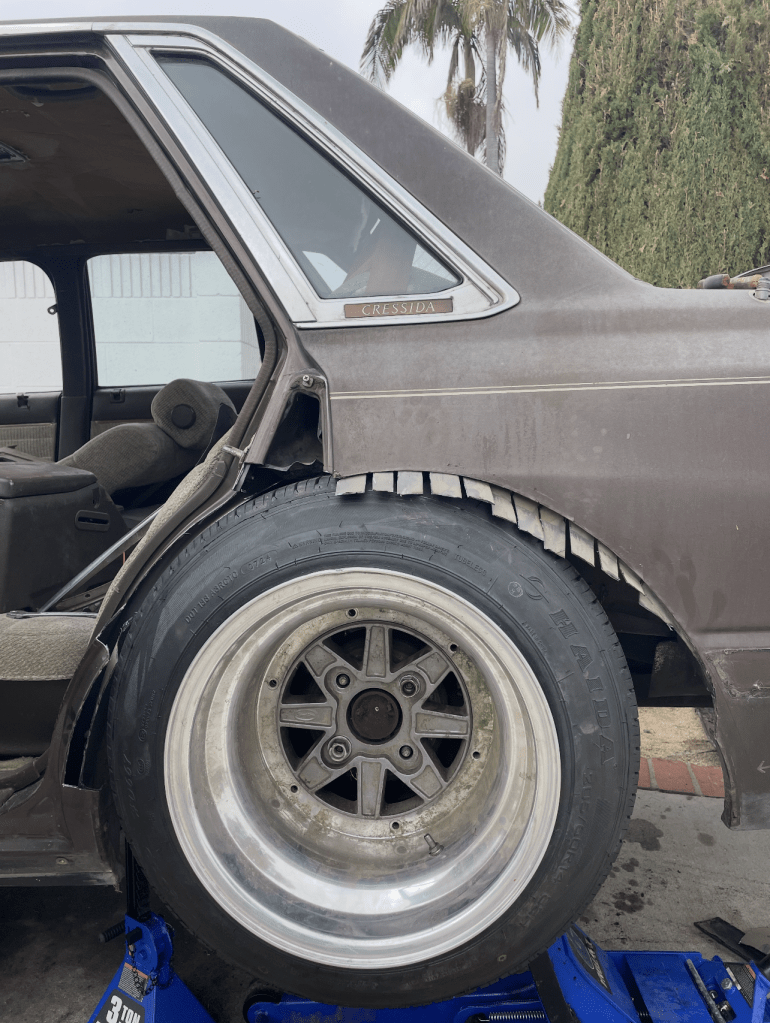
Ralph uses a tape template here.
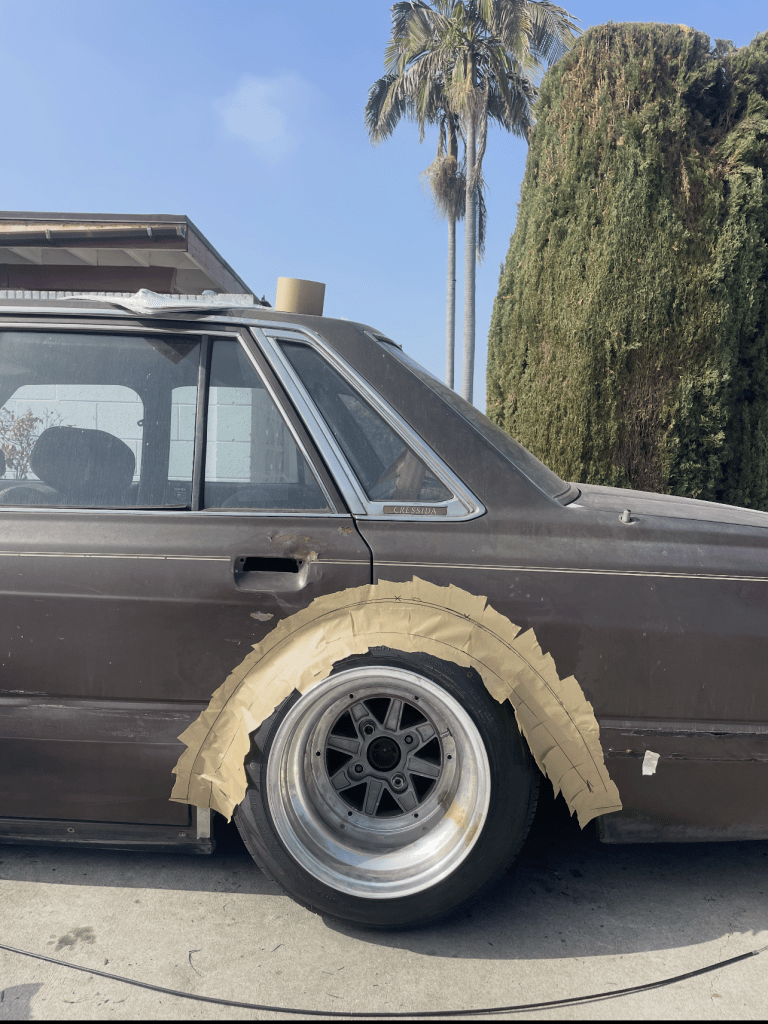
Tape is transferred to card stock.
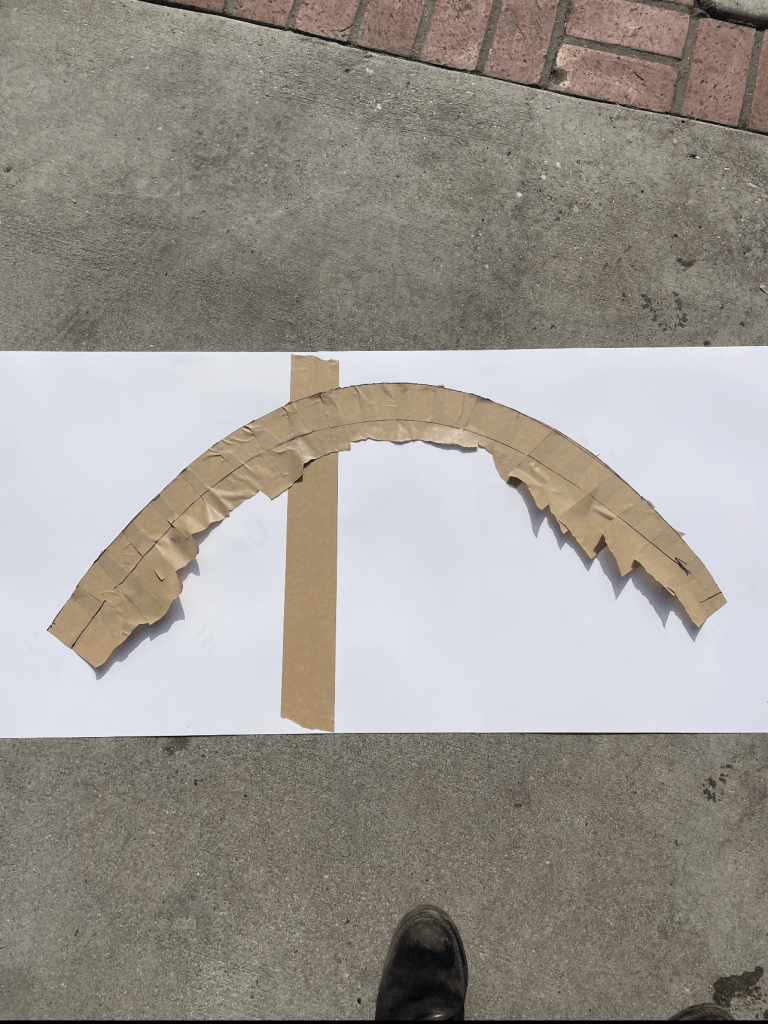
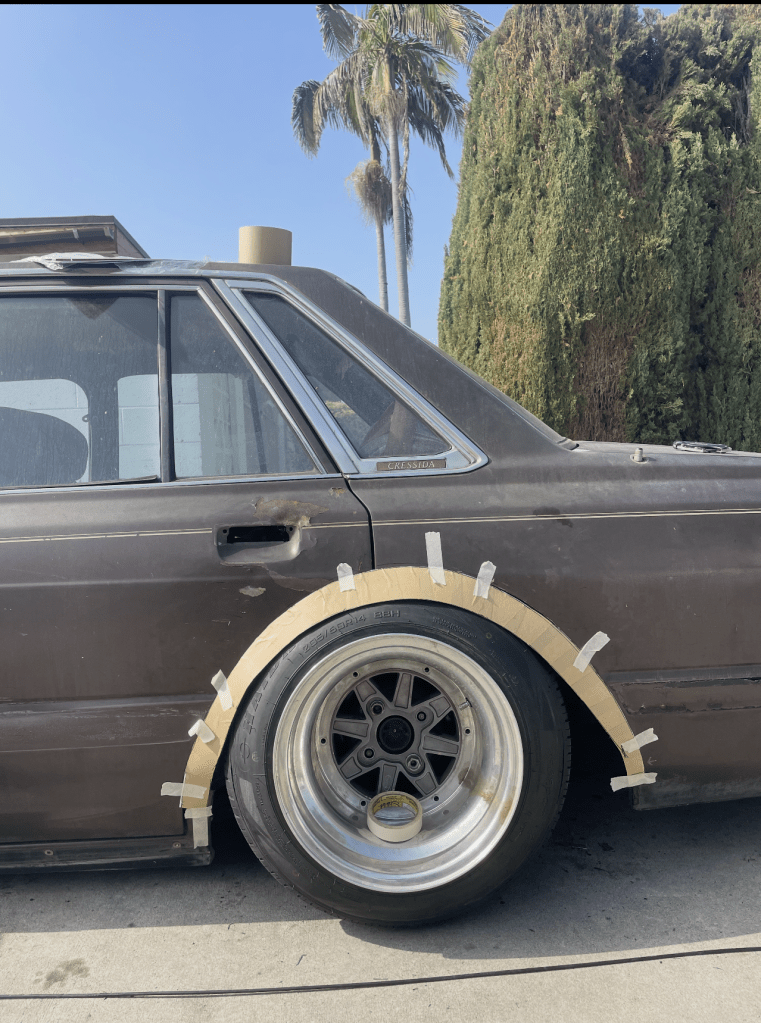
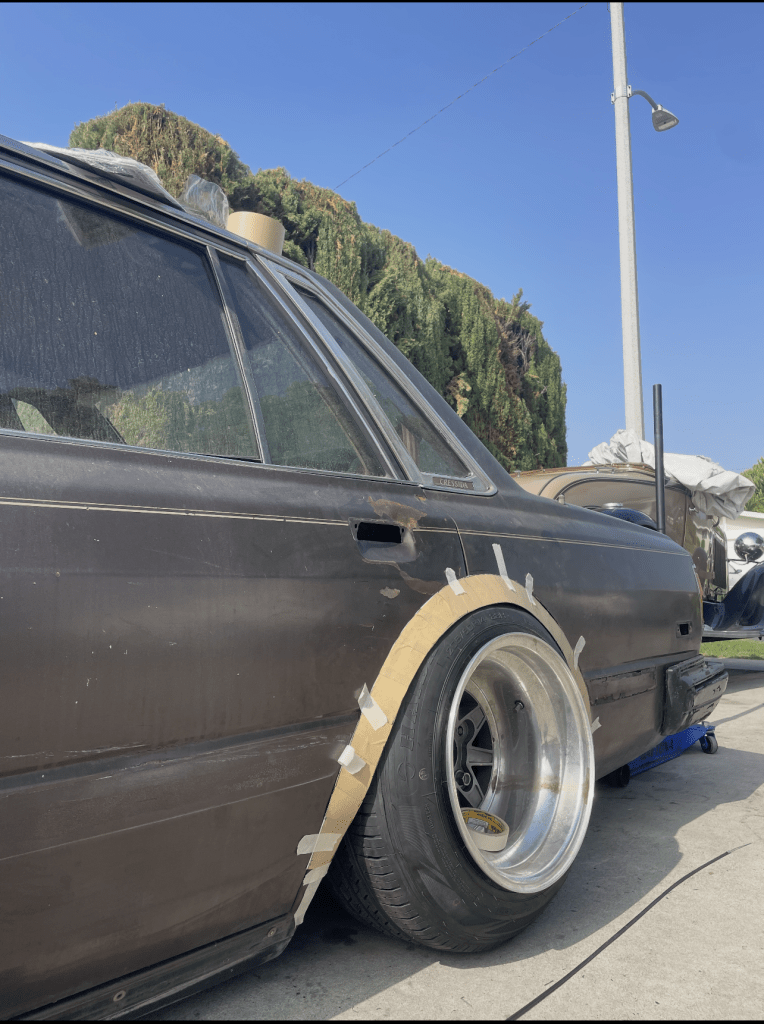

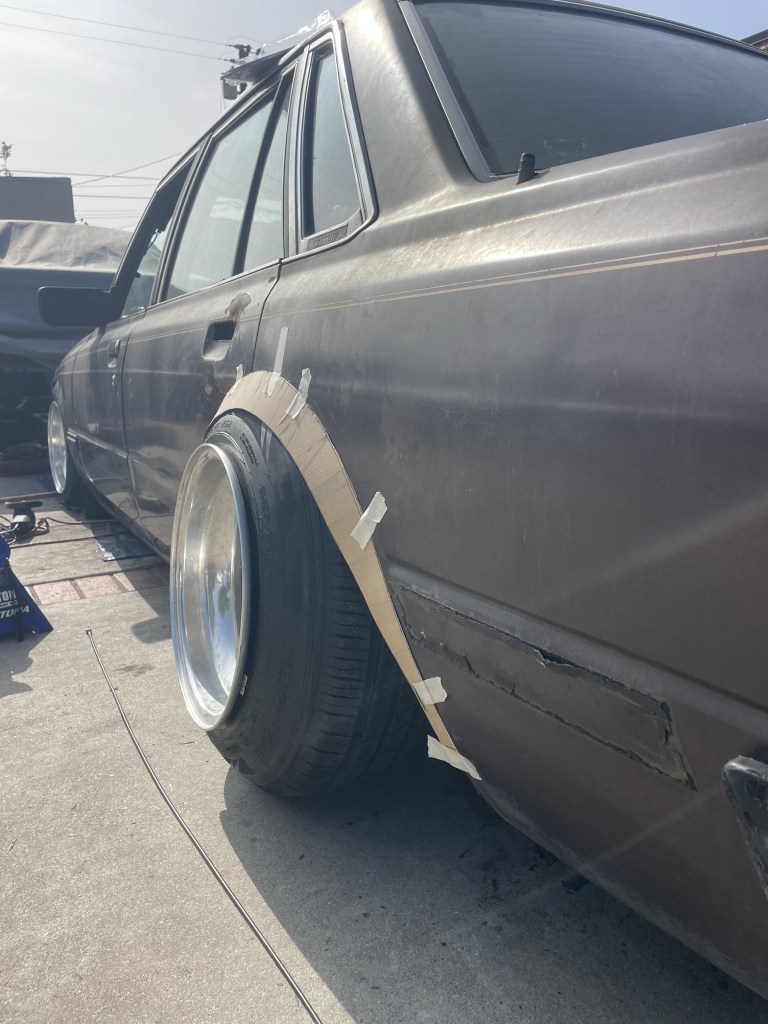
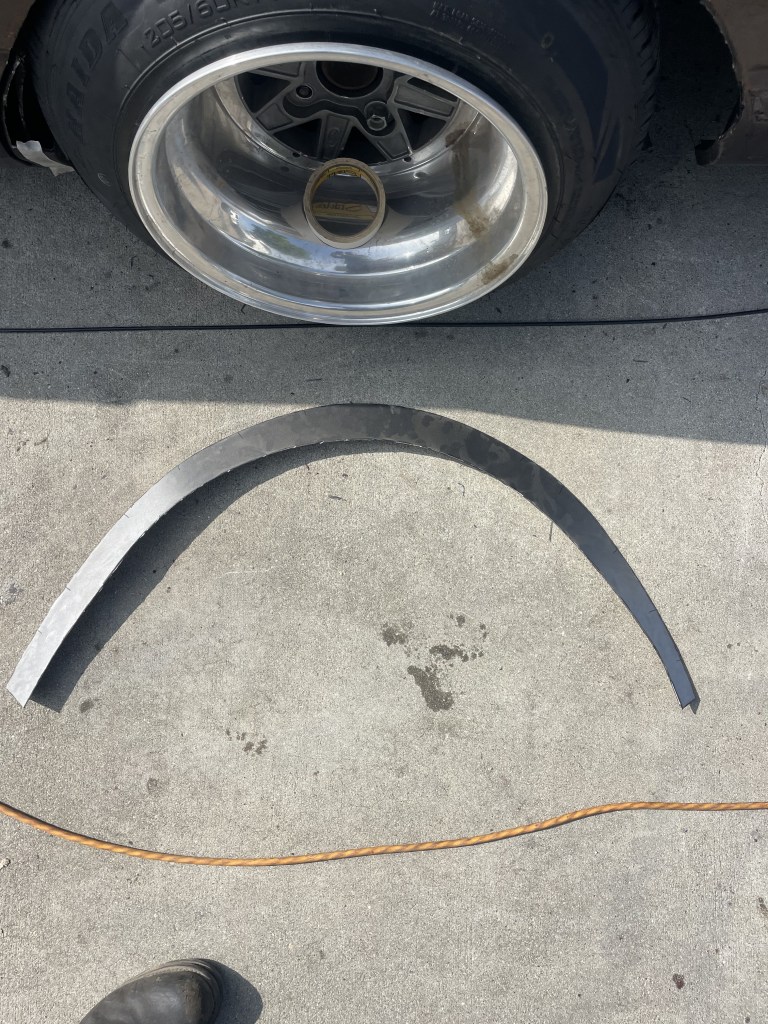
Card stock is used as a template to cut the sheet metal fender.
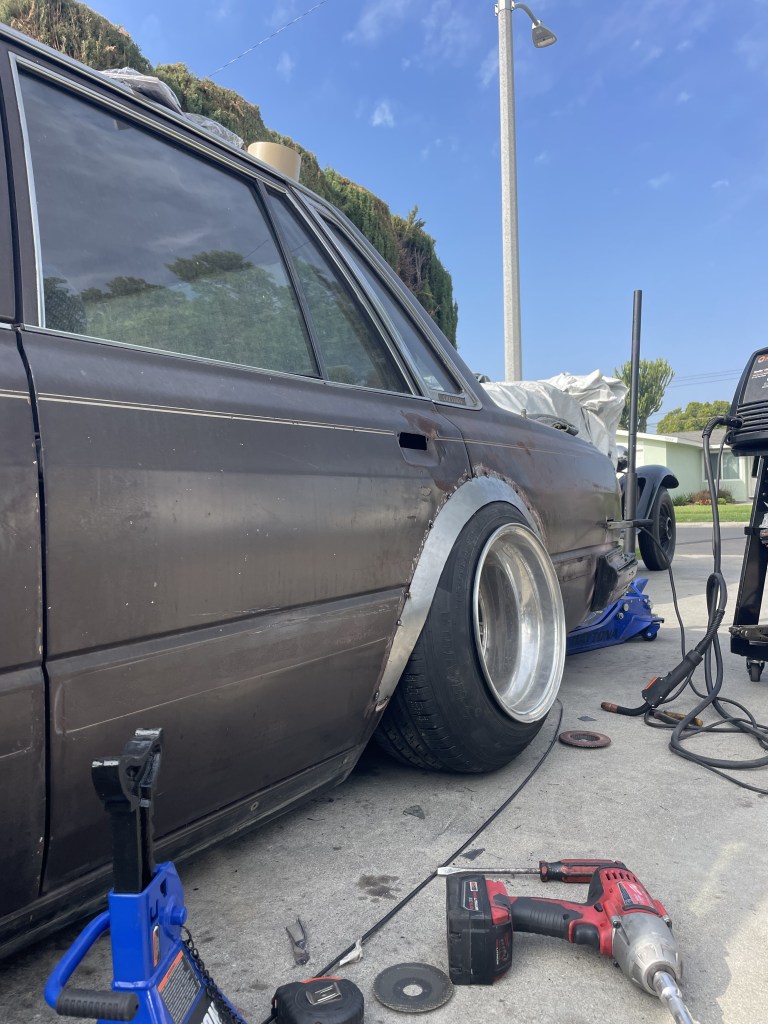
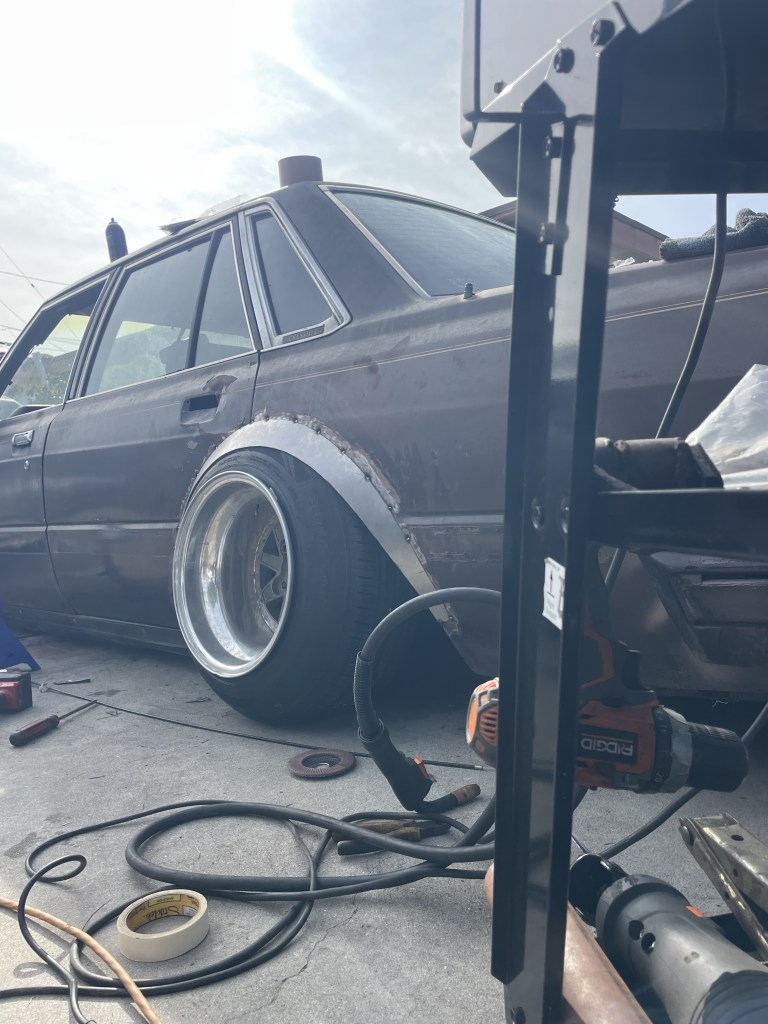
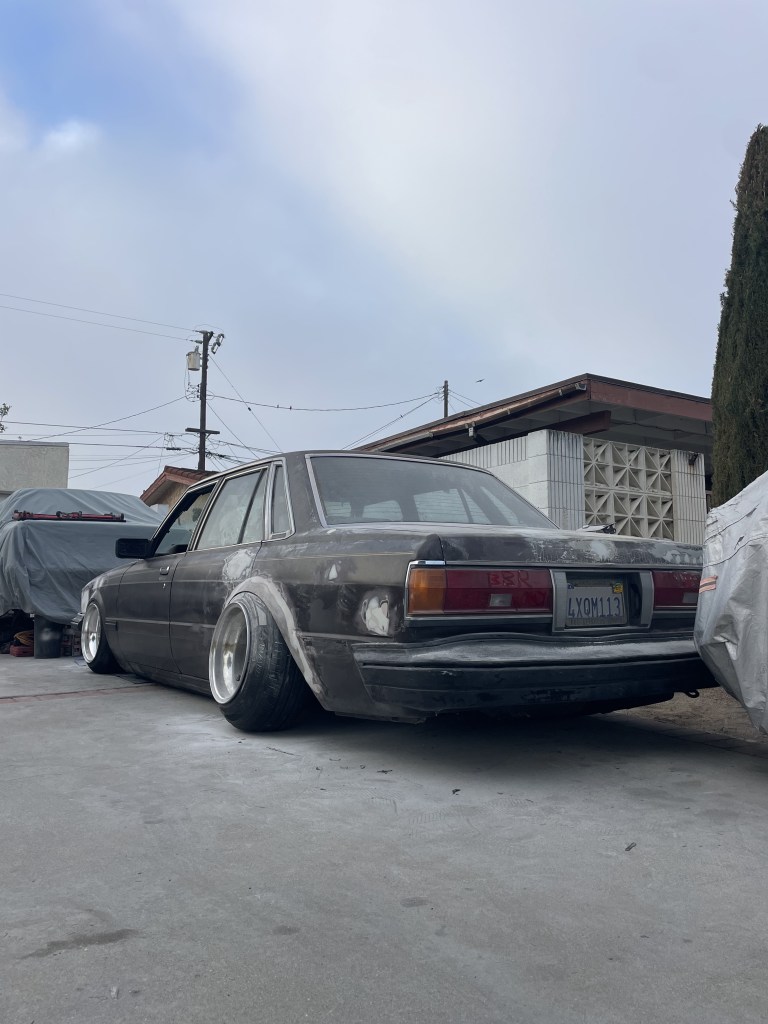

Duncan MX63 @dncnbrks (14×11.5j A-type, 195/60)
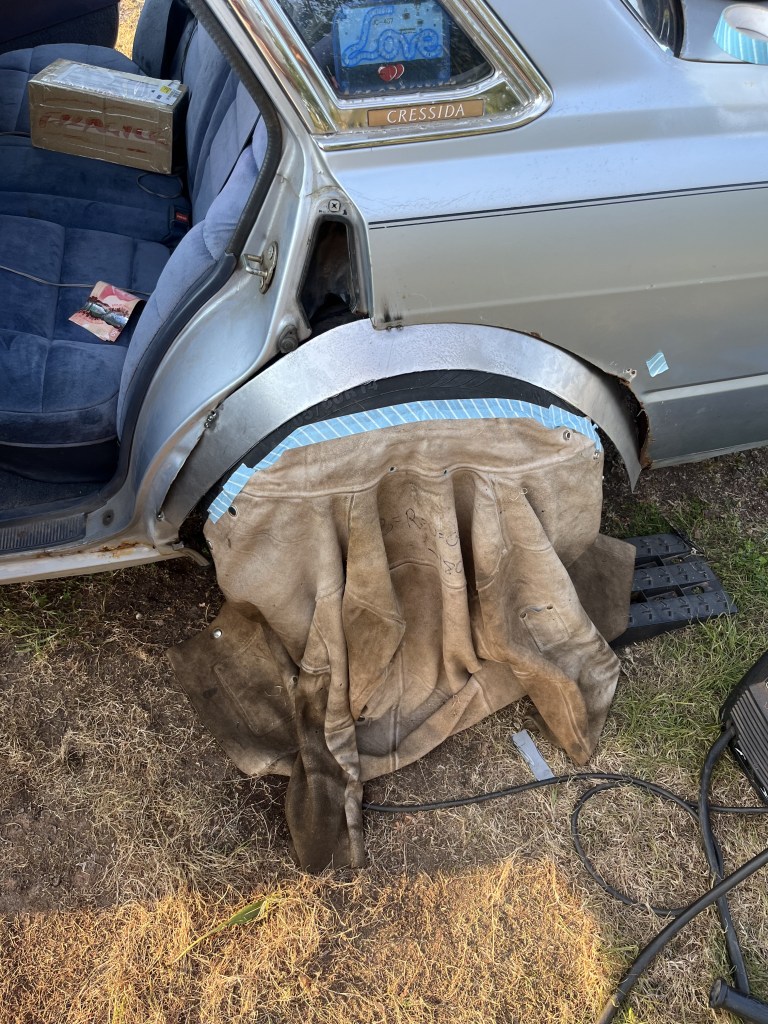
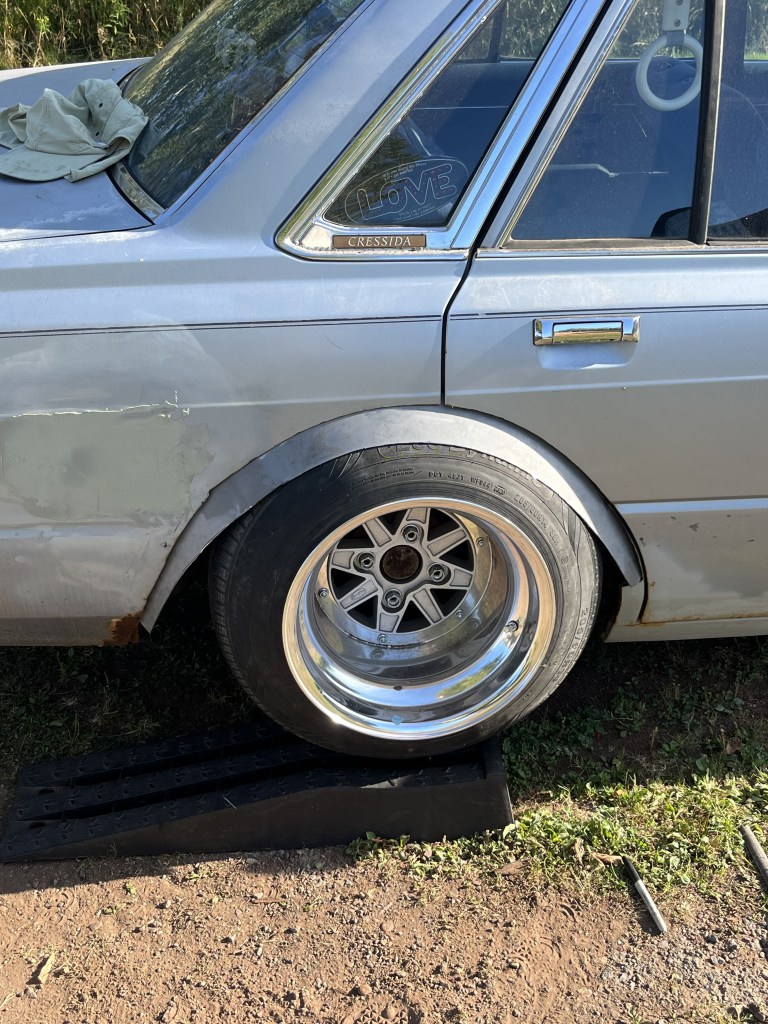
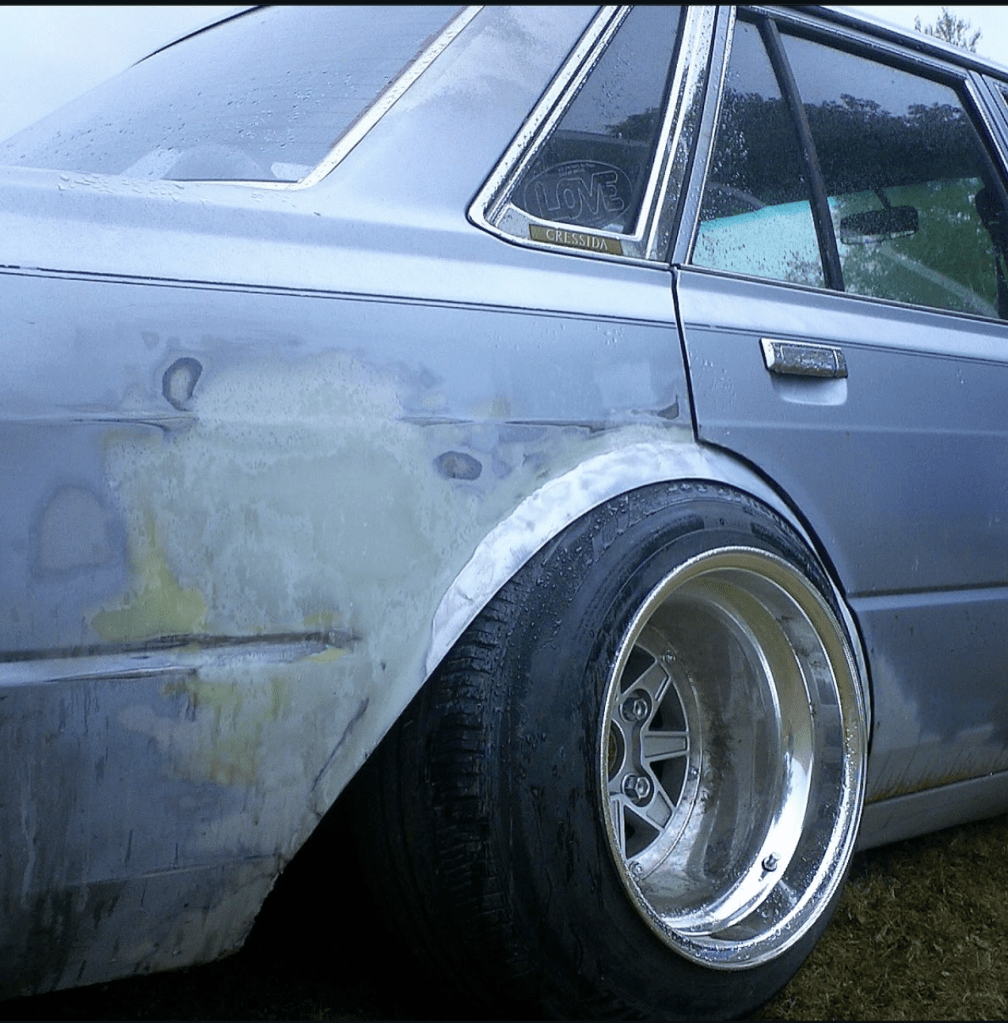
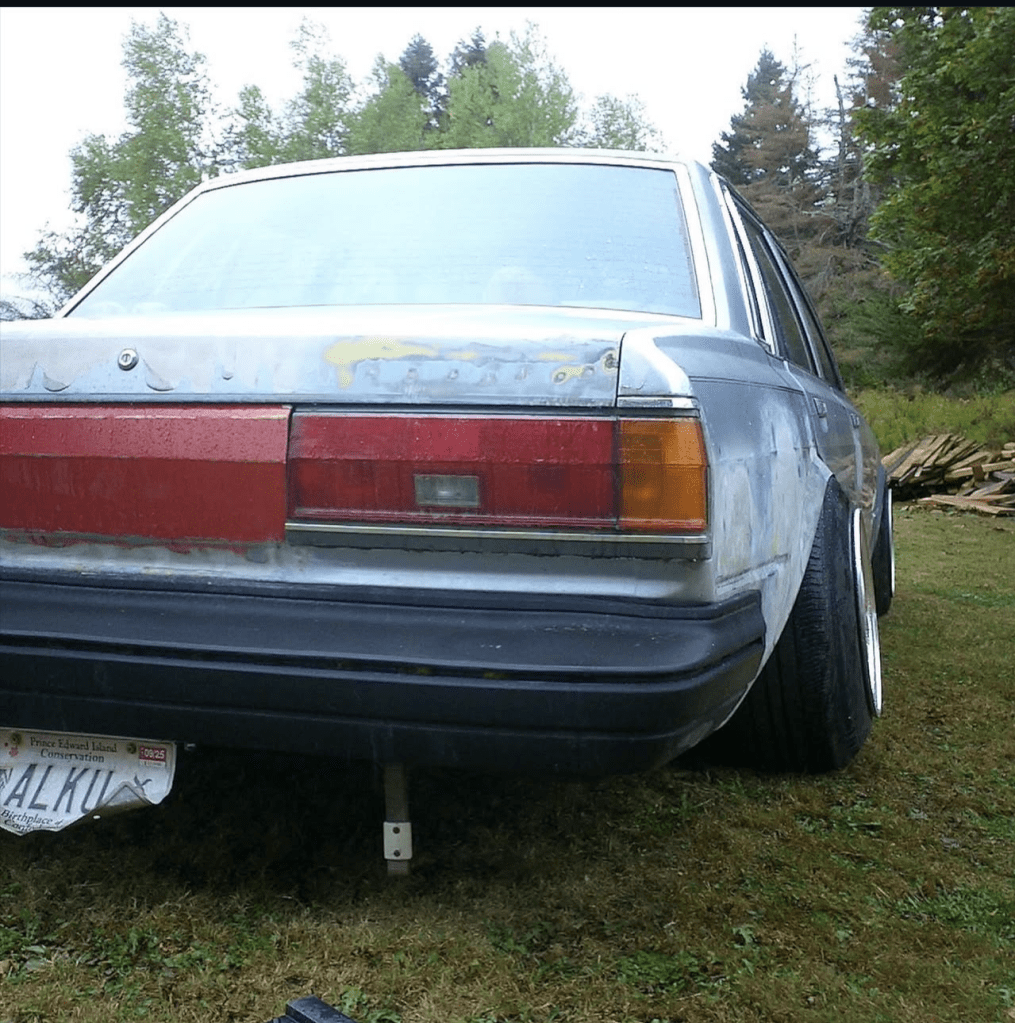

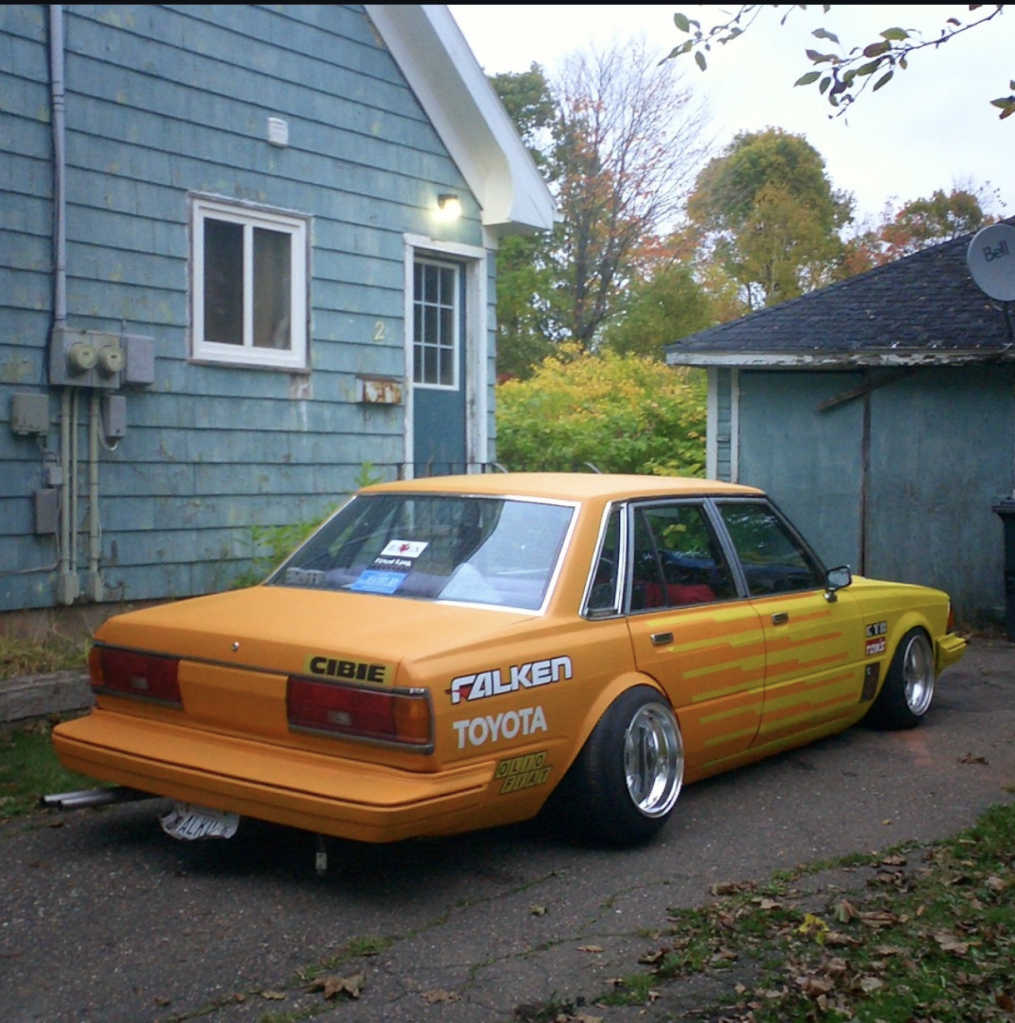
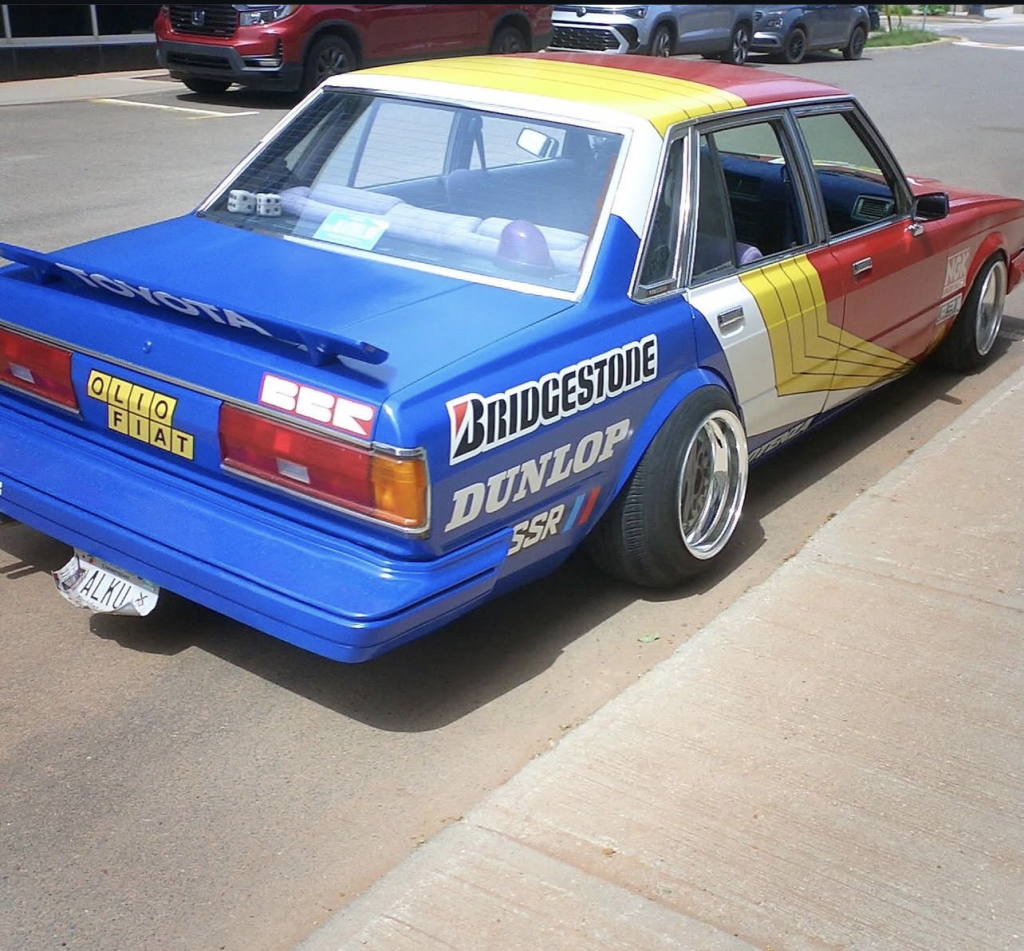
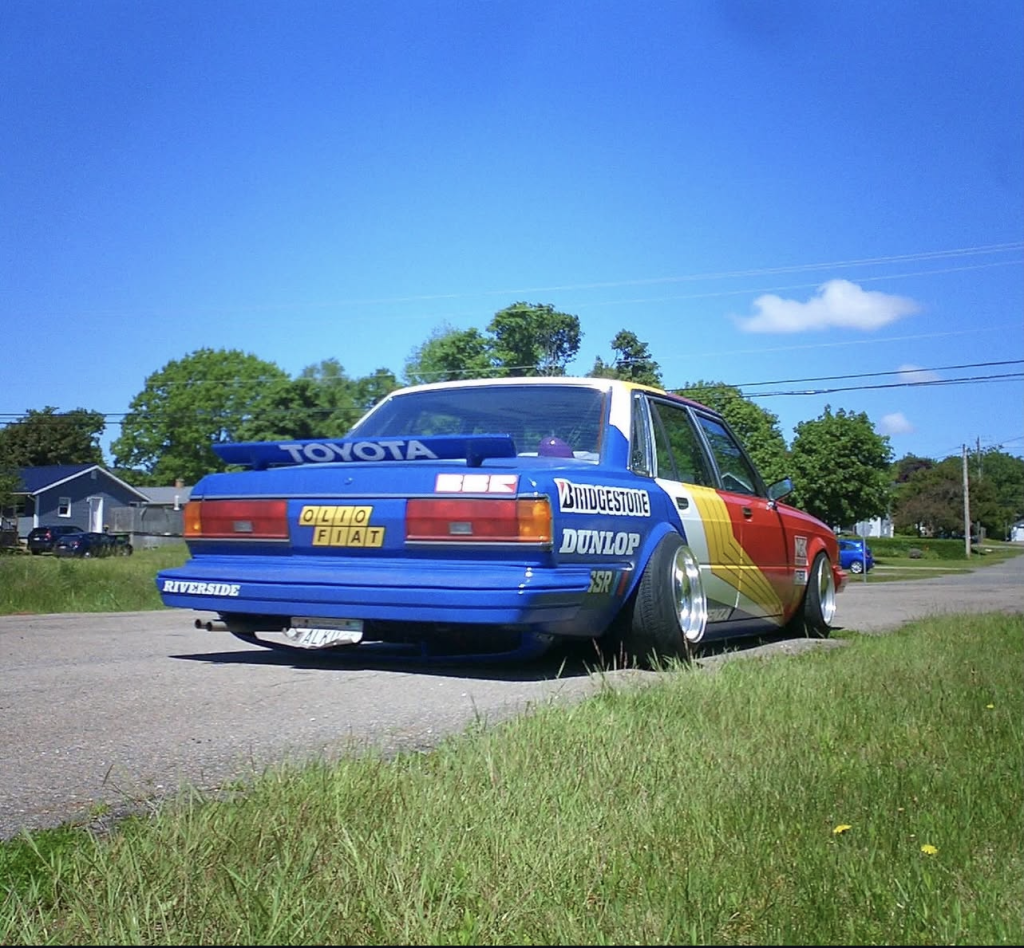
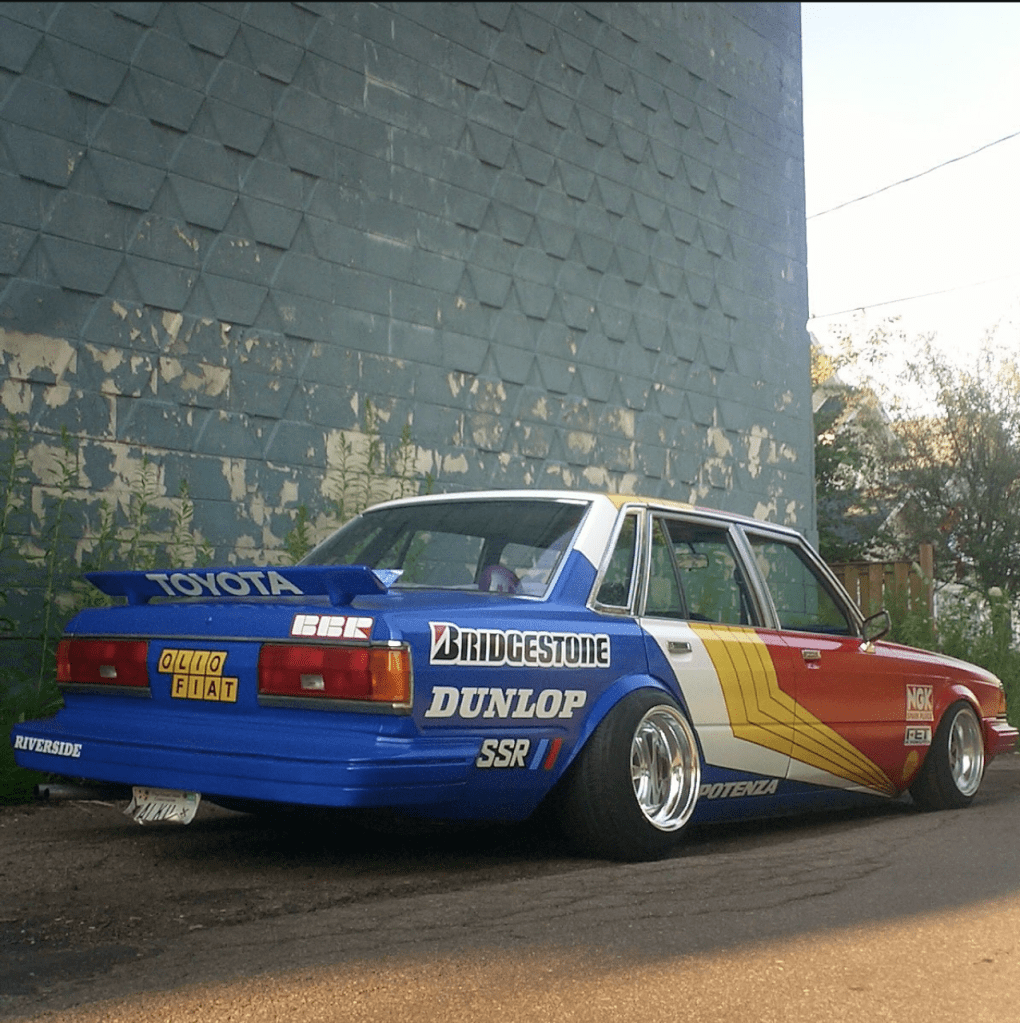
Sam Zaun MX63 @sammypattey (14x11j, 1″ spacer, 195/65)
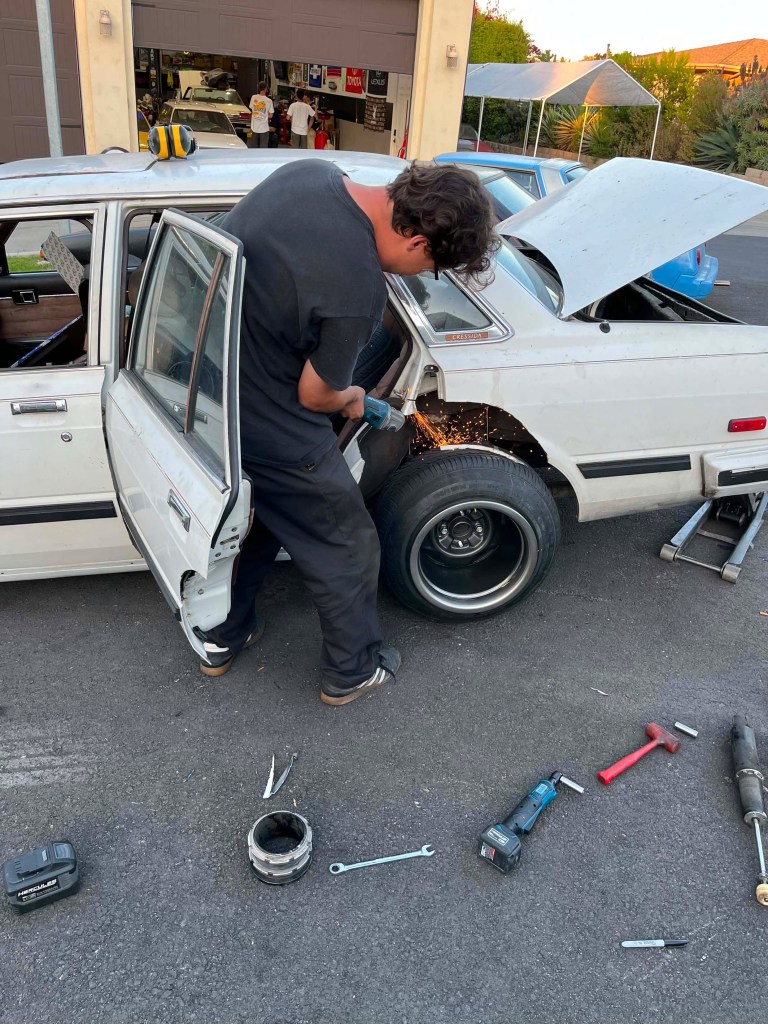
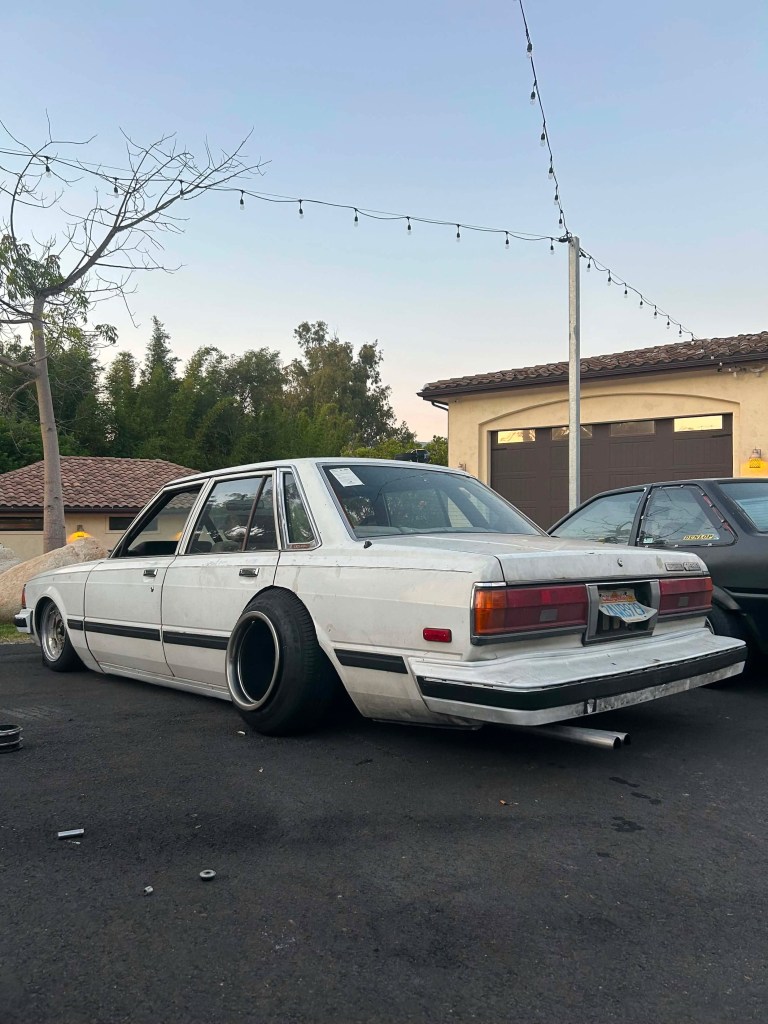
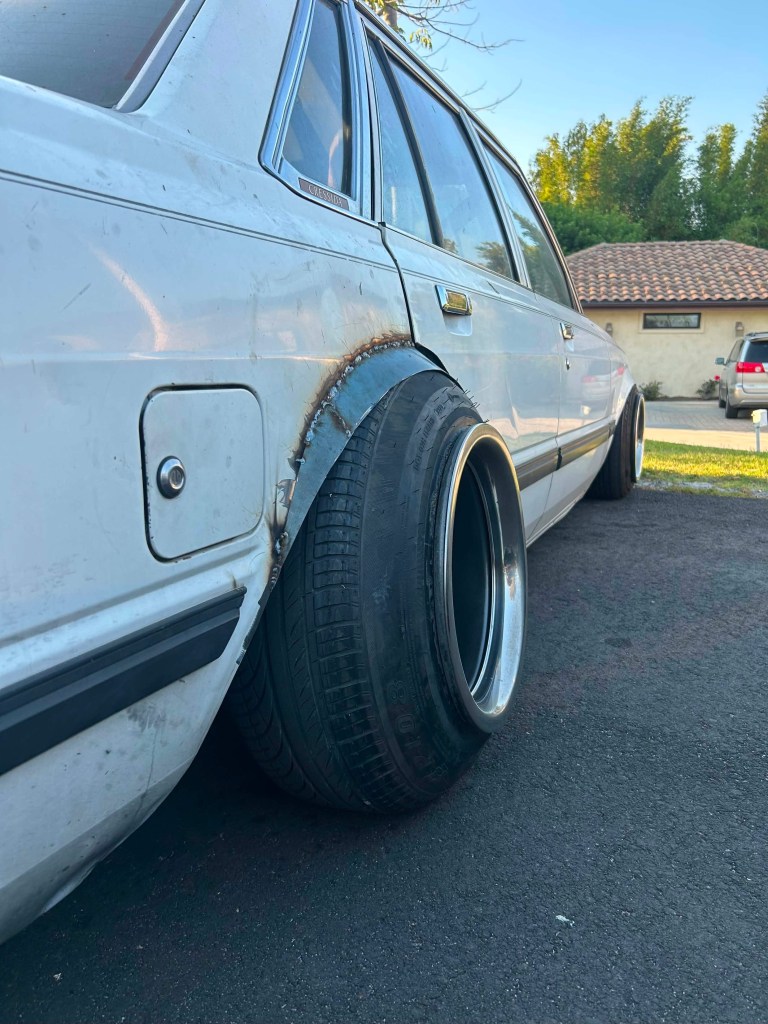
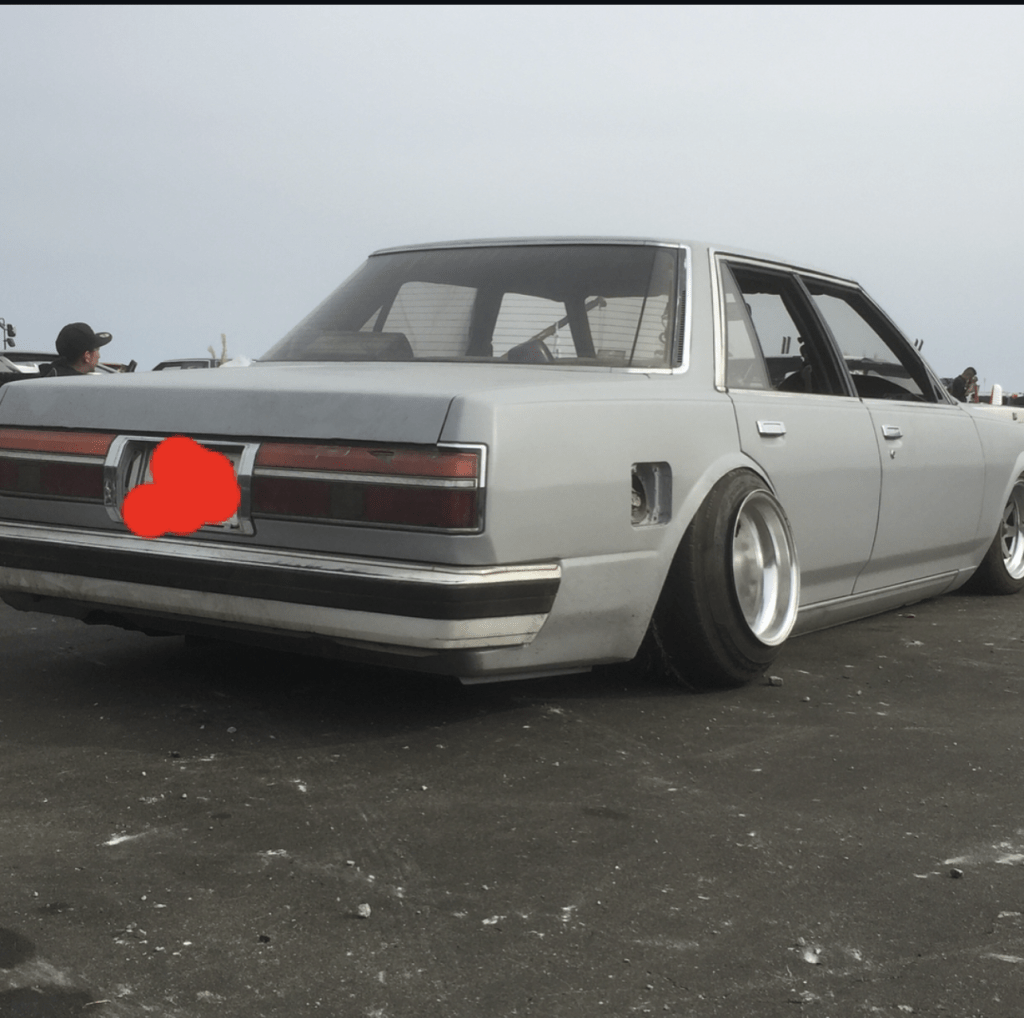
Satoshi Takahashi GX71 @satoshi_takahashi630 (14x12j B-type, 195/60)
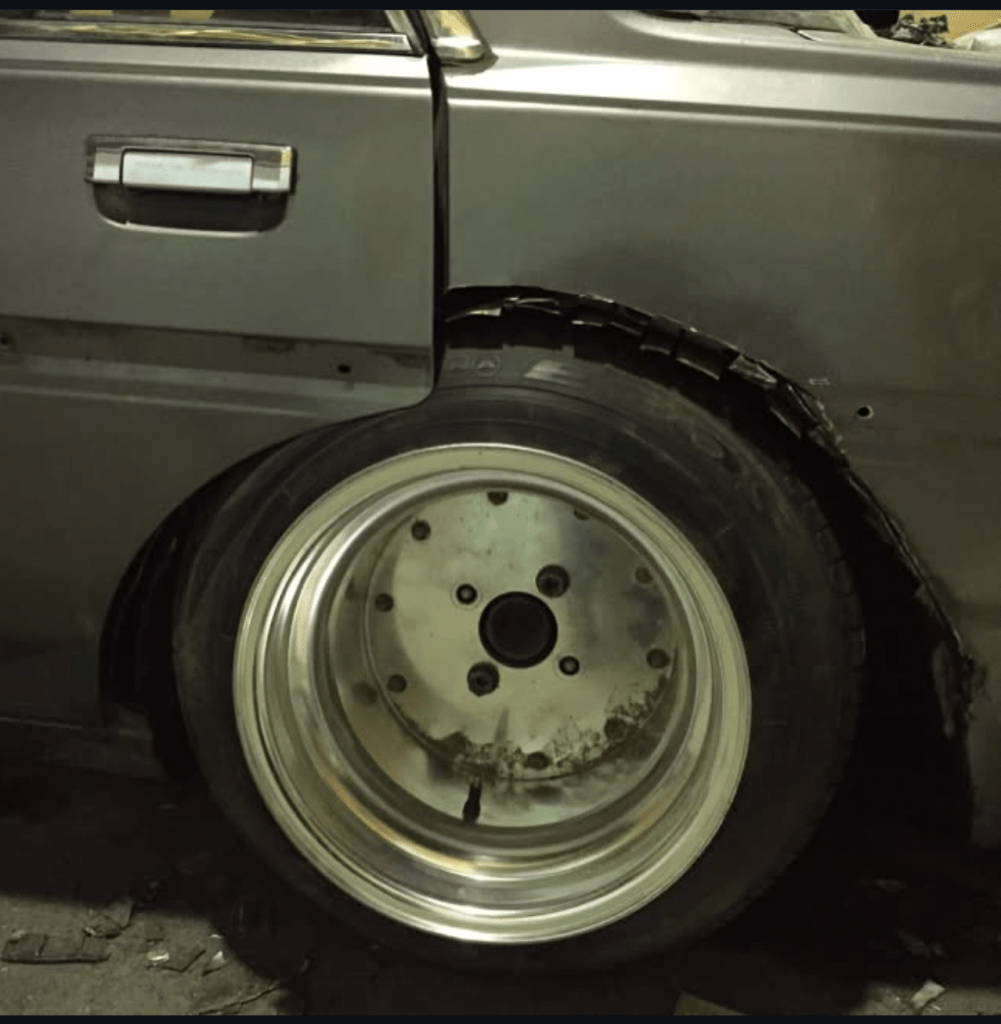
Initial fender is medium sized.
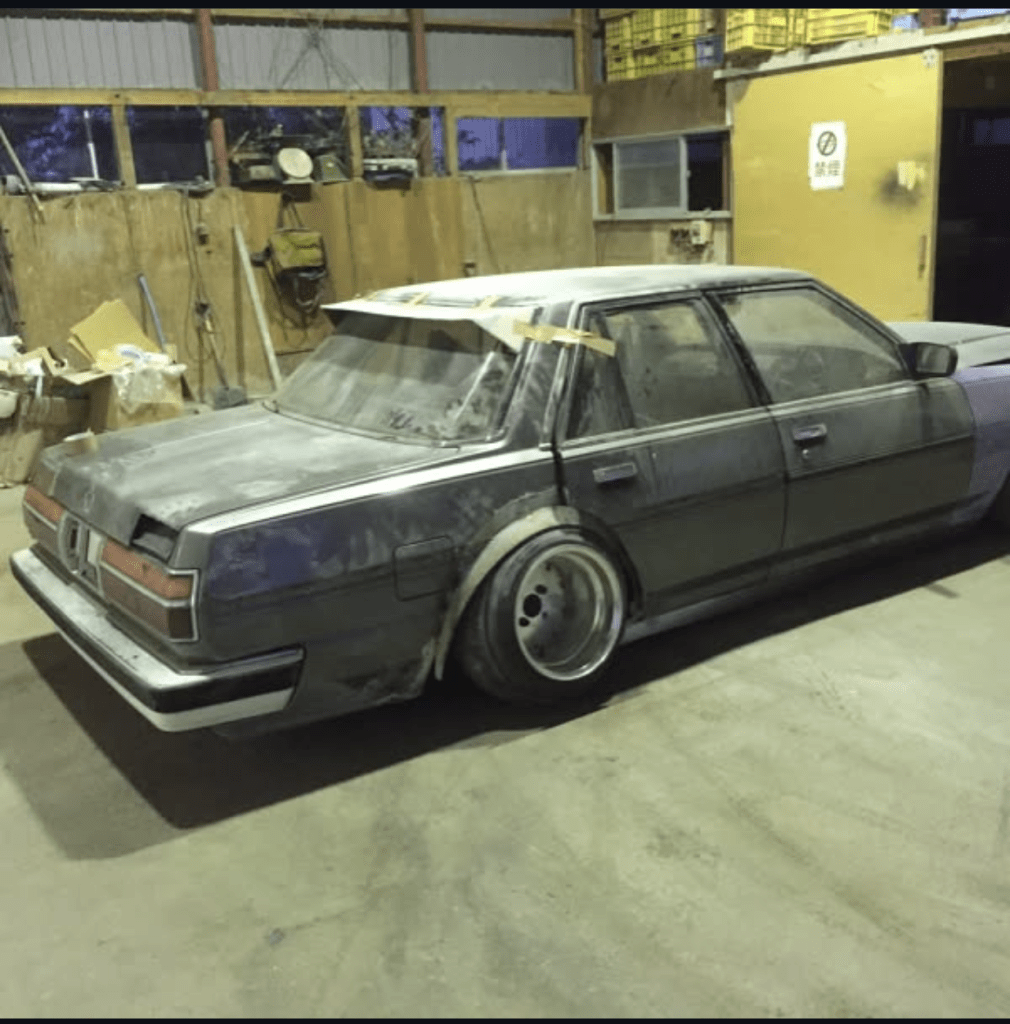
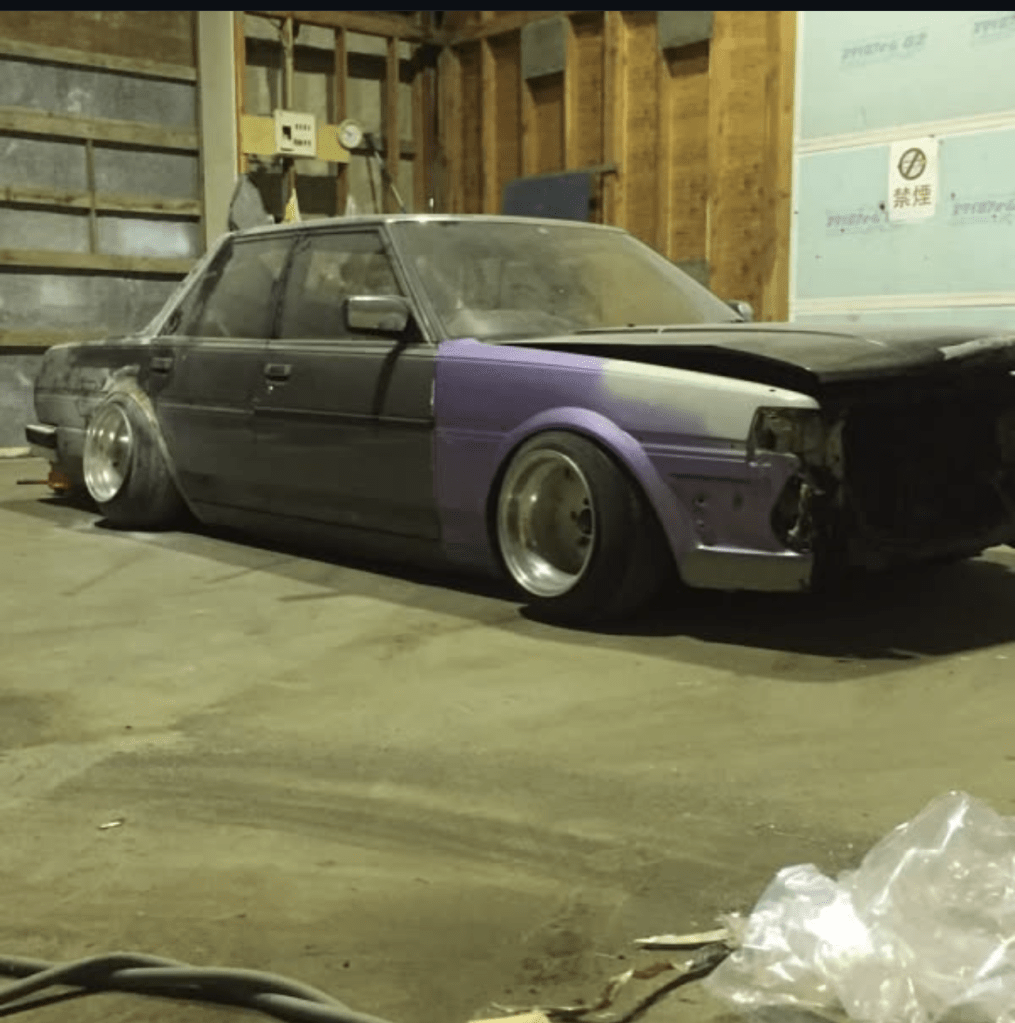
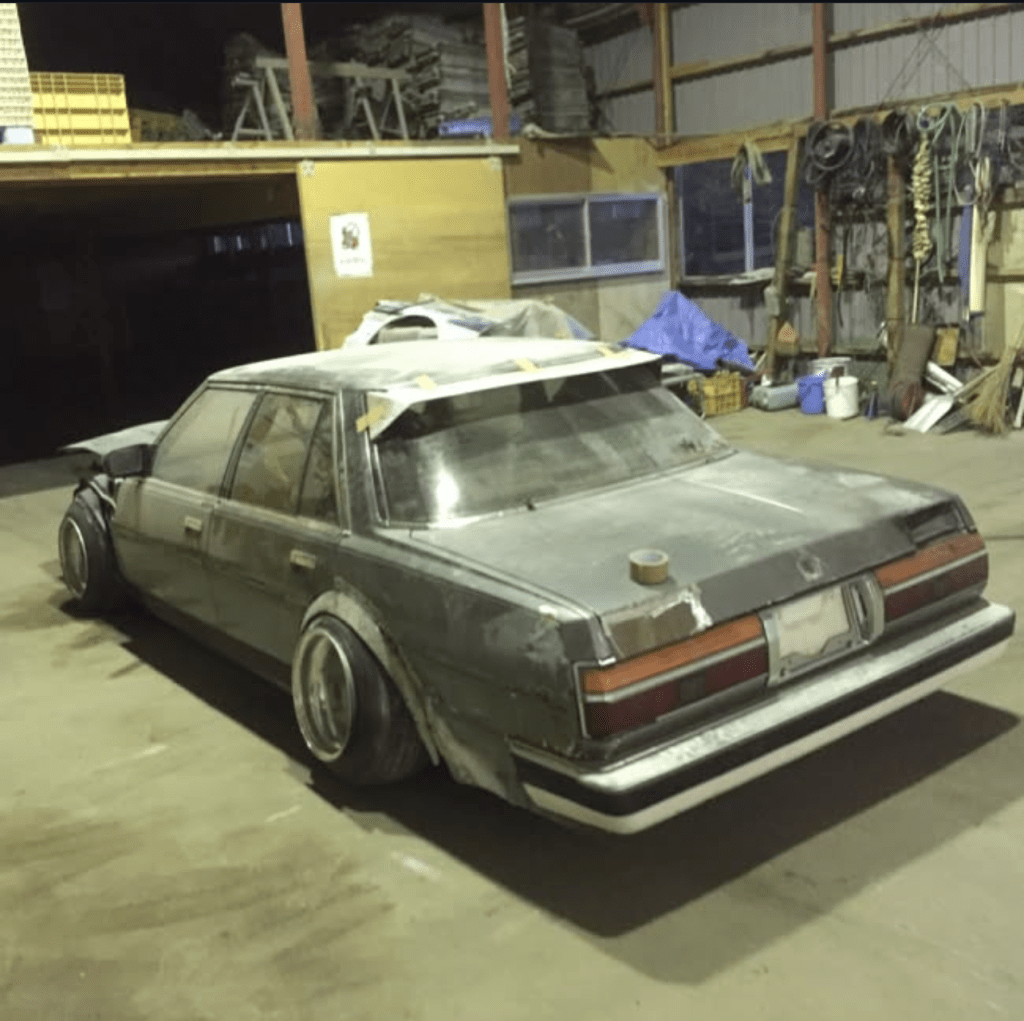
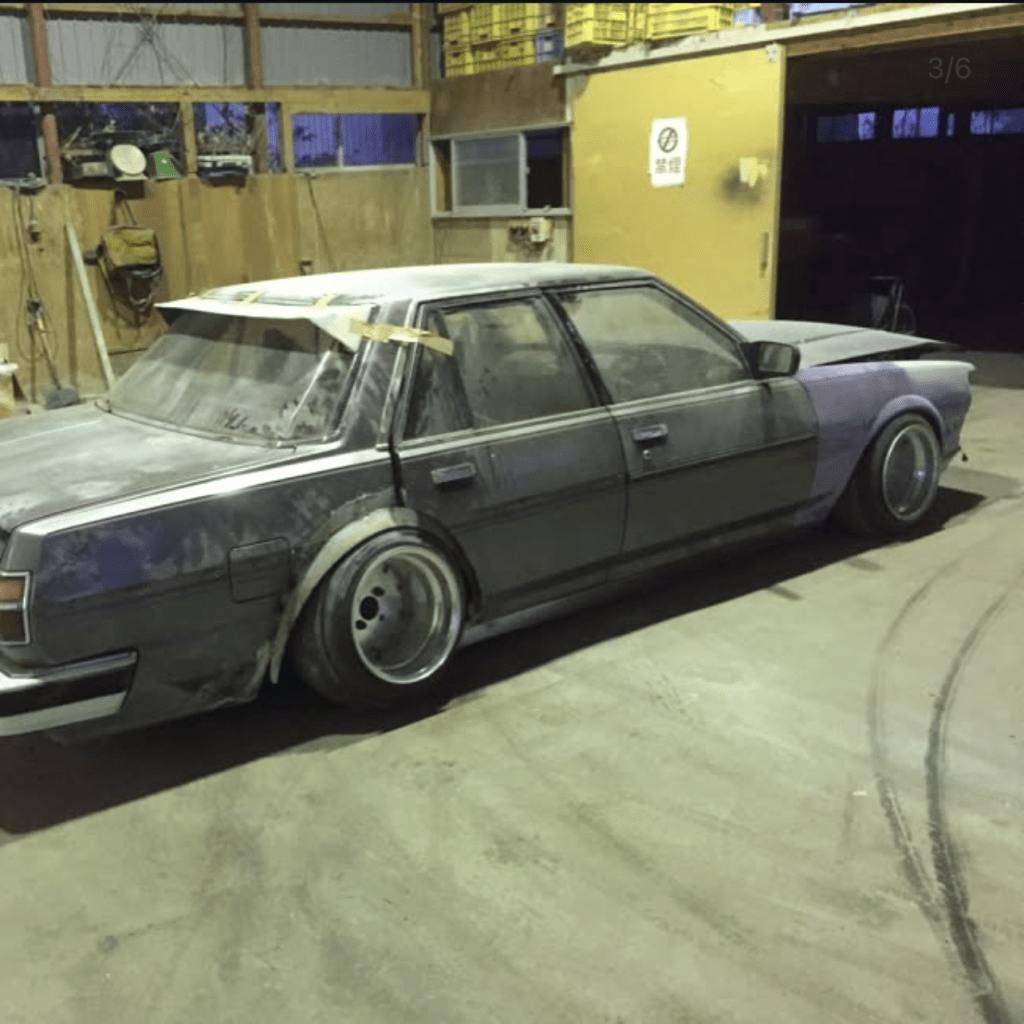
That fender is later trimmed to a very short size.
Miscellaneous examples
The following examples are of finished metal fenders that I do not have build progress photos of.
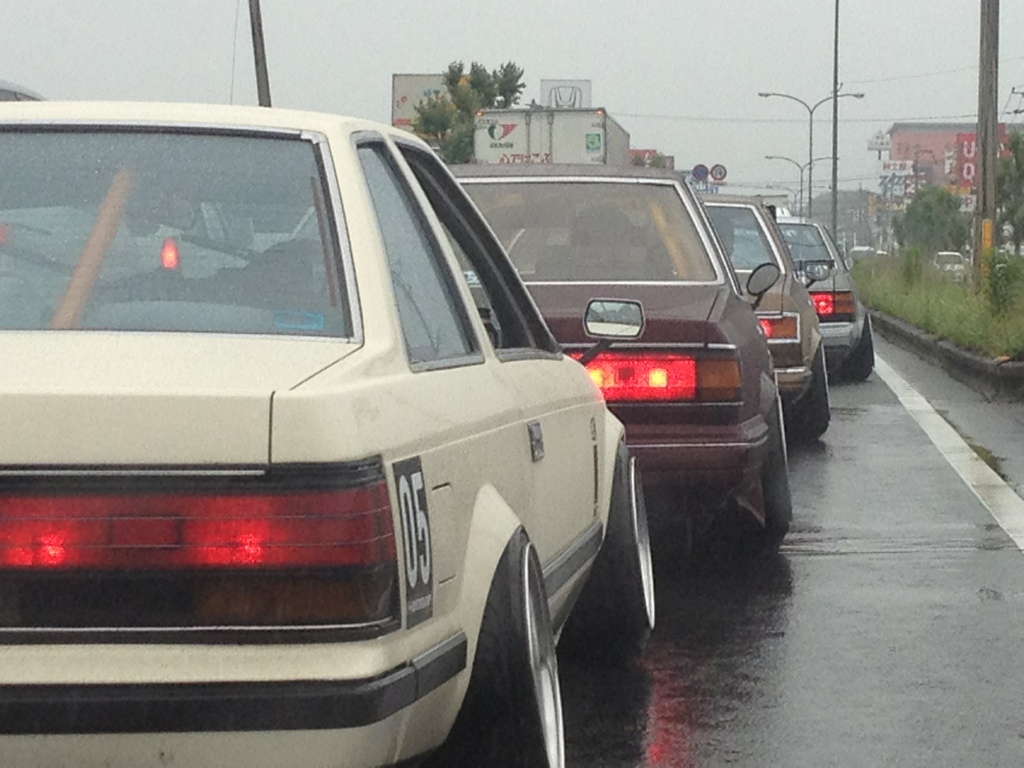
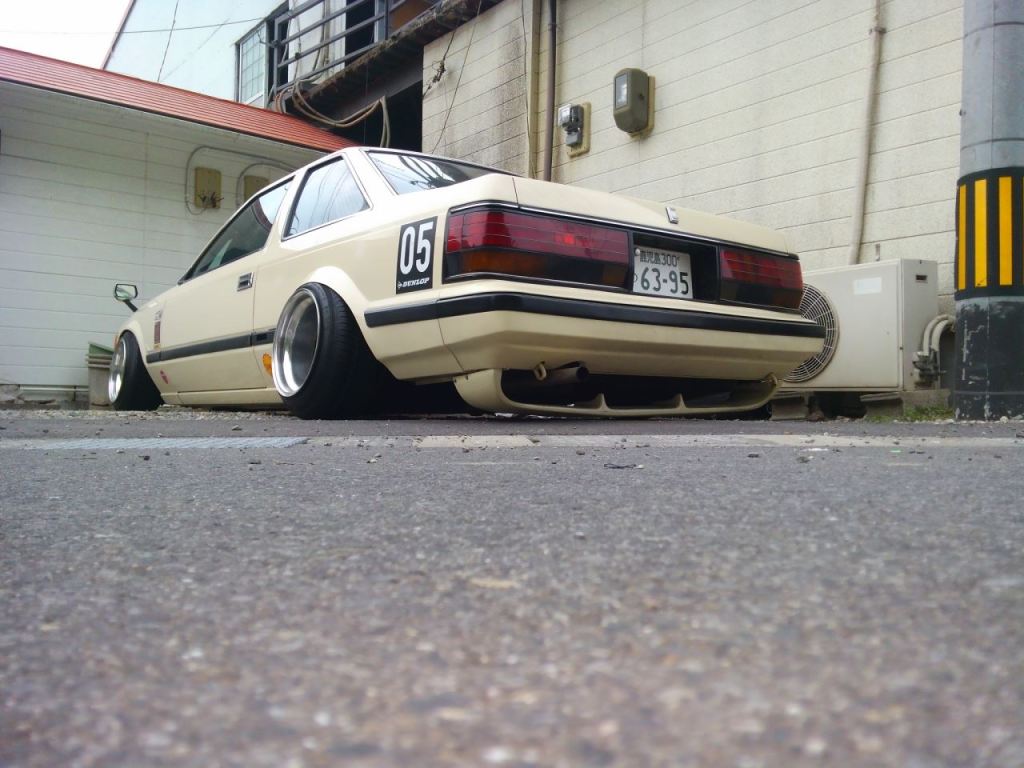
Isamu Miyamoto GZ10
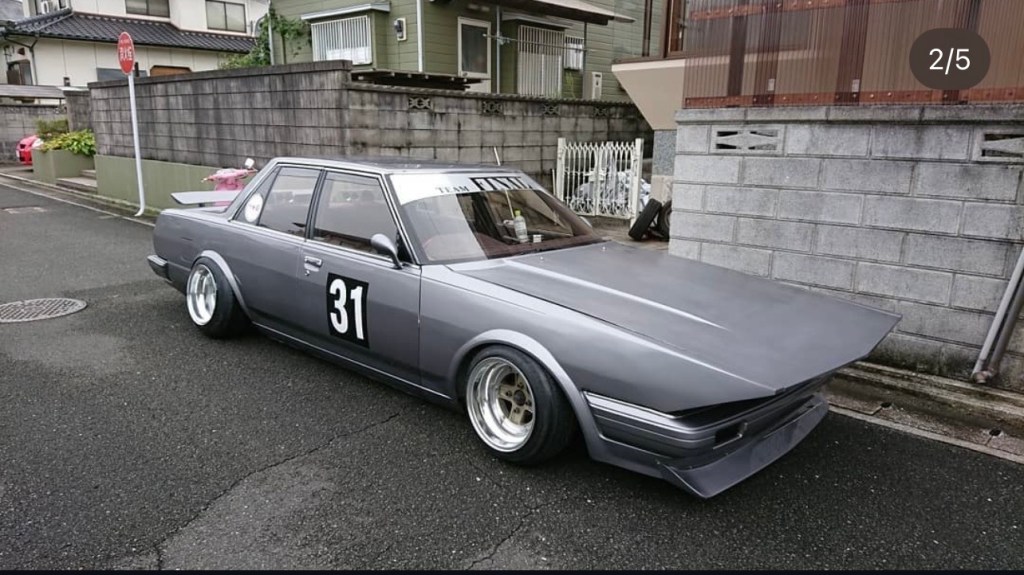
Team Final GX71
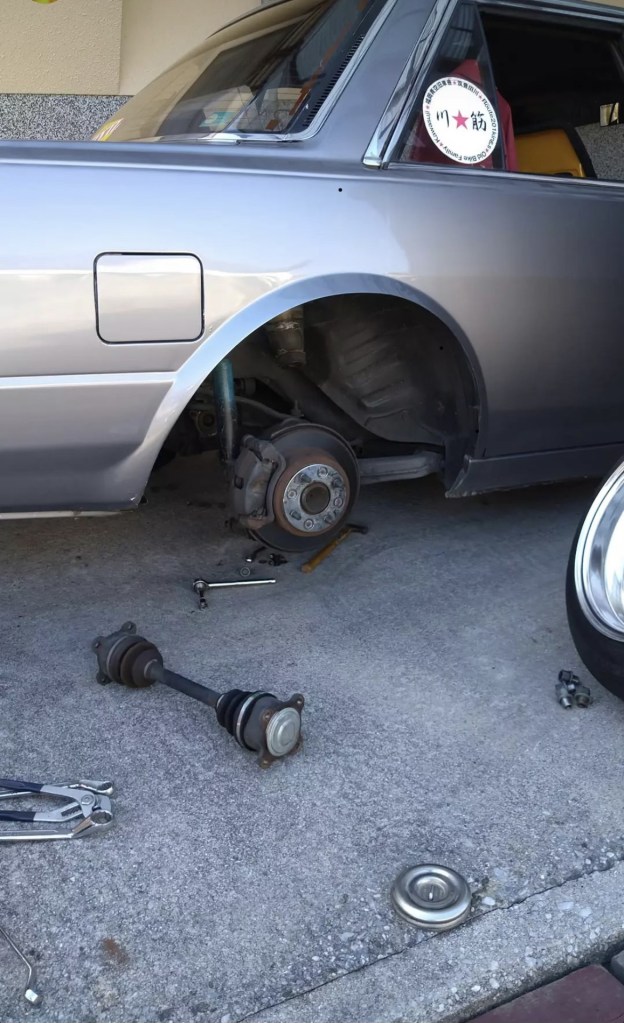
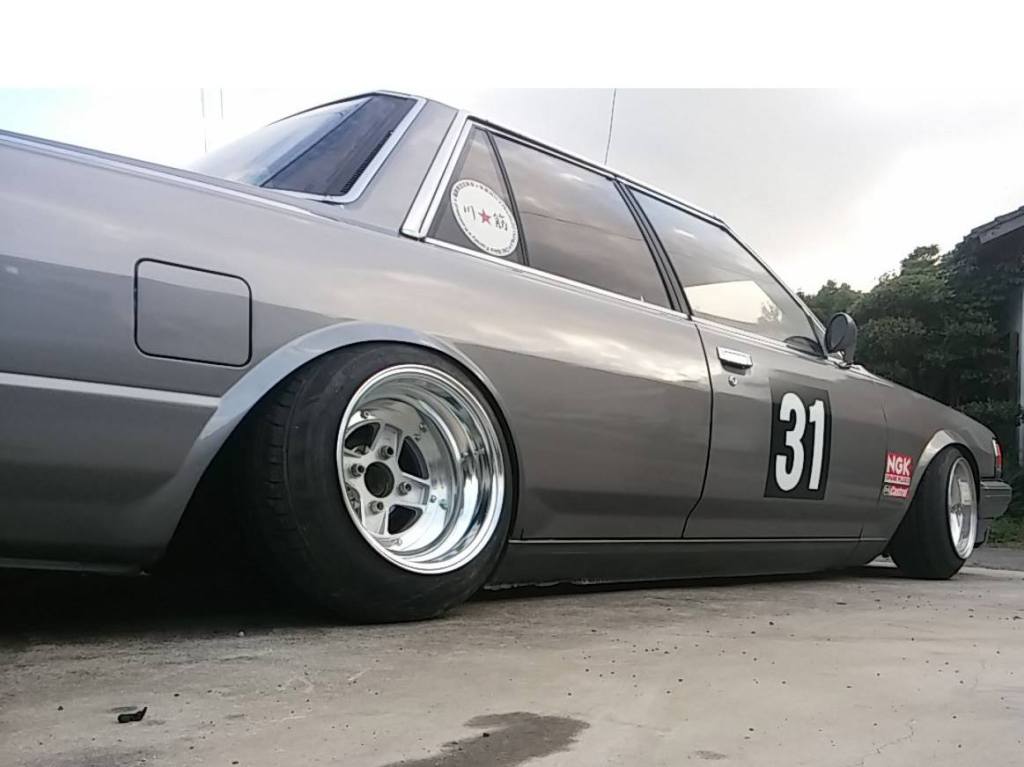
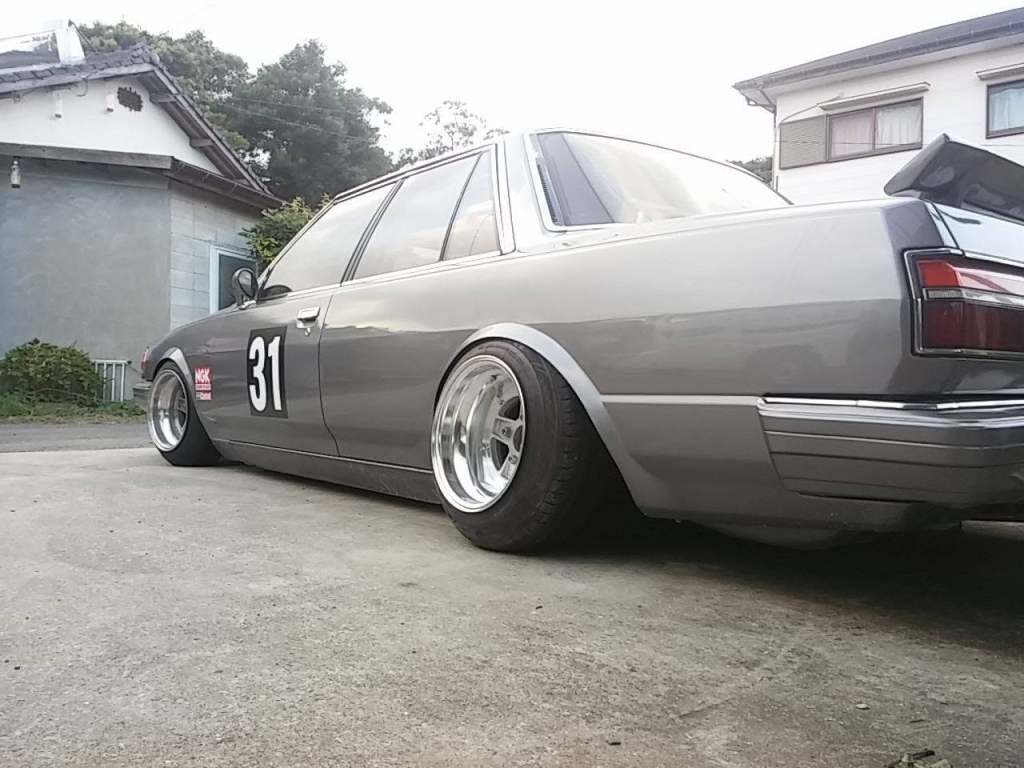
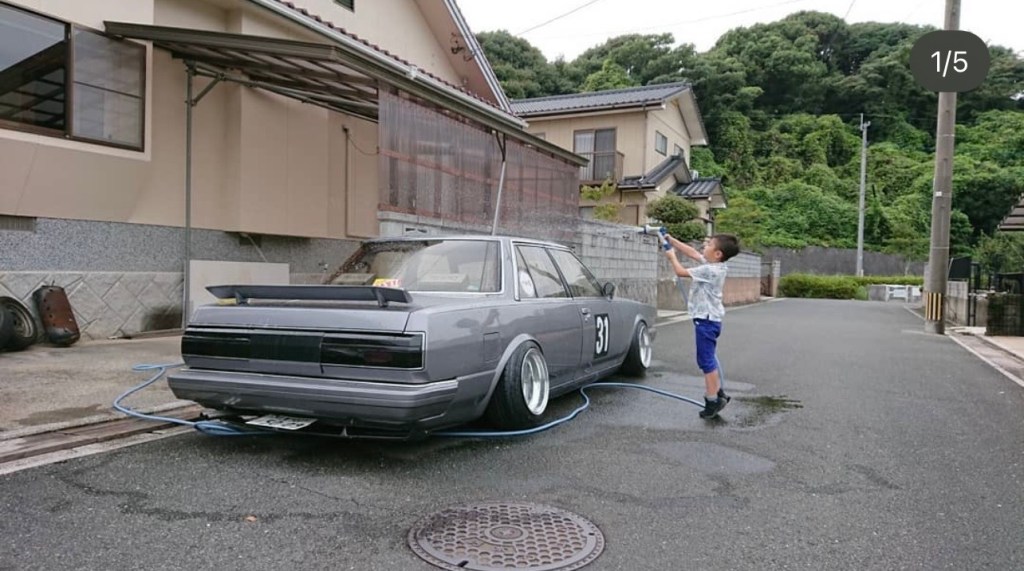
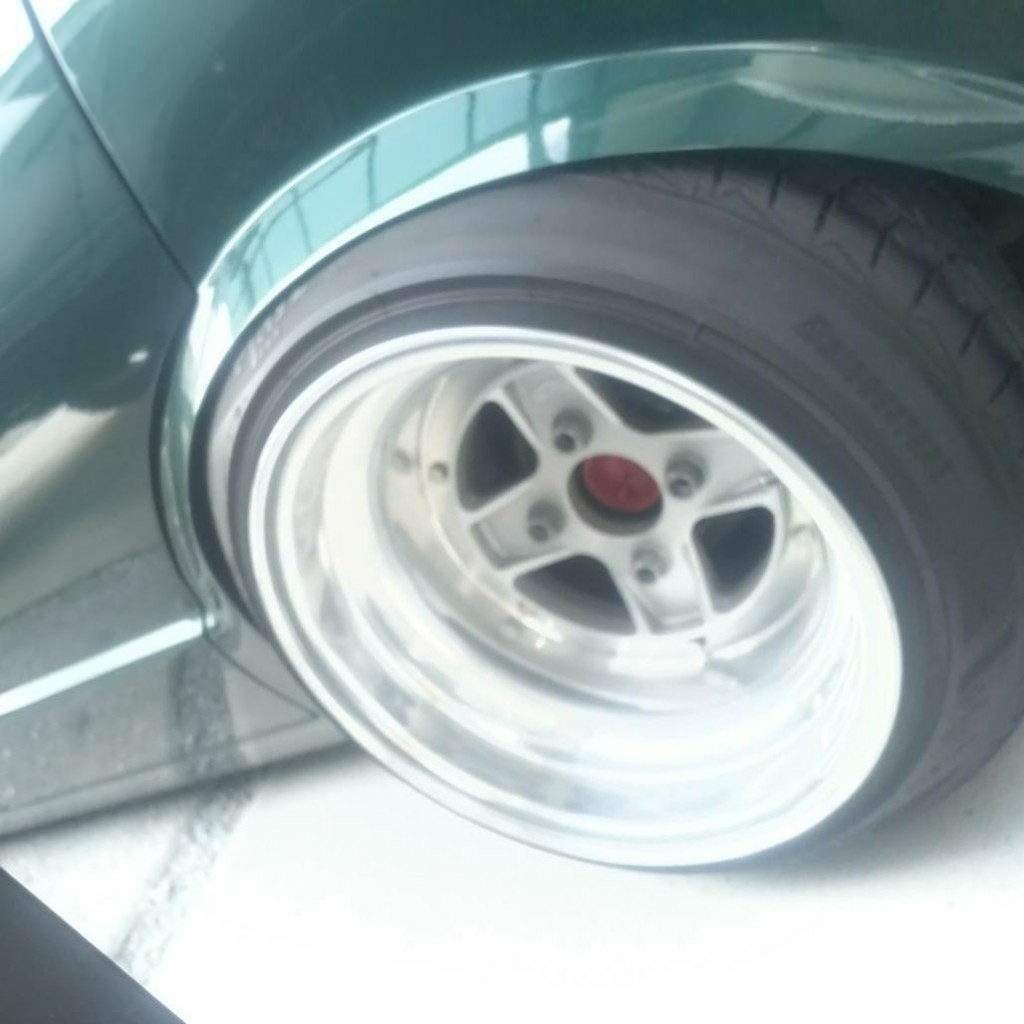
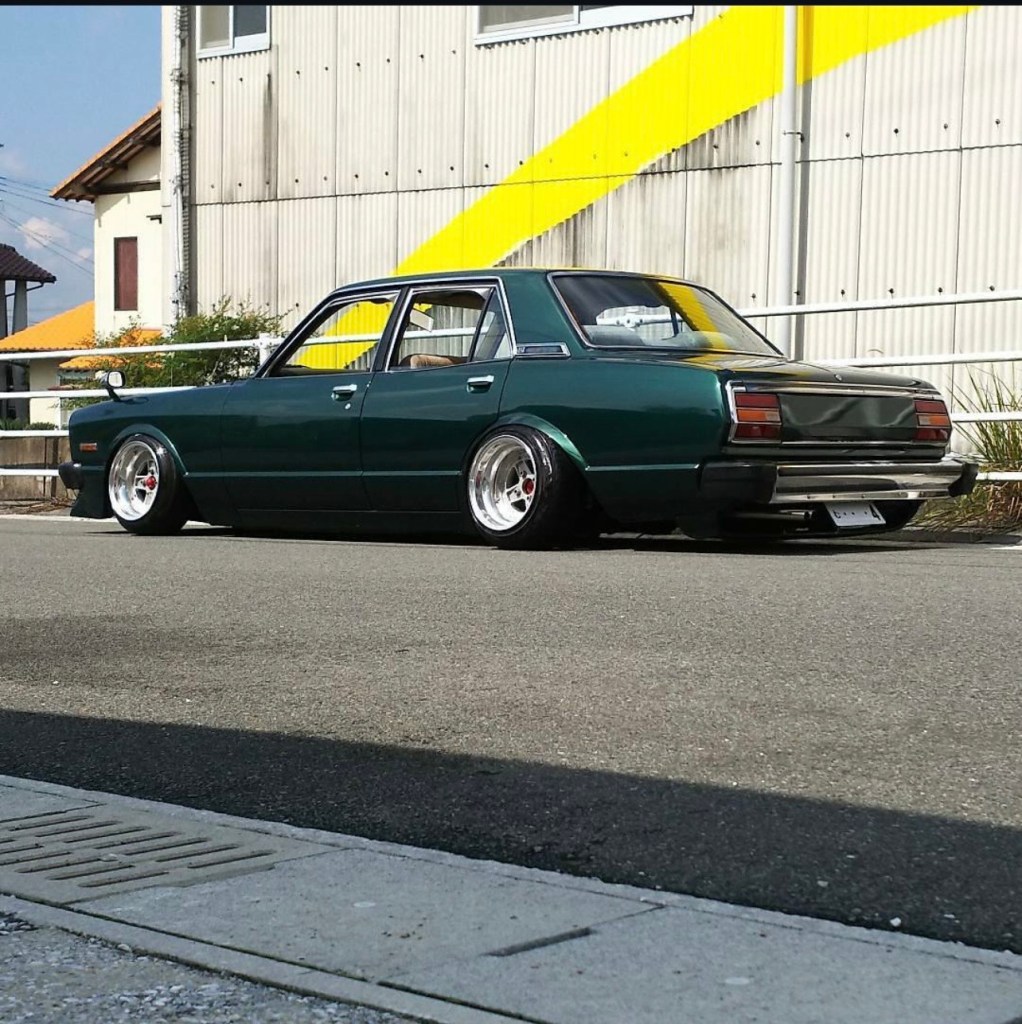
Green Butame
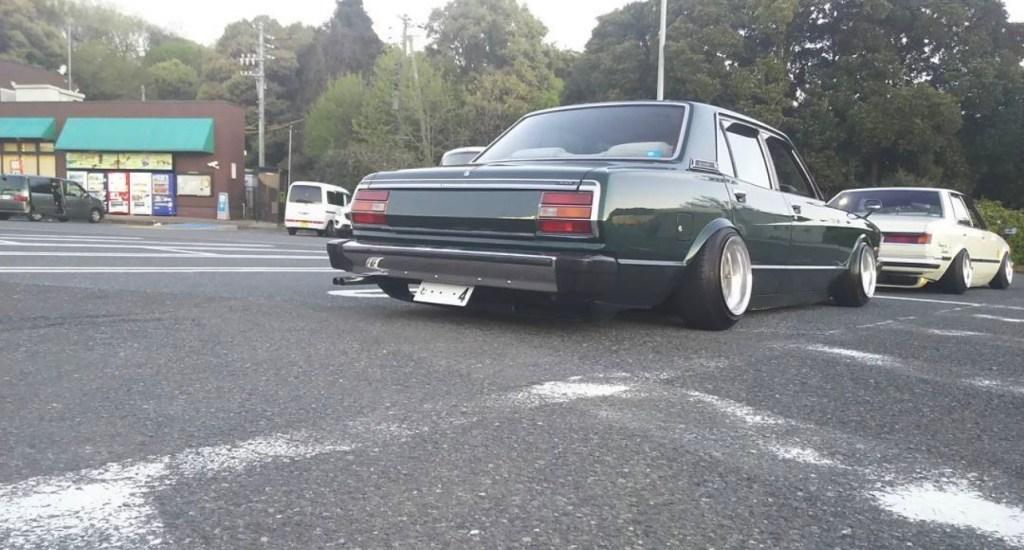
Komazaki GX61 @gx61komachan
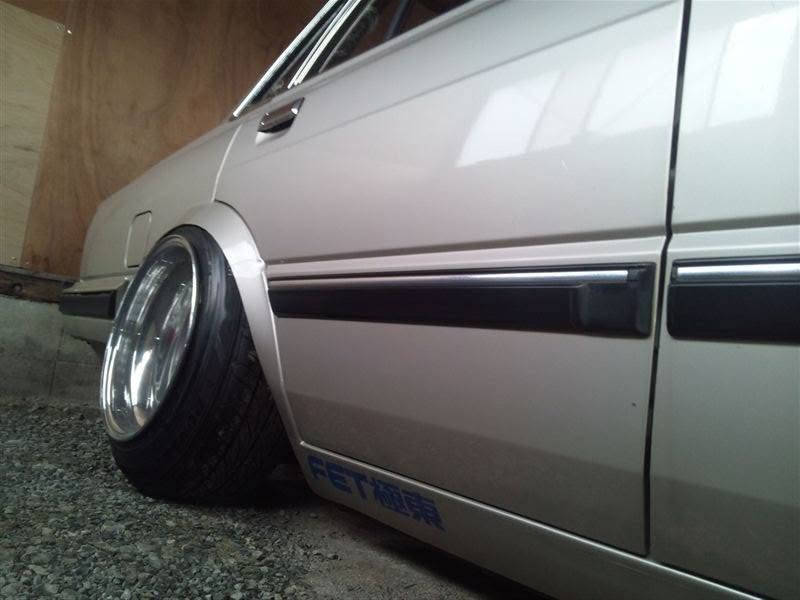
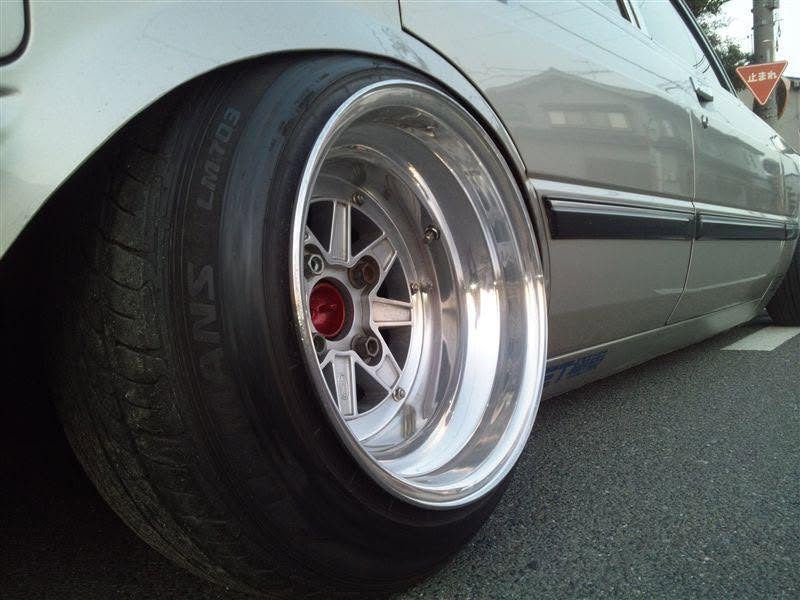
Satsuma All-Stars GX51
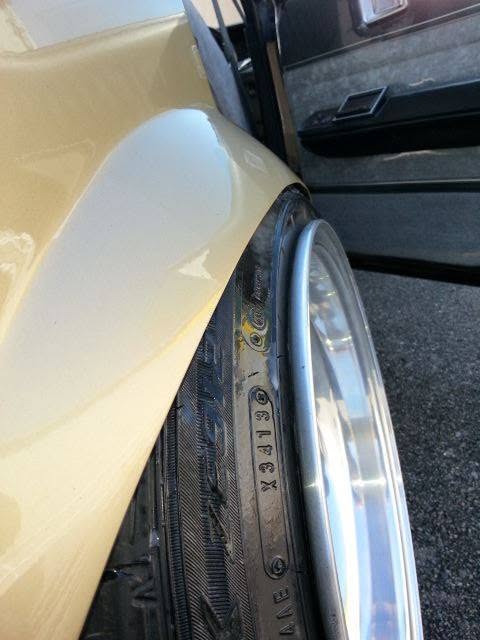
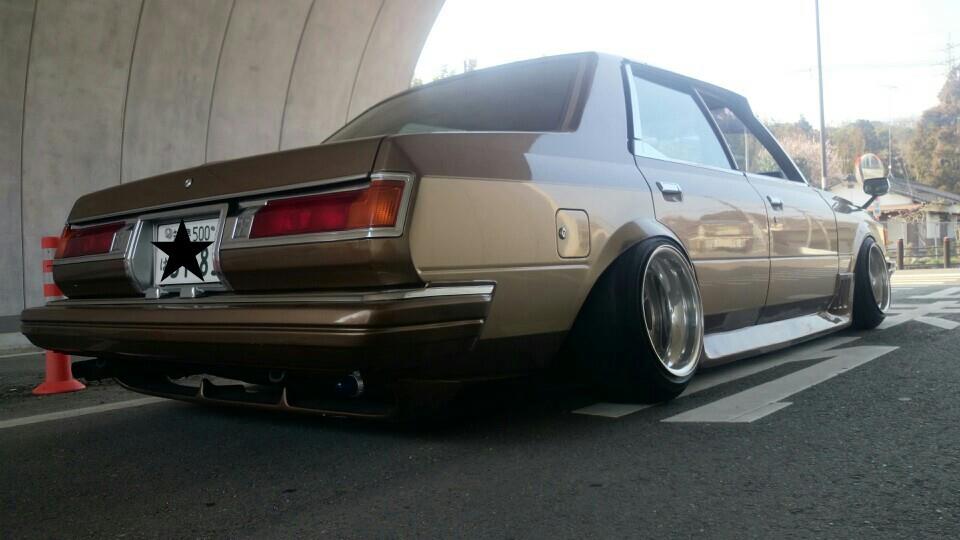
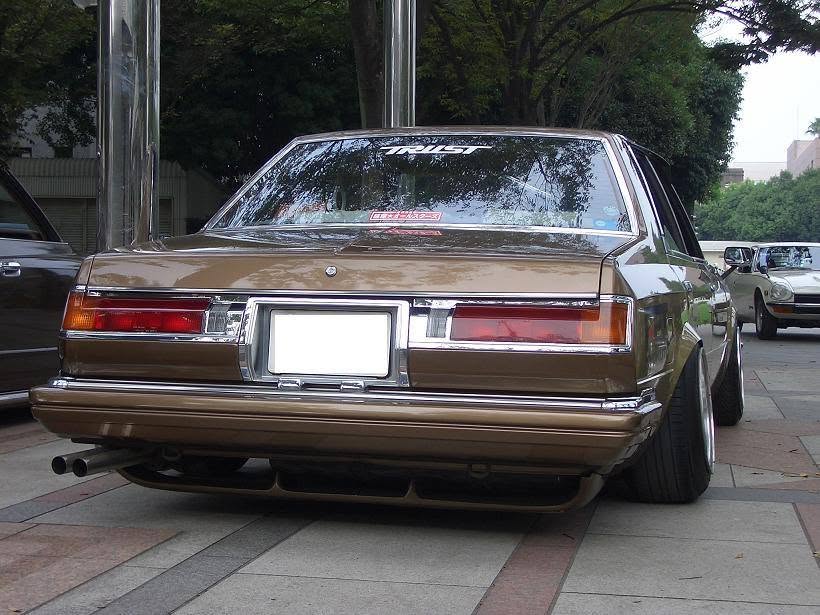
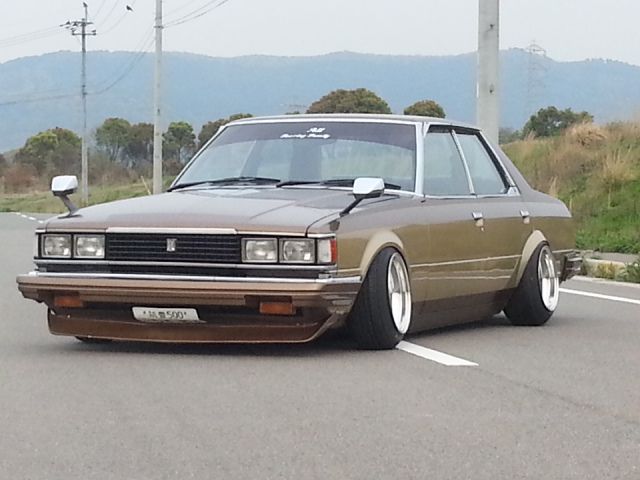
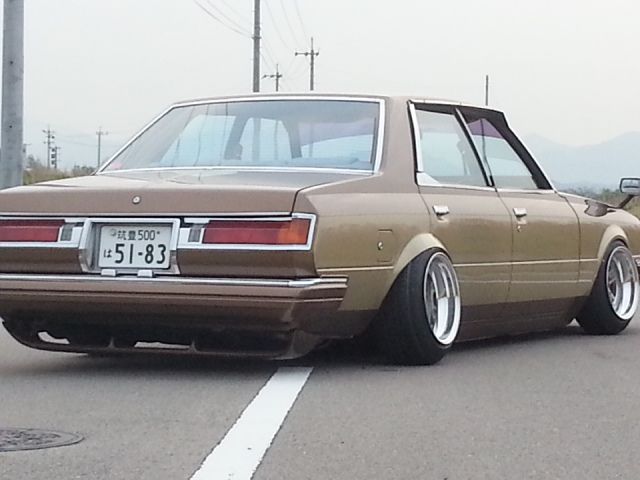
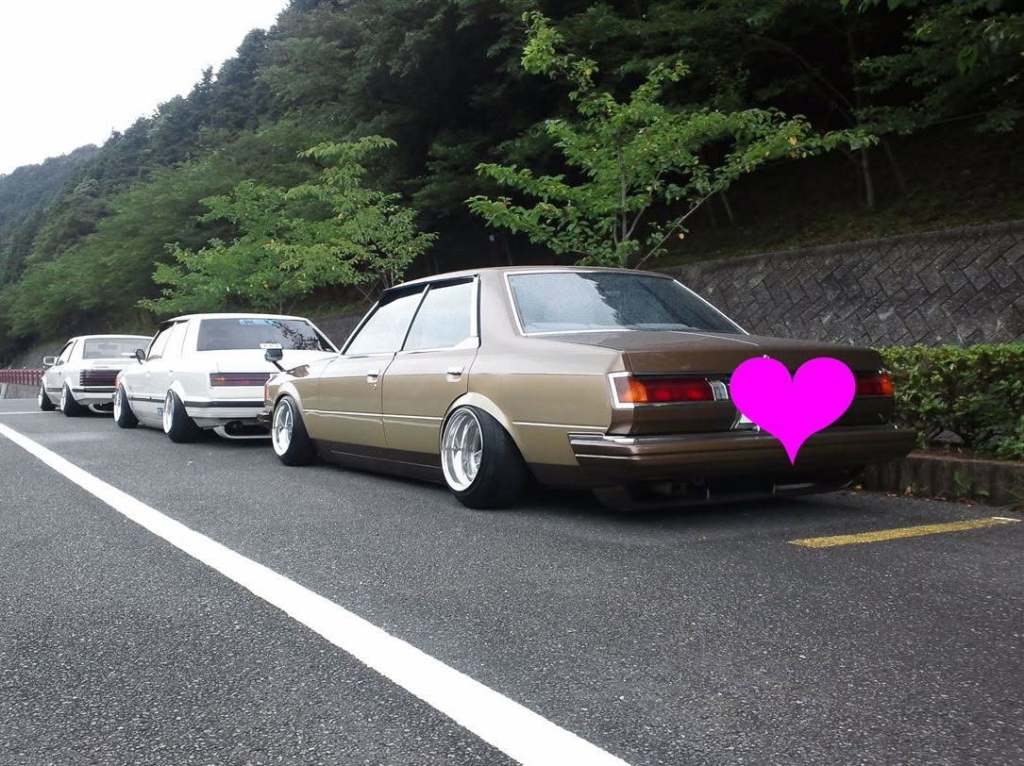
Ryu Kusanagi GX71 @ryuuji_kusanagi
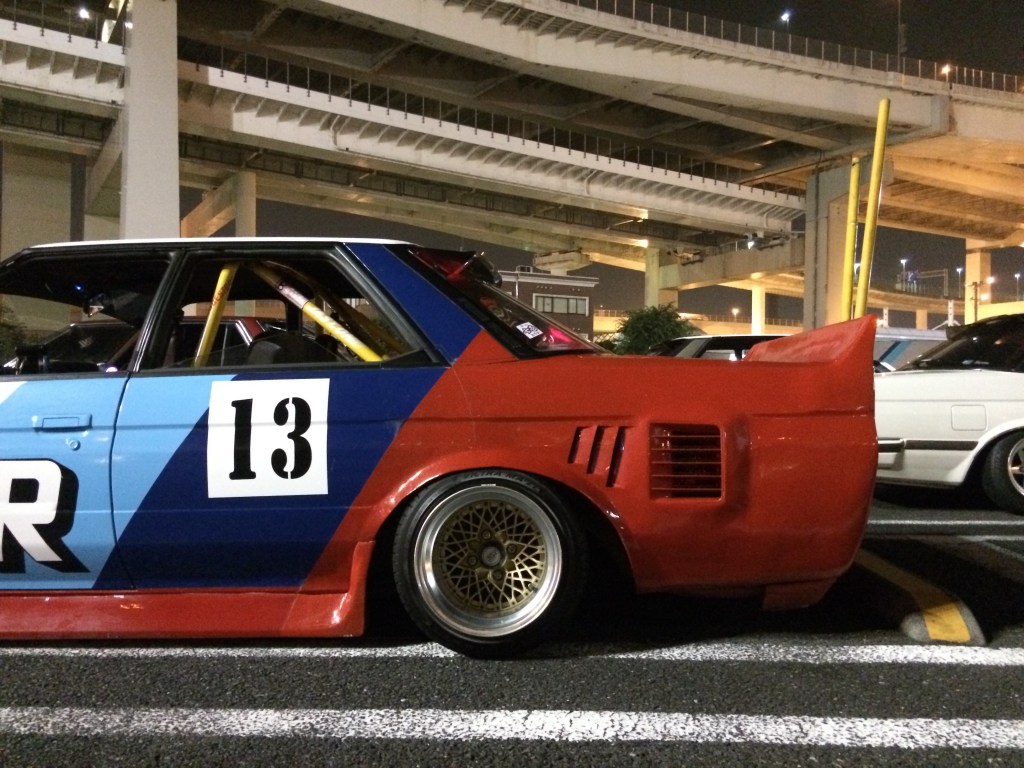
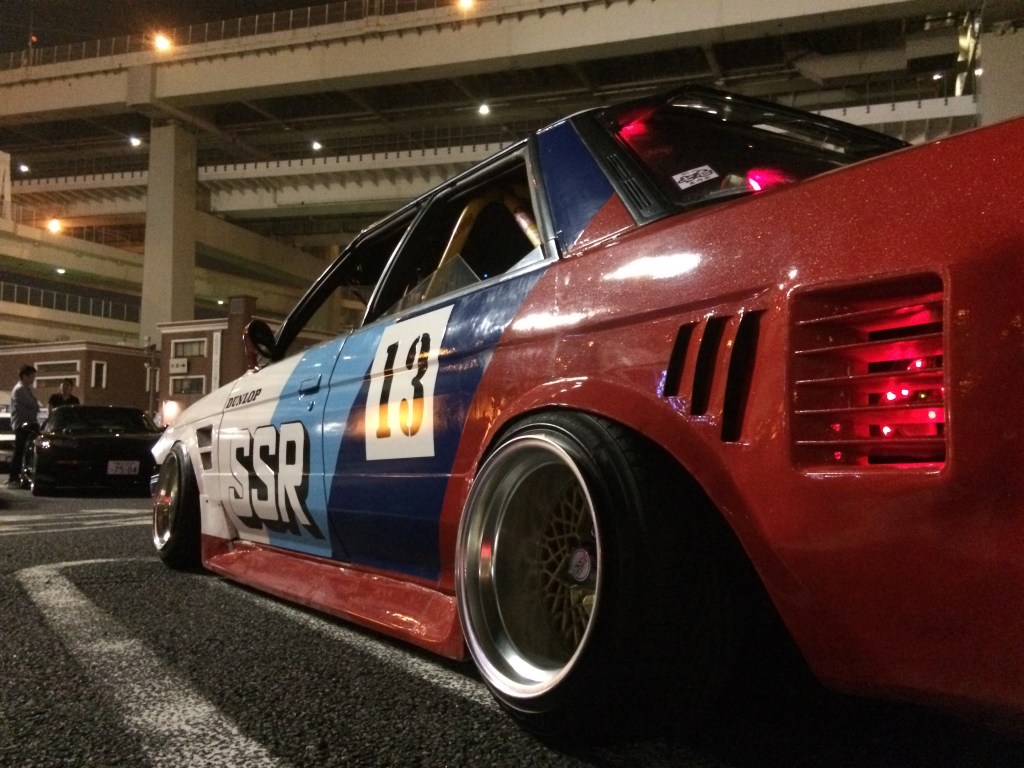
Maroon GX61
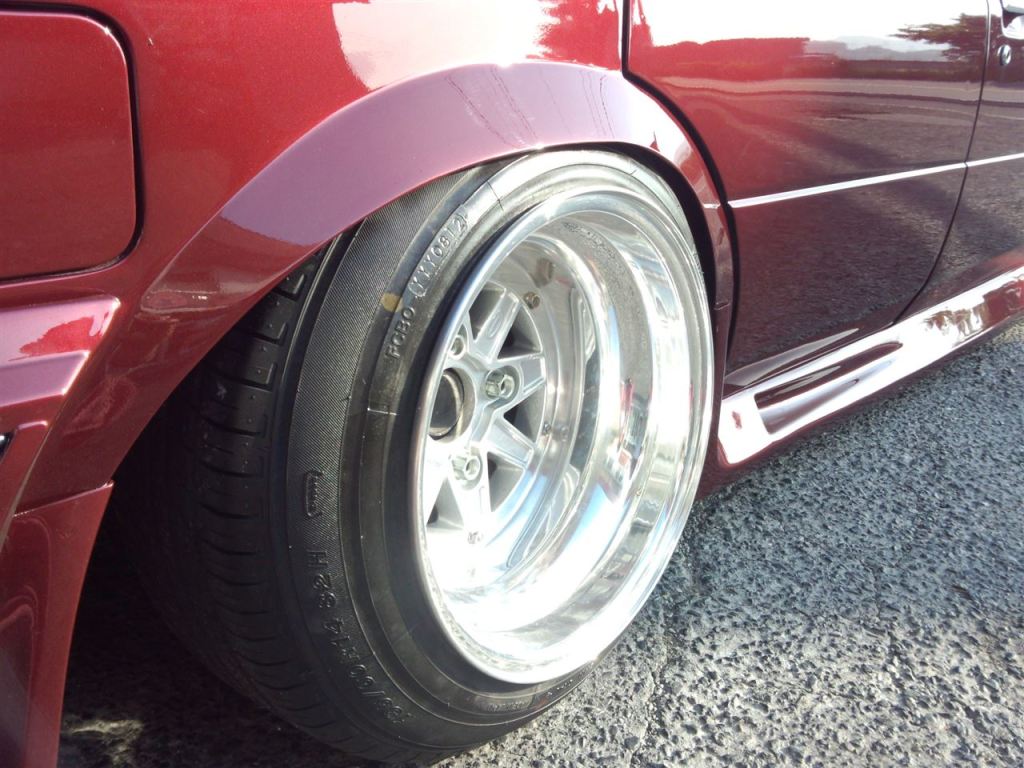
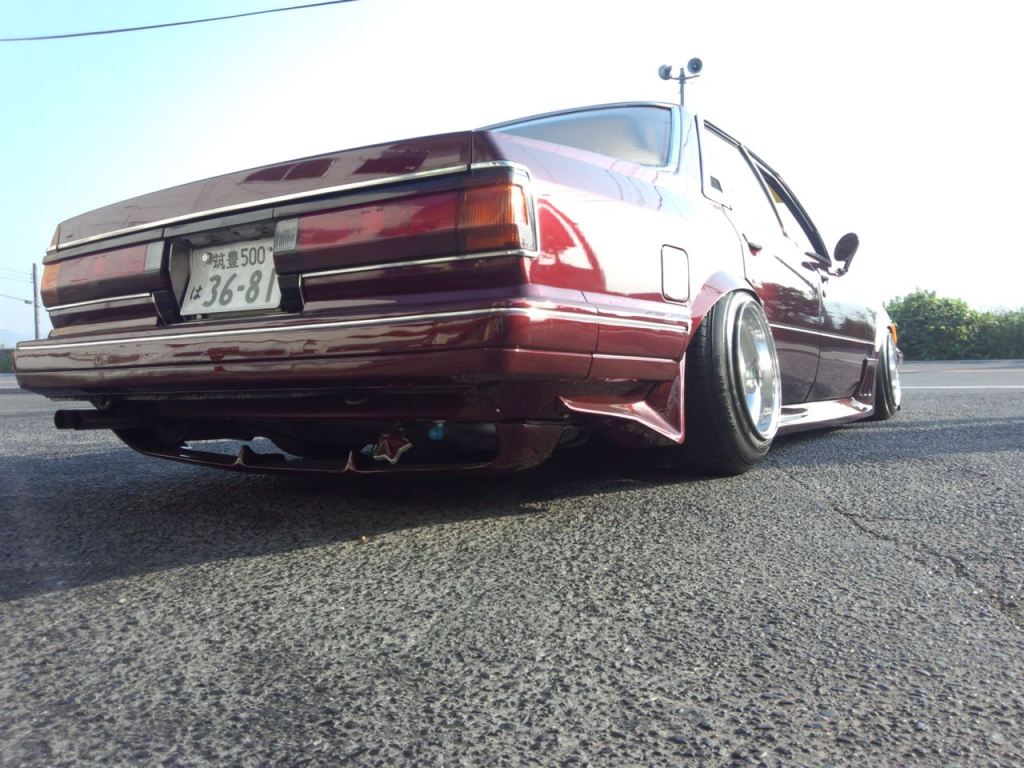
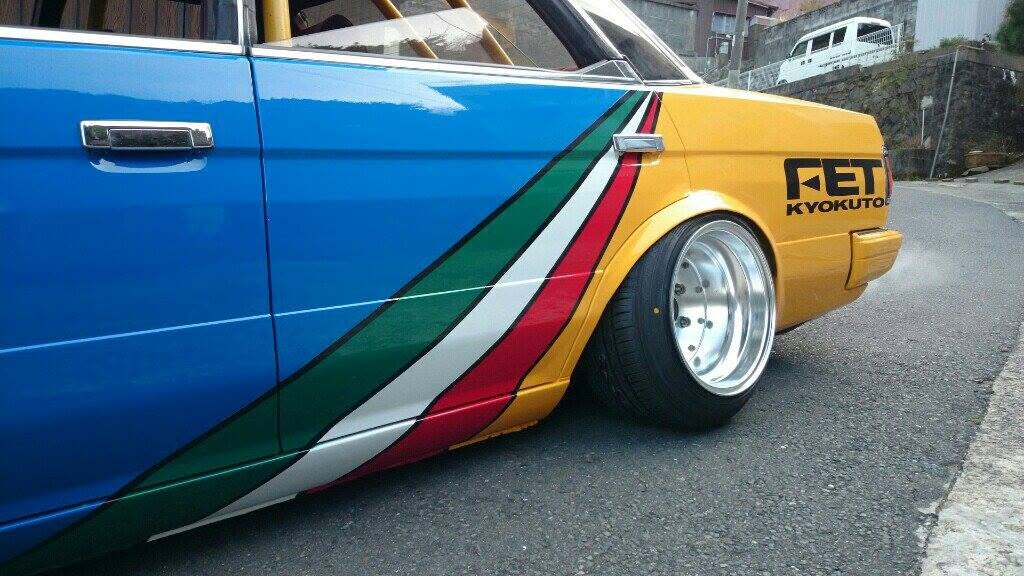
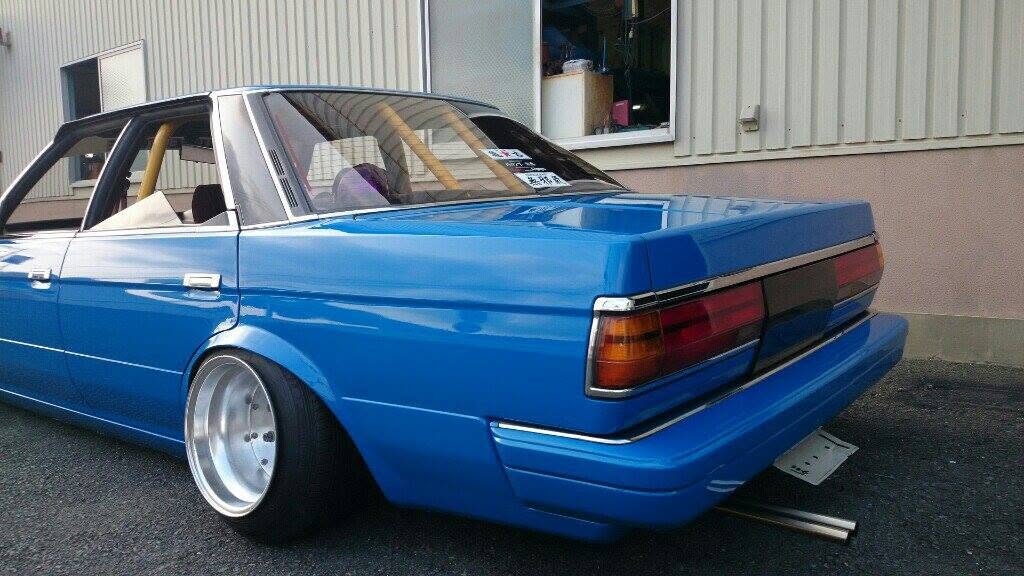
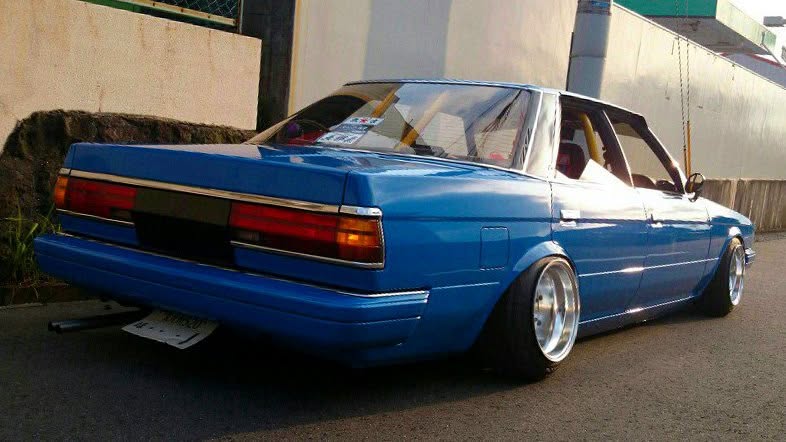
Blue GX61
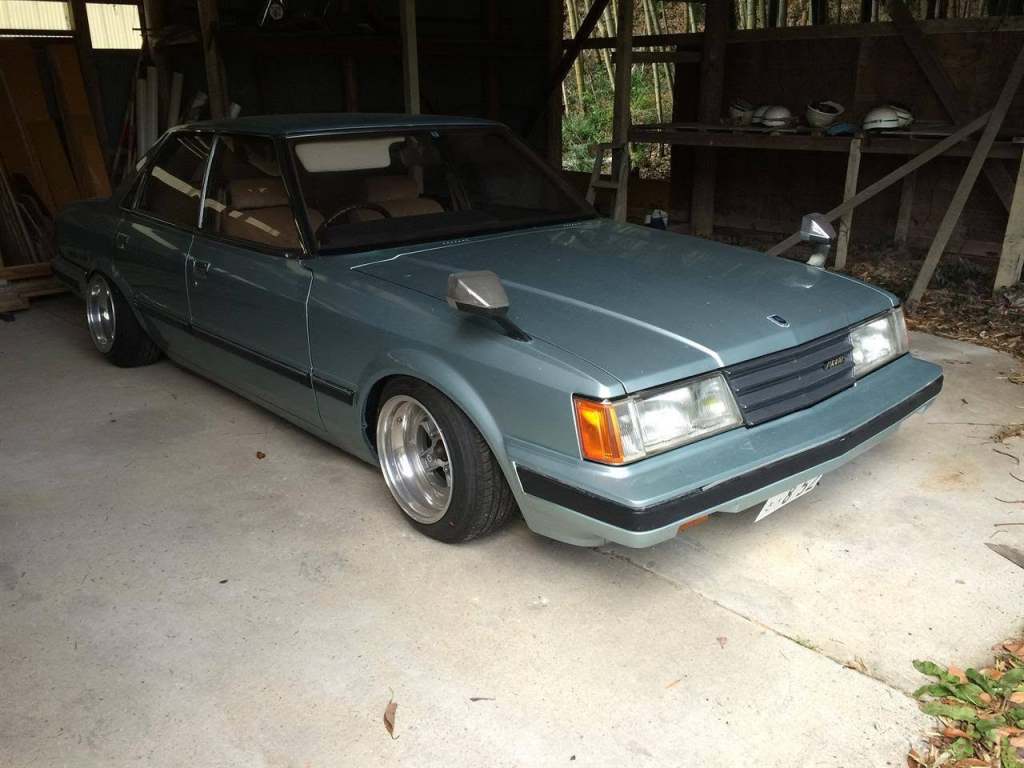
GX71
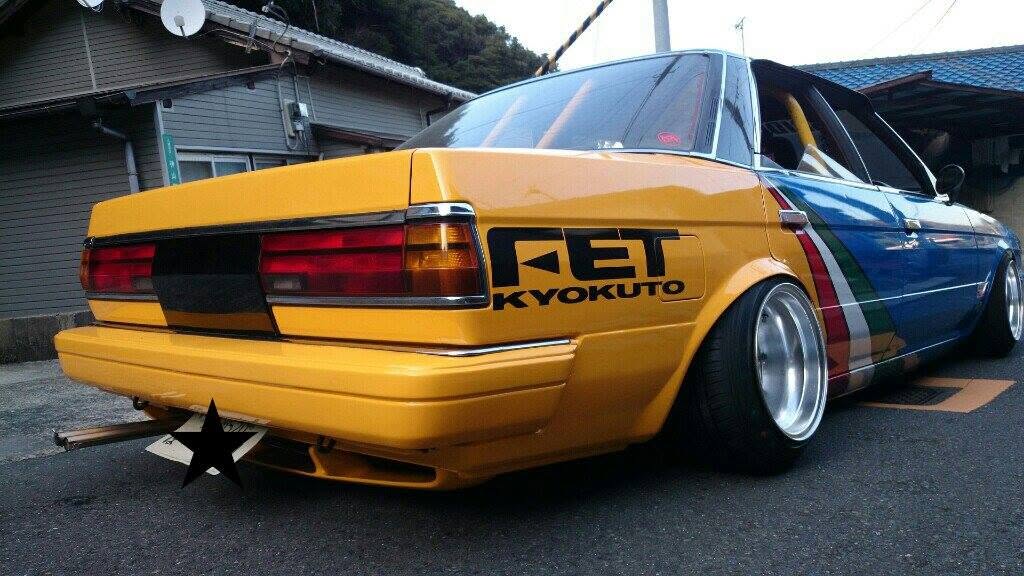
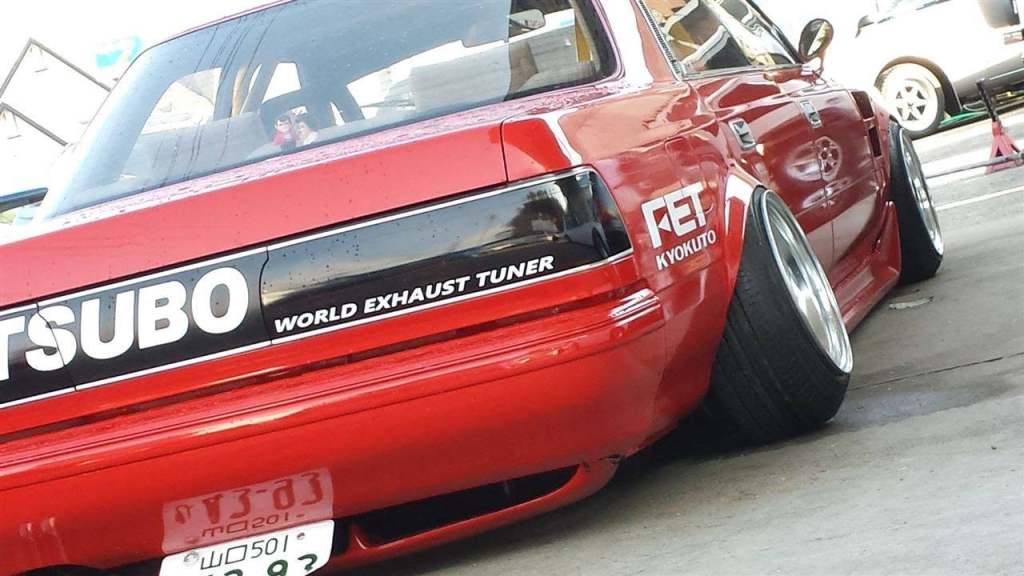
Red GX81
Green GZ10
Other


Leave a Reply